08/01/14: Page Origin.
Our meadmaking hobby necessitates that we keep a number of bottles around, both empty and full while aging.
The bottles were becoming a problem to store so I decided to build a wine rack.
Since we re-use bottles, we have accumulated quite a few.
We make mead starting with about 5-1/2 gallons and still have almost 5 gallons after racking and bottling.
At 3.79 Liters per gallon, 5 gallons requires 26 750 ml bottles or 19 to 20 one liter bottles.
We use 1 Liter bottles since they're more effecient to store.
After doing some measuring and a little figuring I felt we could get 5 bottles in one horzontal row with a minimum of one inch of wood, front and back, to bear the weight.
I decided the vertical spacing on our wine rack should be 5-1/2" centers (including the 1-1/2" support thickness) vertically and 4-1/8" spacing horizontally.
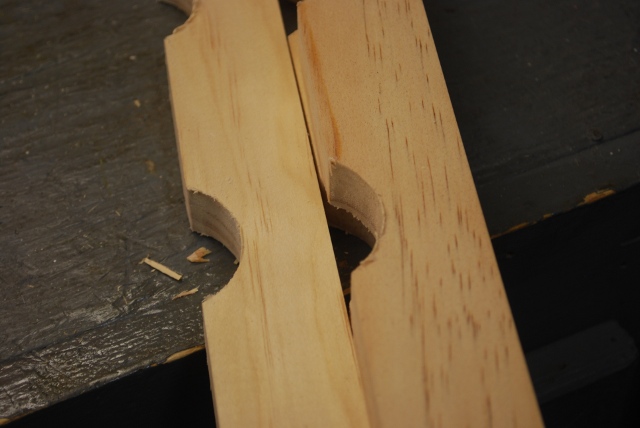
The front and back bottle supports would be notched to a depth of .5" with a radius of 13/16" for the bottles's neck and 2-1/16" for the bottle's body.
This gives a 1-5/8" diameter bottle neck and a 4-1/8" body diameter allowing us to use 750ml or 1Liter bottles.
Since the front and back support bars would both be notched 1/2" deep they needed to be offset with the back bar 1-1/4" lower than the front, so both size bottles would lay more or less horizontally.
The corners would be 1x4s with 1x4 side braces and a solid 1x top laminated from 1x6s.
The 1x2 horizontal support bars would be mortised into the corner 1x4s and the side braces will use biscuits to attach them to the corner verticals.
Please see my Mortise and Tenon Techniques Page for more info on mortise and tenons for this project.
I didn't put a dimension for the heigth of the top, since this rack can be much taller (ours is 50-3/4" under the top), but the underside of the top must be at least 4" above the top of the top front support bar in order to clear 1 Liter bottles on the top shelf.
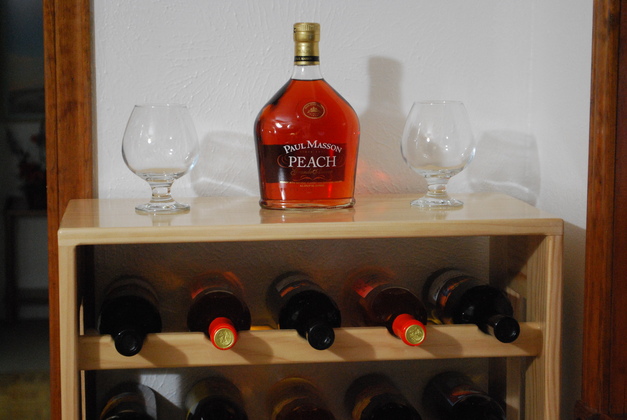
Betty and Cindy think I should build one with wine glass storage below the top and leave the top bottle row off.
I'm thinking about that, it might make a nice Christmas gift!
I thought about it and heres it's page
This is when I did the pics for my page on cutting lumber.

|
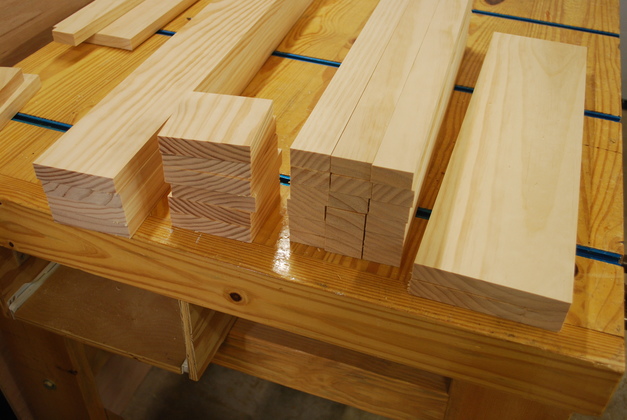
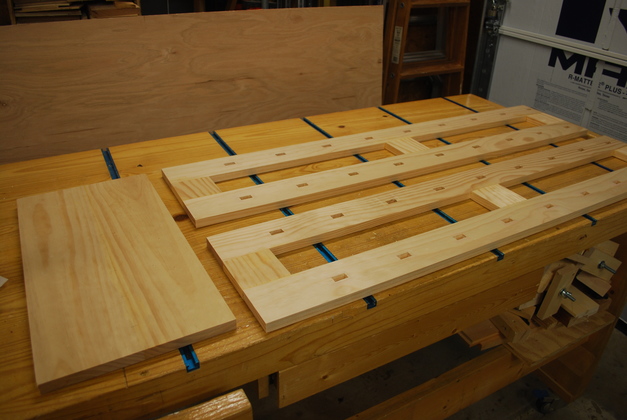
The lumber for this wine rack, laid out on the workbench.
|
|
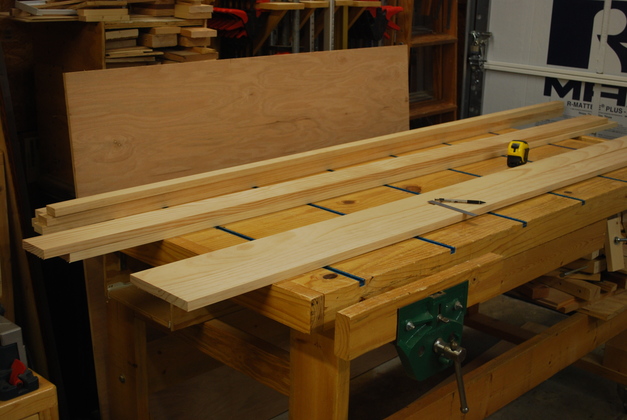
Top of the wine rack being laminated.
This is two pieces of 1x6 being edge laminated with #20 biscuits.
|

|
I use my Hole Saw Jig to cut the notches in the support bars.
|
|
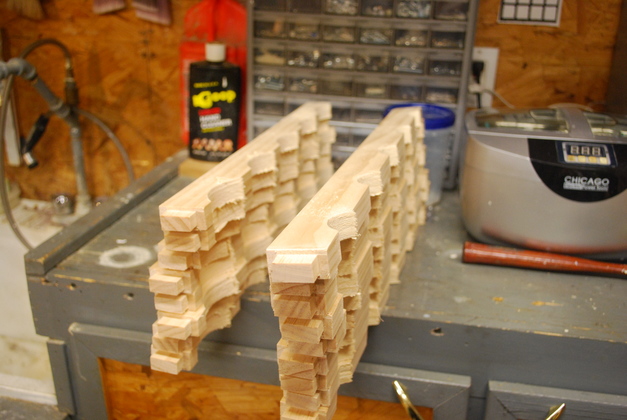
Tenons cut and all notches sawed, ready to sand.
I use an oscillating spindle sander to clean up the saw marks.
|
|
Here they are after sanding.
|

|
Support Bars.
Rounded off all the corners (on the router table), they are ready for final sanding, painting, and gluing.
|
|
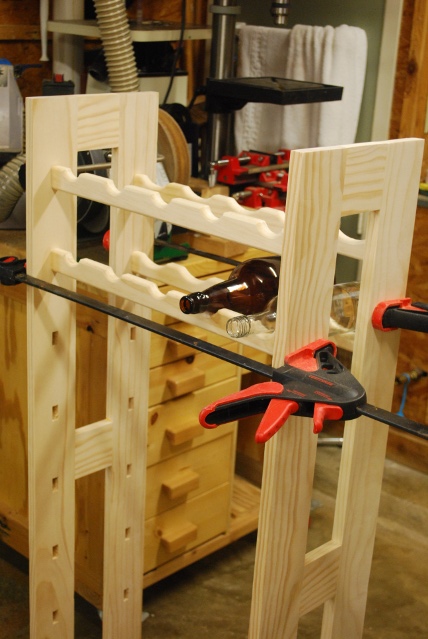
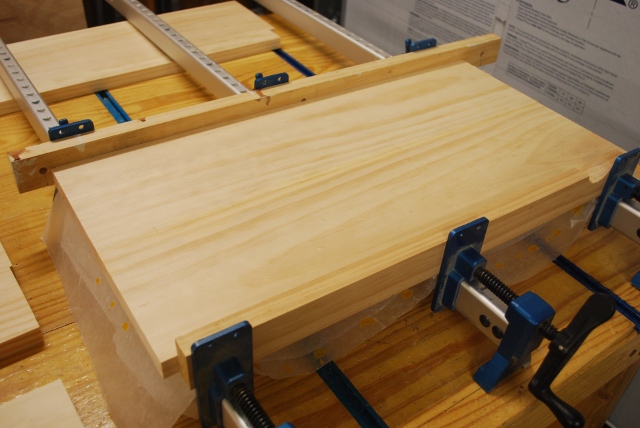
Frame in the glue clamps (Gluing in the cross braces).
You must make sure the frame is square when its glued.
The two sides happen to be reversed, top to bottom, in this pic.
You are looking at the top of the right side on the right and the bottom of the
left side on the left.
|
|
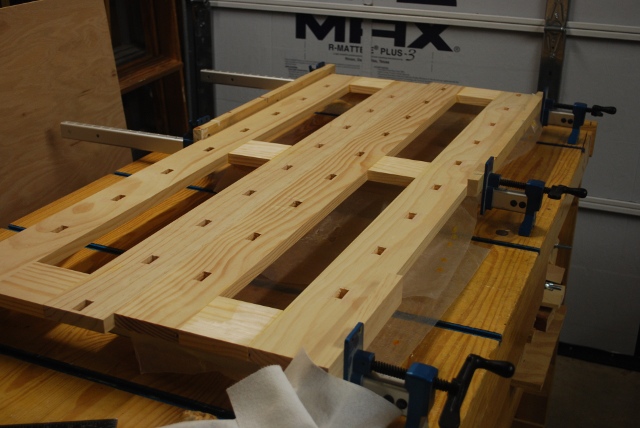
Mortised sides and braces glued together (the top is on the left).
You can see how the mortises (where the support bars will be glued) are at different heights.
Here is my Mortise and Tenon Page.
|
|
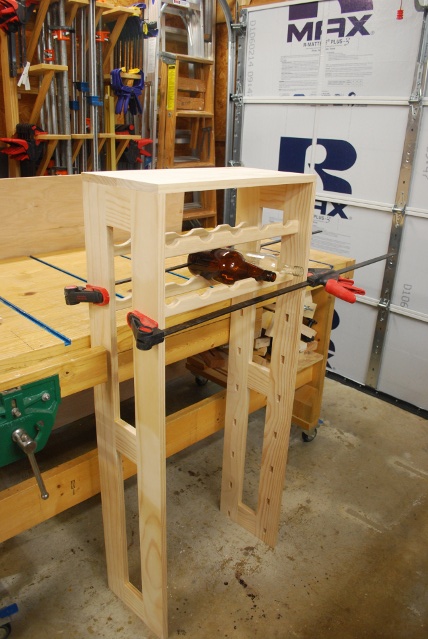
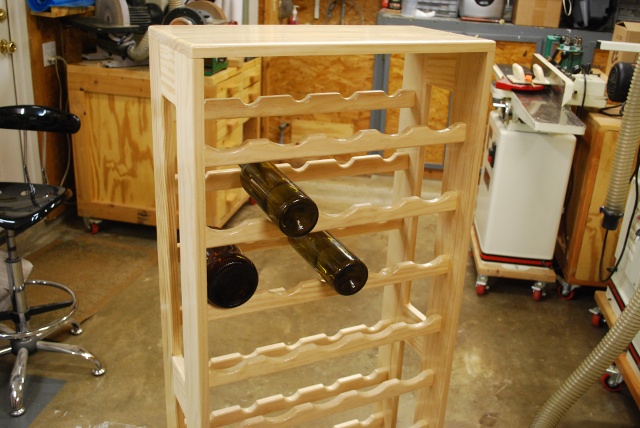
A test fit of the rack and support bars, note one 1 Liter and one 750 ml bottle.
I was looking at clearance below top and top bar, also between bars.
|
|
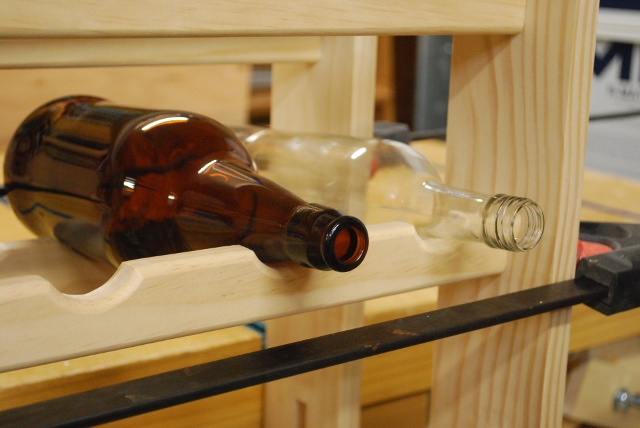
Closer view of bottles laying on support bars.
A 1L is on the left a 750 ml on the right.
|
|
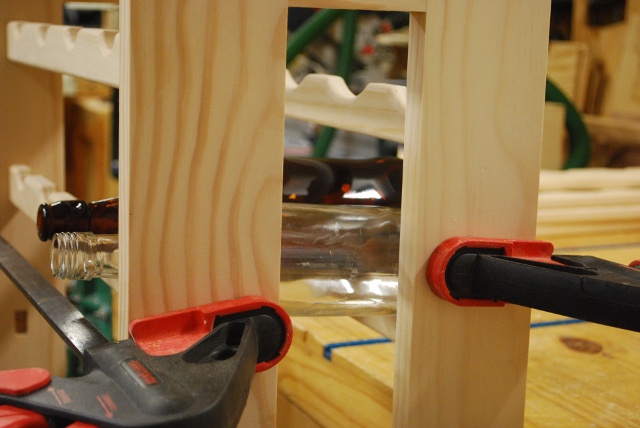
From the other side, you can see the relative angles of the bottles as they lay.
|
|
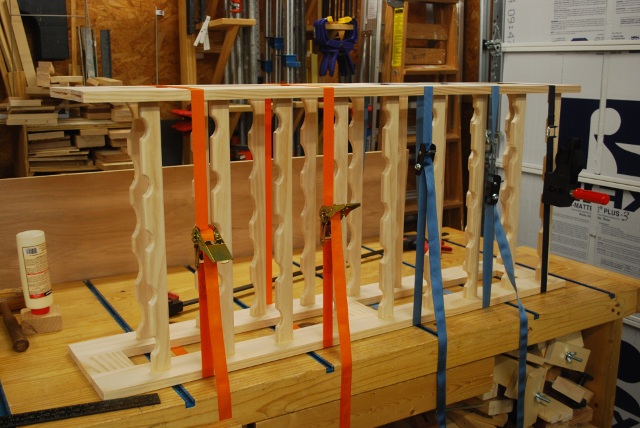
Wine rack laying on it's left side.
All support bars being glued on the lower end (left side), the strap clamps are holding pressure forcing the tenons into the mortises while the glue sets.
I tapped above each support bar's upper end with a mallet to seat the tenons into the mortise below.
You'll notice the framing square laying on the workbench on the left, I used it to make sure the tops and bottoms of the rack are square.
Tomorrow I'll glue the tenons on the top end of the support bars (right side of rack) into their mortises.
You'll note the slots on the left end of the verticals, where the top will be glued.
|
|
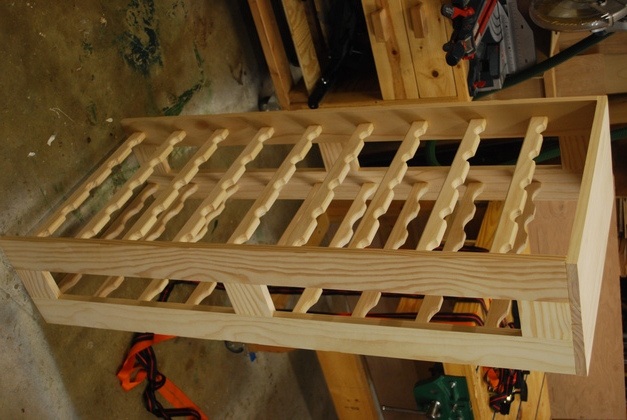
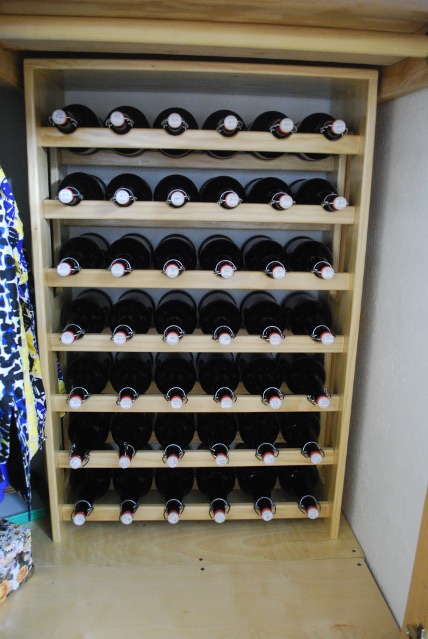
All glued with edges rounded and ready to sand and paint.
This rack holds 45 Liters of mead or about 98 Lbs.
You'll notice you can't see the mortises from the outside, in fact, you cant see any of the joinery work just the joints.
|
|
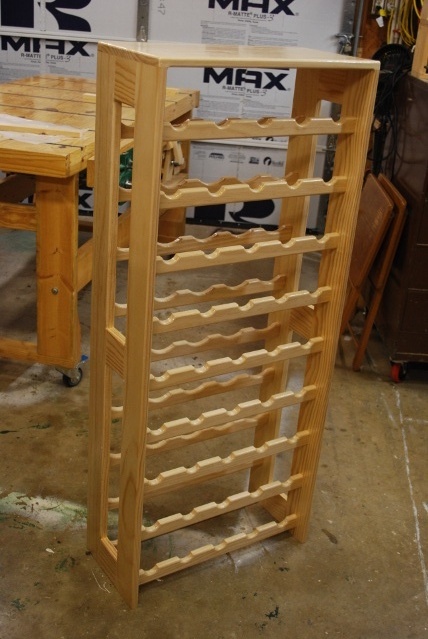
Paint complete.
|
|
Front view.
You can see how the front and back notches differ in size and line up.
|

|
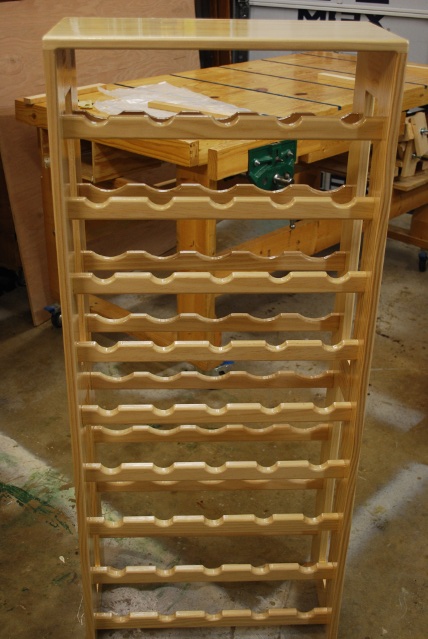
Back view.
The only difference between the front and back is the notch size and the position of the support bars (back is lower).
|

|
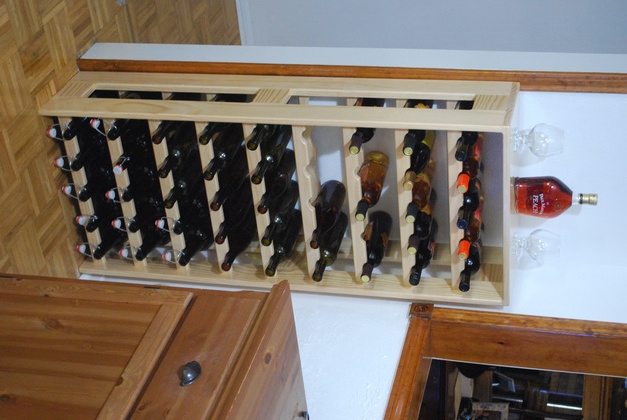
Front with bottles.
|
|
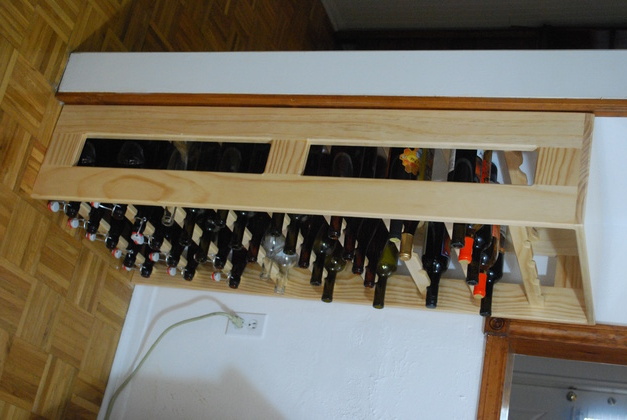
Back end of bottles.
The rack was primarily made for the 1 Liter bottles but accomodates the smaller 750 ml just fine.
The bottles lay almost horizontal, although this view angle doesn't show it.
Here is a better view of how the bottles lay.
|
|
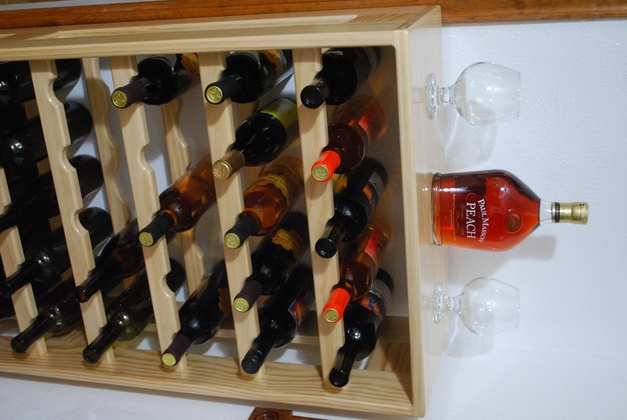
45 bottle wine rack.
Note the 1 Liter bottles on the bottom rows, even though their larger in diameter they fit fine.
|
|
Side quarter view.
|
|
A lot of bottles tucked away in a corner.
|
|
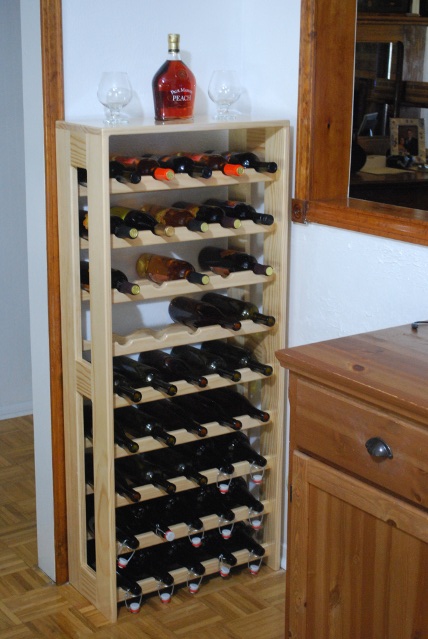
Betty's decorative touch makes it look a lot nicer.
|
|
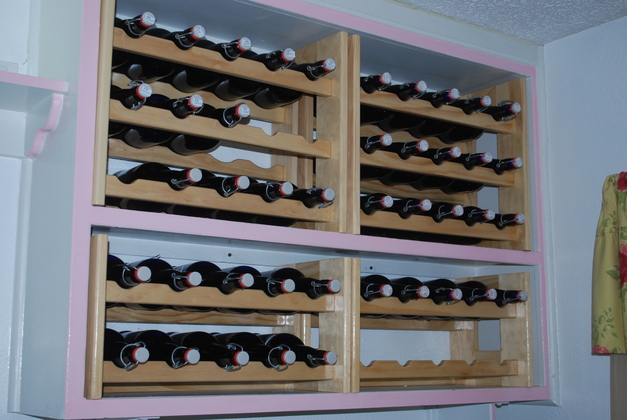
Short bottle racks, can hold 50 Liters of mead.
|
|
A 6 X 7 rack in the back of Betty's closet with 42 Liters of mead aging.
We have a total capacity of 92 Liters aging plus whats in carboys in the utility room.
|