| 
| 
|
| Unloaded, On Blocks | On Caster Base | With Outfeed Table |
|
Table Saw Stuff
| ||
|
|
|
|
| Unloaded, On Blocks | On Caster Base | With Outfeed Table |
|
Table Saw Stuff
| ||
I used a table saw in high school and later got a radial arm saw which I used for about 35 years. In 2007 I got a sliding compound miter saw (bosch 10") which I have used until now. But, I finally decided to get a table saw. Normally a table saw requires a lot of shop space, to crosscut you need a lot of room to the side of the saw, to rip you need a lot of room in front of the saw. I ordered a Jet Xacta 10" with a 3HP motor and a 30" rip width. My shop is tiny (≅ 300 ft²) so everything must be on casters.
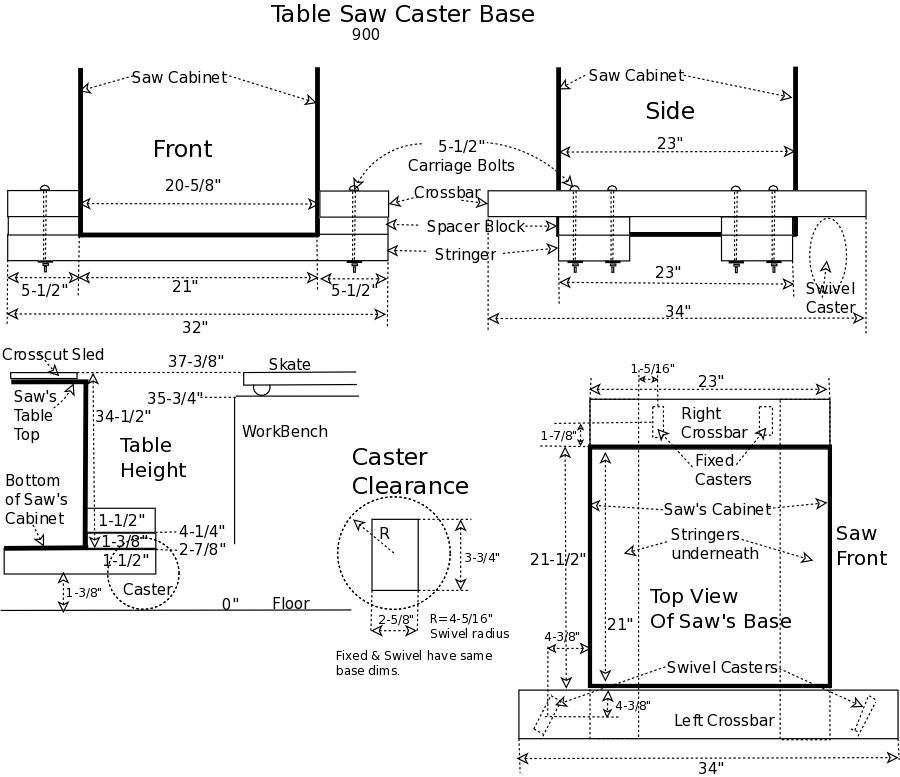
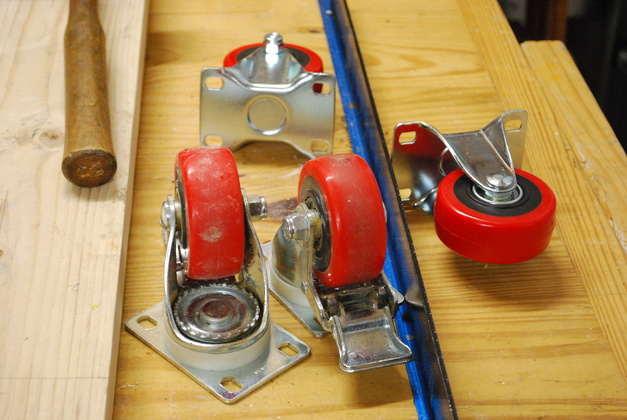
A caster base allows me to rotate the saw in the direction I need for the cut I want to make and to push it against the wall when not in use. I am going to build a caster base out of 2x6s with four 3" 300 Lb. casters (from Woodcraft), two fixed and two swivel double locking. The saw's base is 21" wide and 23" front to back.
The Jet Xacta 3HP weighs about 500 Lbs. and I'll bring it home in my Ford Ranger. Unloading is problematic. I built a ramp that ended in a furniture skate so I could move the saw around while working on the caster base.
| Table Saw vs Miter Saw Mostly Pros (By long lumber I mean 8-10') | |||
| Table Saw | |||
| You move the wood and the blade stays put, easier for ripping, | |||
| You don't have to mark the wood you depend on the setting of your rip fence. | |||
| The fence on a table saw is much larger (longer). | |||
| Hard to size long lumber. | |||
| Miter Saw (Sliding, Compound) | |||
| You move the blade and the wood stays put, easier for crosscutting long lumber. | |||
| Easier to position the blade's tooth to the mark on the wood. | |||
| You don't have kickback with a miter saw so its inherently safer. | |||
| Easier to size long pieces of lumber. | |||
I still use my miter saw to crosscut lumber (sizing) and now I use the table saw to rip to width.
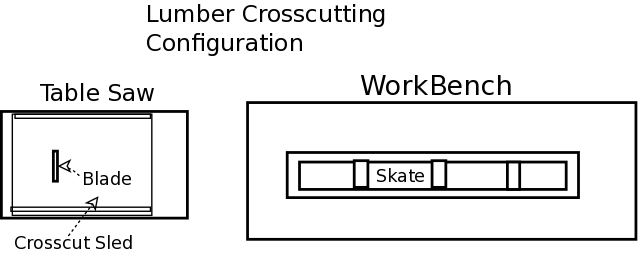
Skate
I need a crosscutting skate for the top of the workbench to support the ends of long boards (8' to 10') being crosscut.
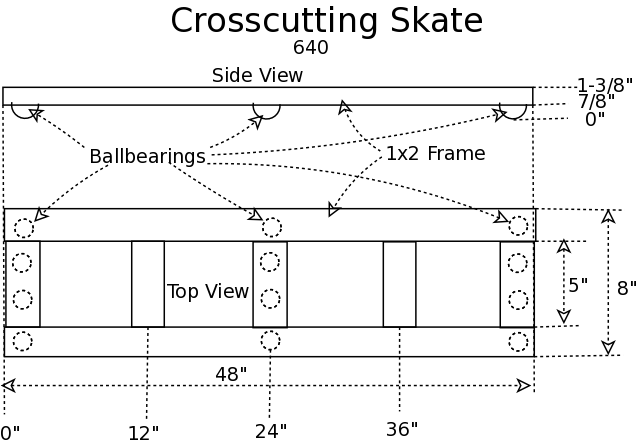
The skate will be a lattice frame of 1x2s, 48" wide and 8" deep, front to back.
I purchased some 5/8" ball bearings from Rockler, there will be three sets of 4 ball bearings, one at each end and one in the center, which will allow the skate to glide in any direction on the workbench with very low friction.
The ball bearings (with housing) are 7/8" high and the 1x2 is 3/4" thick giving a total skate height of 1-5/8".
Caster Base
In order to match the saw's table top, plus a crosscut sled, to the height of the skate on the workbench, the saw's base will need to be 2-7/8" above the floor (see Table Height on diagram).
The top of the caster's frame is 4-1/4" from the floor and will attach to a crossbar on the right and left side of the saw's base.
The 2x6 stringers, under the saw's base and supporting it's weight, will be bolted to the caster crossbar and offset by a spacer block to make the dimensions come out correctly.
I am also adding 1/2" total clearance for the support caster base to the sides of the saw.
I am thinking of attaching 3/4" panels to the front and back of the caster base to help support the depressed center.
If, in the future, I find the caster base drooping, I'll rebuild it with the 2" angles for runners.
Saw and Workbench Height
Work pieces being crosscut will be cut on the table saw and supported by the workbench so the sled on the table saw must be the same height as the skate on the workbench.
The workbench is 35-3/4" high, the skate with ball bearings, will be 1-5/8" high making the workbench plus skate 37-3/8" high.
The saw's table is 34" if I add a 1/2" crosscut sled the total height is 34-1/2" high.
I have to place the saw on a caster base, for mobility, and to raise the saw (plus sled) 2-7/8" to it'll be the same height as the skate on the workbench.
Crosscut Sled
I'll need a crosscut sled so I watched some videos on youtube.
I'm thinking about 1/2" hardwood plywood, 28" front to back and 36" wide.
I'll laminate two pieces of 3/4" plywood to make front and back handles.

|
2x6s for the ramp and then the caster base. |
|
|
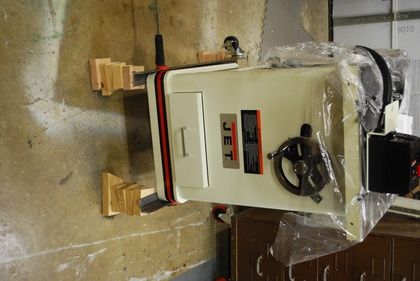
The saw front, supported by 2" angle iron, on blocks, after unloading and removing the ramp tail and furniture dolly. You are looking at the front of the saw. The caster base will be moved under the saw from left to right. The casters on the back end of the angles from an old project, these are not what will end up on the caster base. |
|
300# casters, Woodcraft. |
|
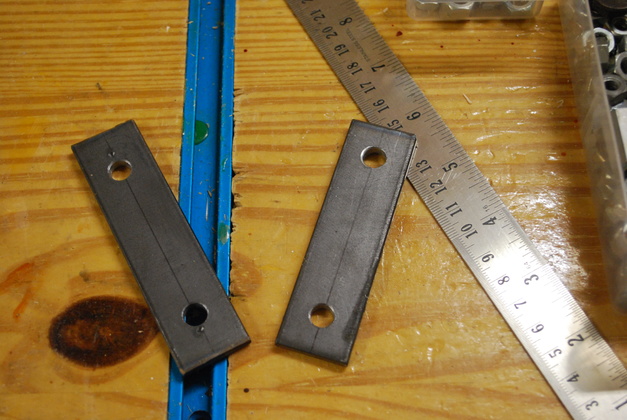
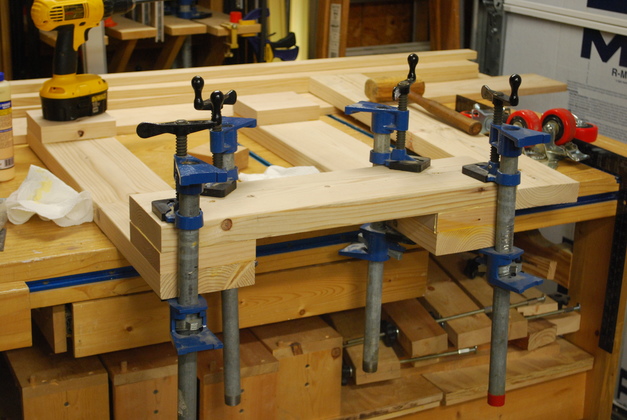
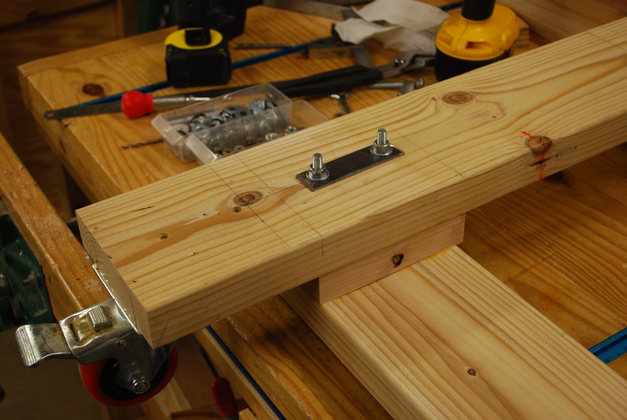
"Washers" made from 1" flat bar stock. The spacer blocks will be glued to the ends of the stringers, then the crossbars glued on top. Finally there will be two 5/16" carriage bolts through each spacer block with one of these washers on top and bottom. The carriage bolts are probably not necessary, but since the weight of the saw is pulling the stringers off the crossarm, I thought it a good idea. |
|
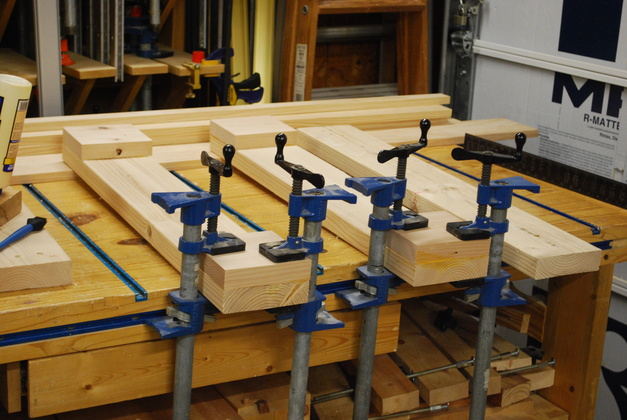
Gluing spacers to stringers. |
|
Gluing crossbar to spacer blocks. |
|
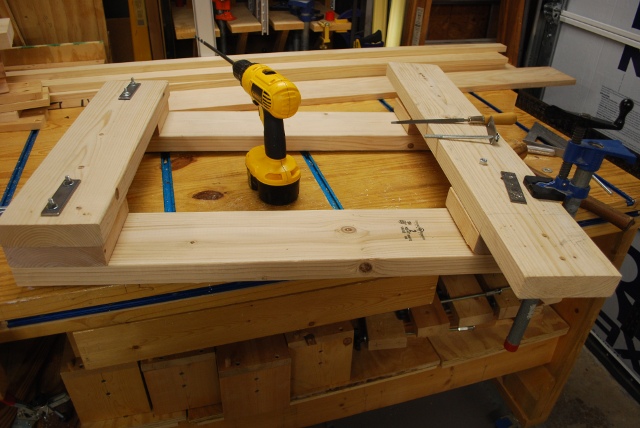
Drilling the bolt holes. |
|
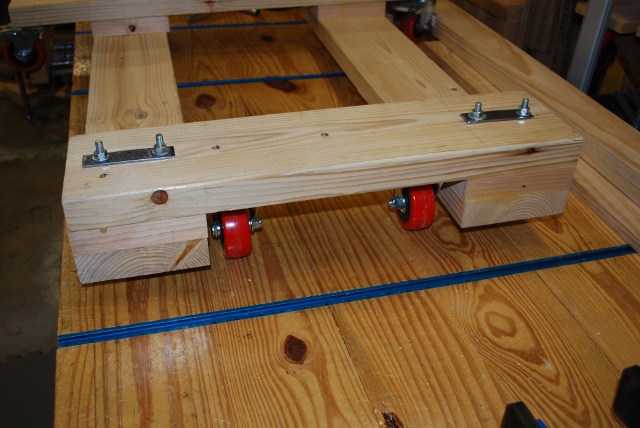
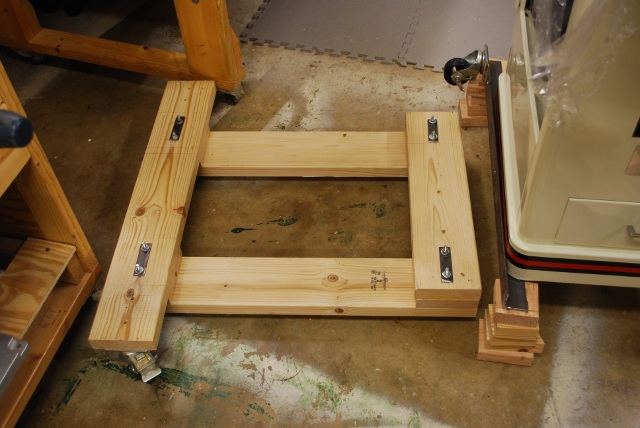
Bolts tightened and swivel casters installed on left crossbar of casterbase. |
|
Right end of caster base with bolts and fixed casters. |
|
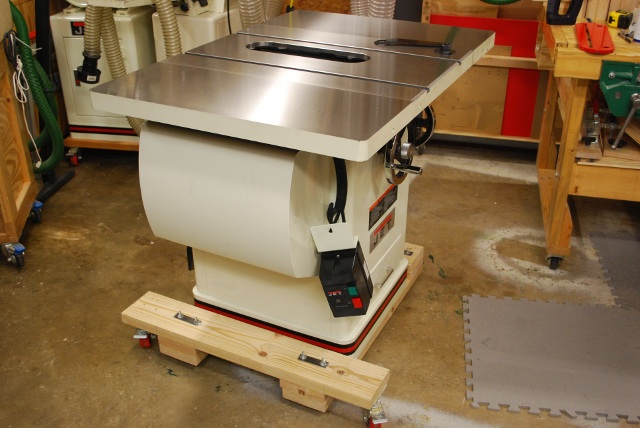
Base assembled, ready to slide under saw. I had to raise the saw high enough to clear the caster base. I put 4 stacks of blocks on the floor, one under each end of the 2" angles supporting the saw. I used another stack of blocks on the floor and a 1x4x18" lever to raise the saw high enough to clear another block adding blocks until the bottom of the angle irons was higher than the caster base. When the saw was high enough I moved the caster base under it and then began lowering the saw by removing blocks from each corner. Once the weight was on the caster base I removed the angles and block stacks. Last I used blocks on the floor and the 1x4 to lift the saw while I removed blocks from the top of the casterbase until the saw was sitting directly on it. Don't forget to lock the casters while lowering the saw. Sorry I didn't get pics of the transfer but I was busy. |
|
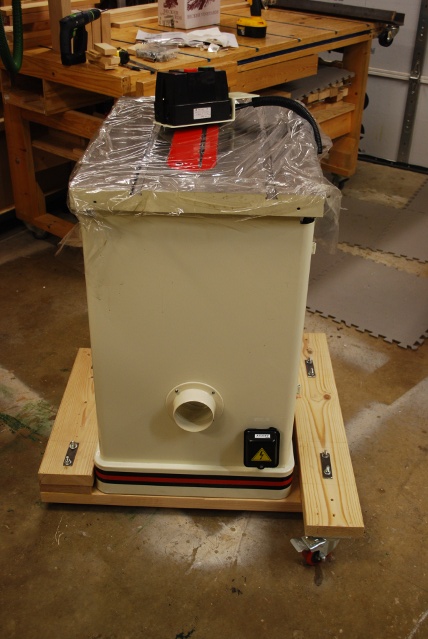
Back end of saw siting on the caster base. |
|
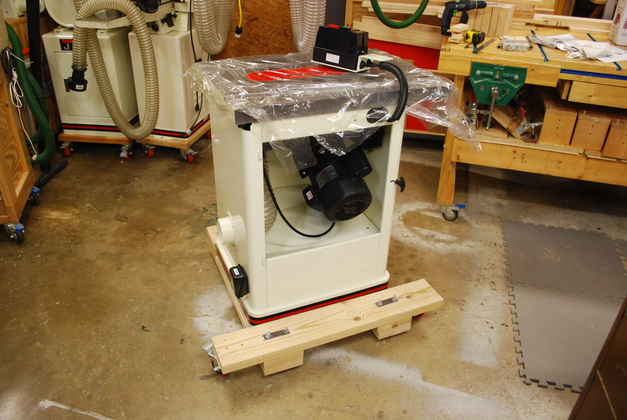
Left side of saw on caster base. |
|
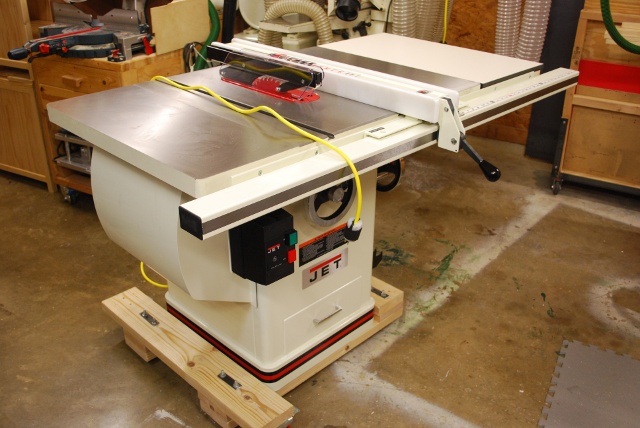
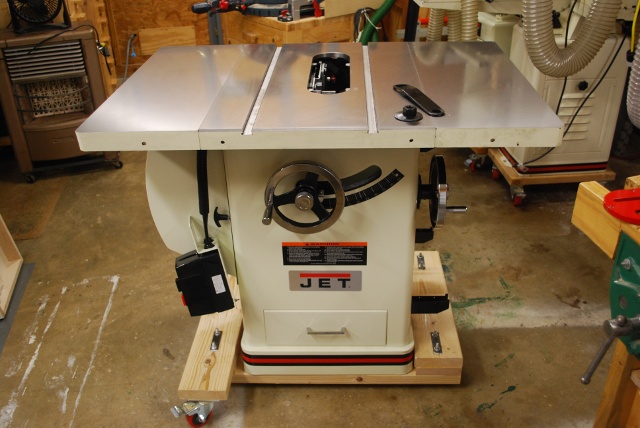
Front of saw with wings attached. I removed the clear plastic covering from the table and extensions, cleaned the oil off with WD-40, and put on a coat of Boeshield. I've been using Boeshield T-9 for years to protect all my machine tables. Boeshield T-9 even has it's own web site. |
|
Left front quarter of saw with wings. |
|
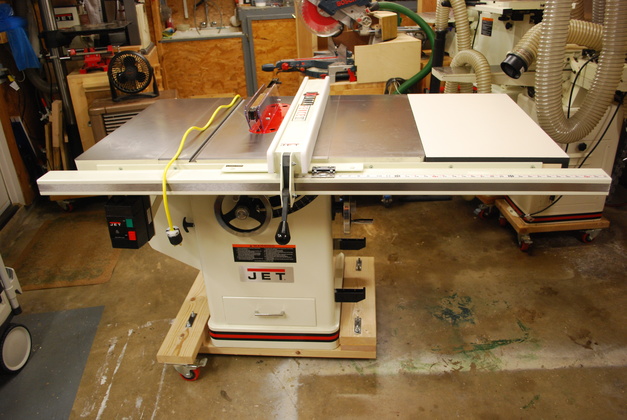
Front with blade, blade guard, riving knife, extension, fence, and power cord. The power switch has been mounted. |
|
|
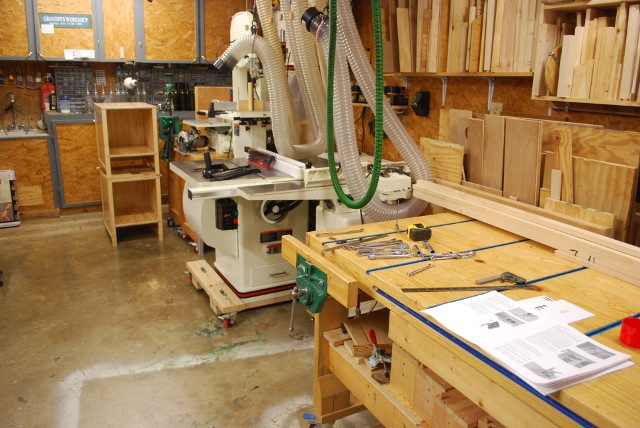
I previously added a 240V 20A drop from the ceiling, you can just see the yellow cord hanging just off the far end of the saw. |
|
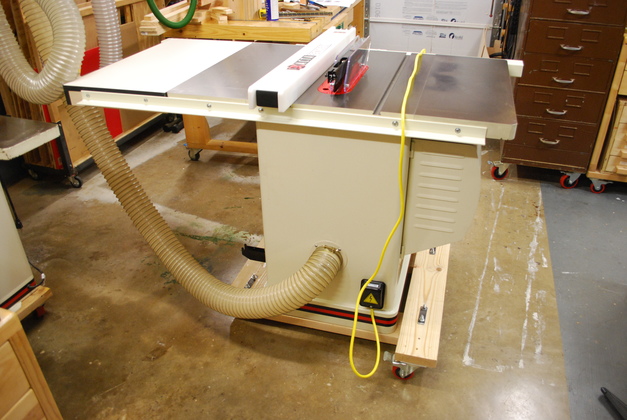
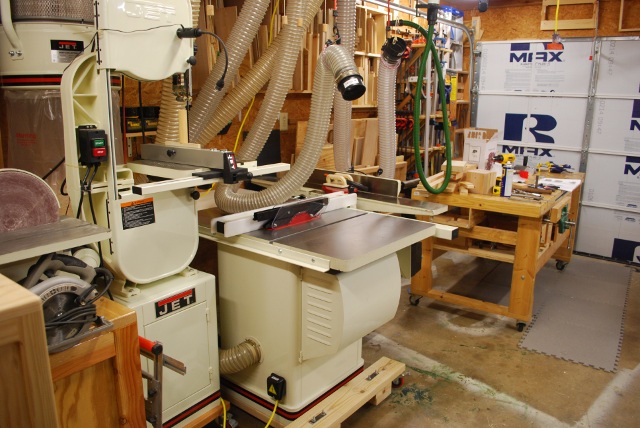
4" dust hose connected. I normally use a 4" quick connect but the port was too small so I just clamped the hose directly to it. Shouldn't be a problem since this port is dedicated to the saw. |
|
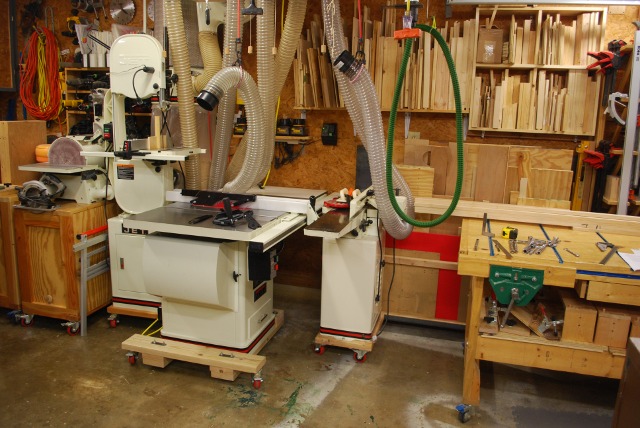
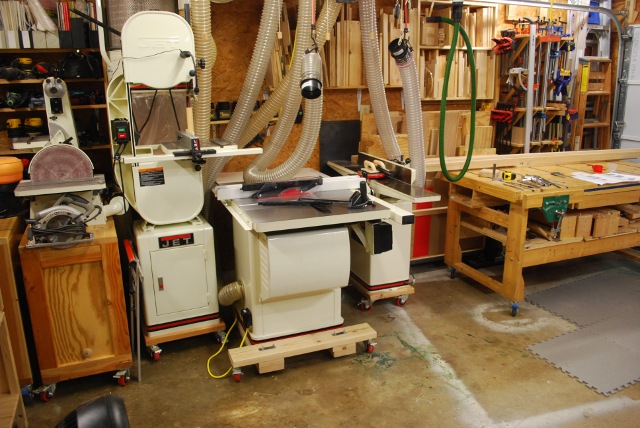
Its a monster in the machine line backed up against the wall. |
|
Looking toward the workbench. |
|
|
|
|