| 
|
|
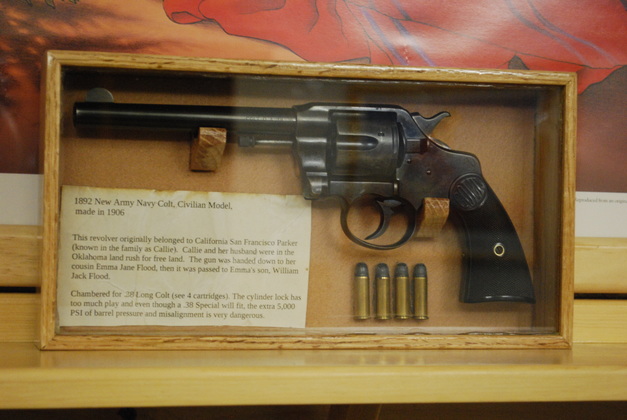
Revolver Shadow Box
|
12/26/13: Page Origin.
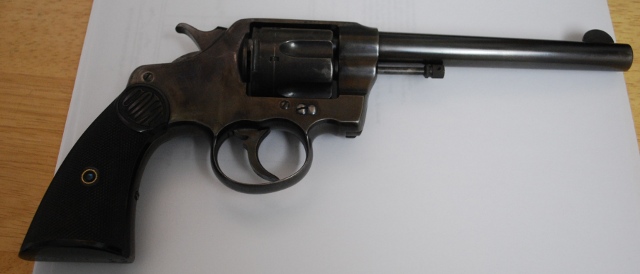
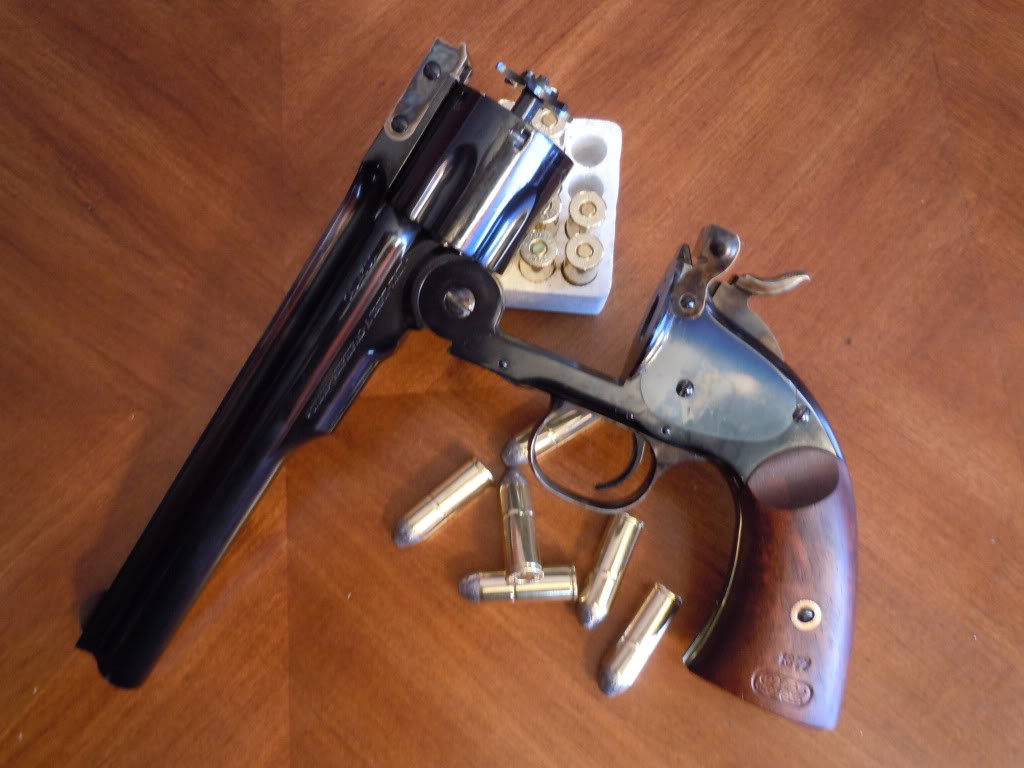
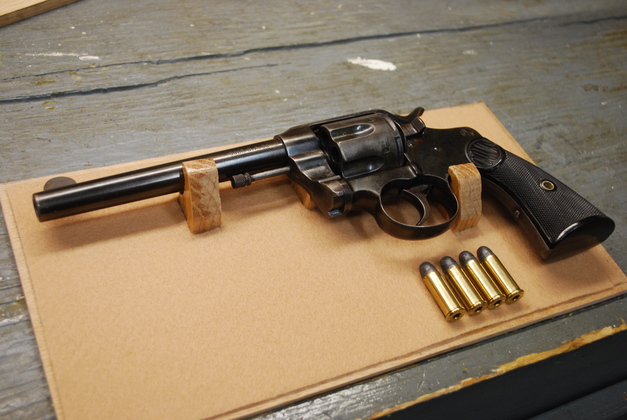
Betty inherited a 1889 Colt, 38 Double Action Revolver which was manufactured in 1906 (best I can tell).
This was called the "New Army and Navy" Revolver Second Release, commercial model.
In 1892 the military adopted this design, as "M1892 Colt Army & Navy" in 38 Long Colt Caliber, as their standard side arm.
This was one of the first revolver designs that let the cylinder swing out for loading, previously, there was a loading gate in the frame at the rear of the cylinder (that allowed one cartridge at a time to be ejected then replaced) and a top break revolver.
The cylinder lock has a little slop in it, another reason not to fire the gun.
This revolver is chambered for .38 Long Colt cartridges however a 38 Special will fit, but I sure wouldn't fire it, the 5,000 PSI increase in pressure, along with cylinder misalignment, could be a very bad experience.
I believe the .38 Long Colt was also called the .38 Government.
The .38 Long Colt was originally a black powder cartridge, with a 150 gn. .358" or .357" lead bullet with between 16 - 18 gn of black powder substitute FFFg.
Another interesting note, this revolver's earliest patent date was 1884, which was also the year smokeless powder was invented.
linkS:
Construction Pics.
I'll begin with some pics of the revolver.
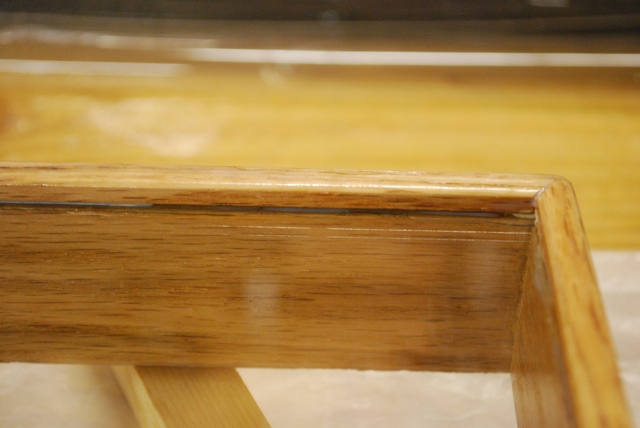
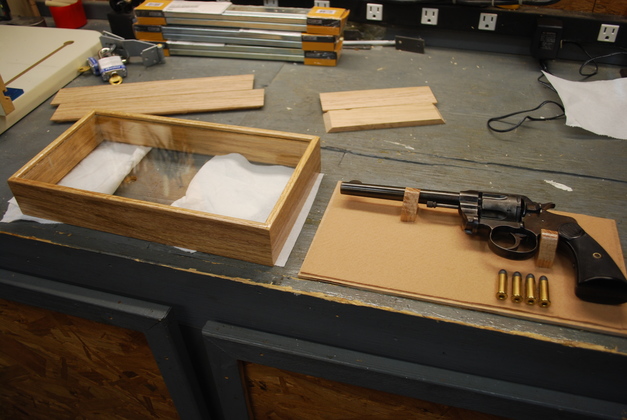
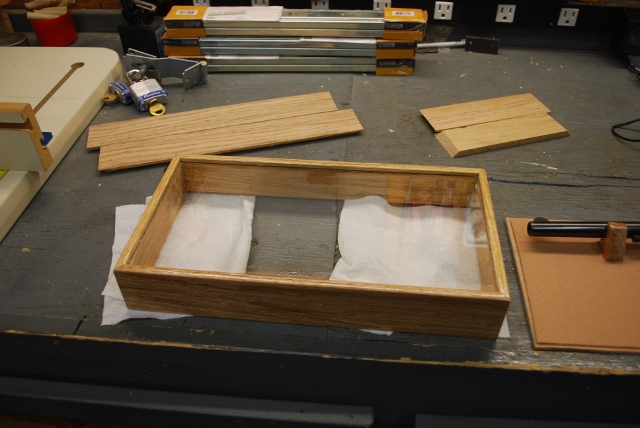
The box has interior dimensions of 12" wide, 6" high and has a vertical clearance of 1-1/2"
The walls will be 5/16" thick so I add 5/8" to each dimension to get the wall length.
The height of the walls is 1-1/5" plus 3/16" for the bottom board plus 1/8" for the glass thickness plus 3/16" for the top rounded edge or 2&aquot; total.
Once the walls are cut to height and length, I miter each then cut a slot 1/8"quot; wide and 1/8" deep for the glass 3/16" from the top.
Then a 3/16" deep by 5/32" wide rabbet at the bottom for the bottom of the box.
The top, or front face of the box, will have 1/8" rounded edges.
Revolver Pics
|
The left side of the revolver.
|
|
You can get a better idea of the condition of the surface, no rust but some wear.
|
|
The right side.
|
|
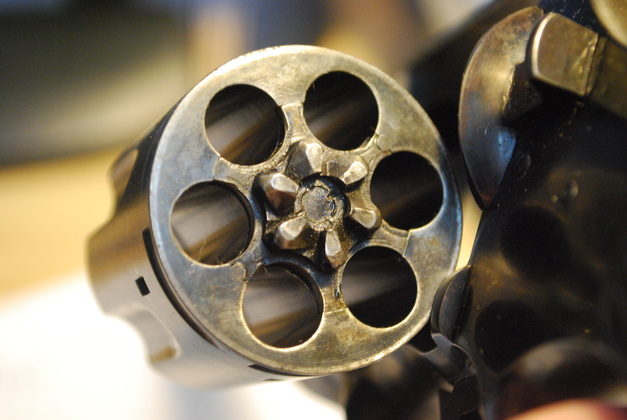
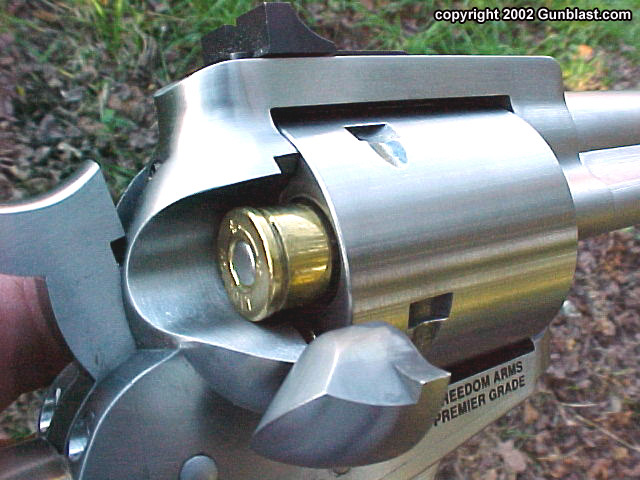
Cylinder open.
Note the cylinder swings out on the left side, easy for a right hander to reload while holding the gun in his right hand.
The loading gate was invented by a left hander.
|
|
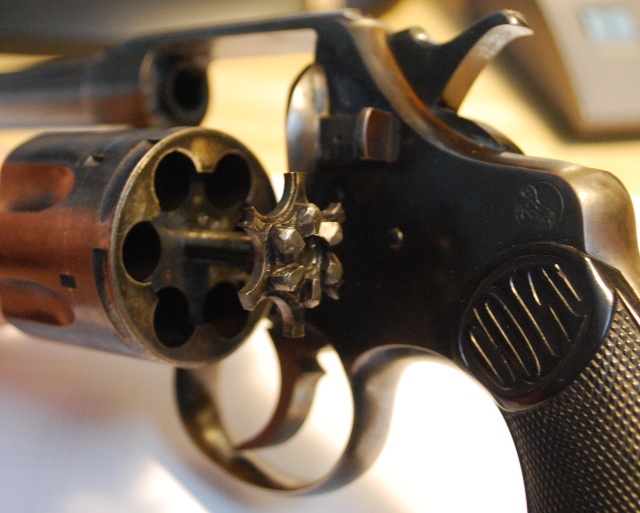
Extractor extended.
|
|
Example of a revolver loading gate.
Invented by a left hander, and ideal for use by a left hander, it was the most common before the swing out cylinder was introduced by Colt in 1889.
|
|
A top break (like a Schofield .45 LC).
Note how the extractor pops out to eject all the cases when open.
|
|
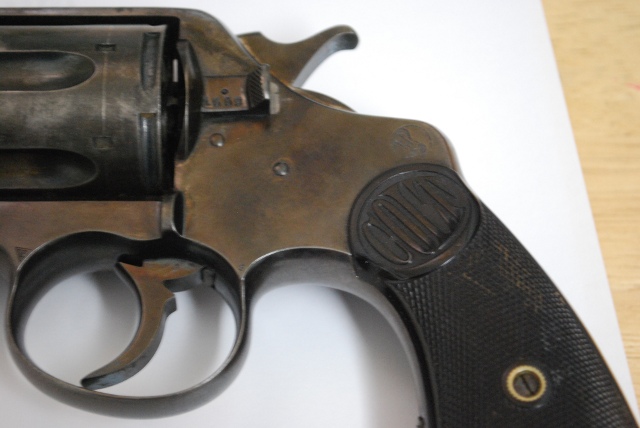
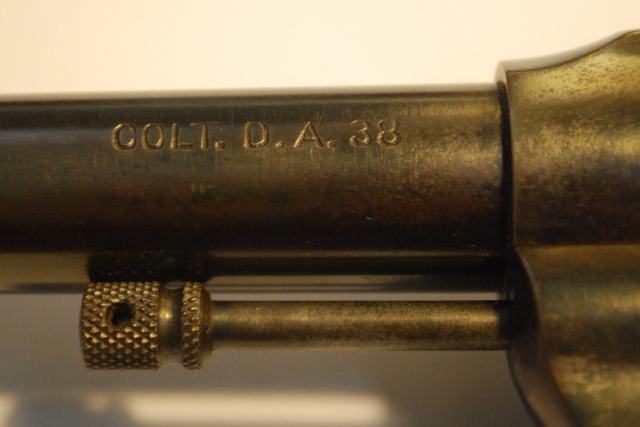
Colt Double Action 38, engraved on the left side of the barrel.
|
|
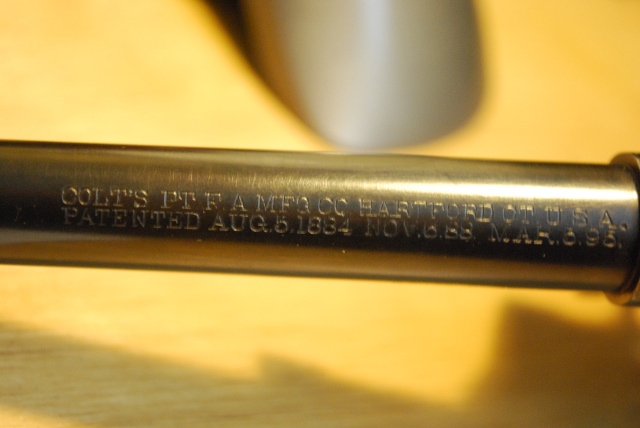
Engraving on top of the barrel.
Colt's PTF A MFG. Co. Hartford Ct. U.S.A.
Petented Aug.5.1884, Nov.6.88, Mar.5.95.
|
|
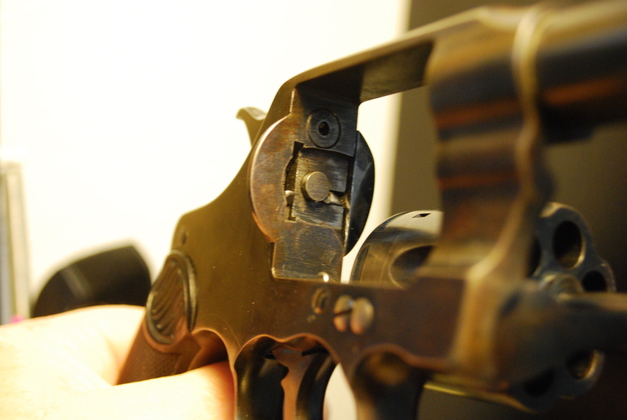
Cylinder pivot and stop.
|
|
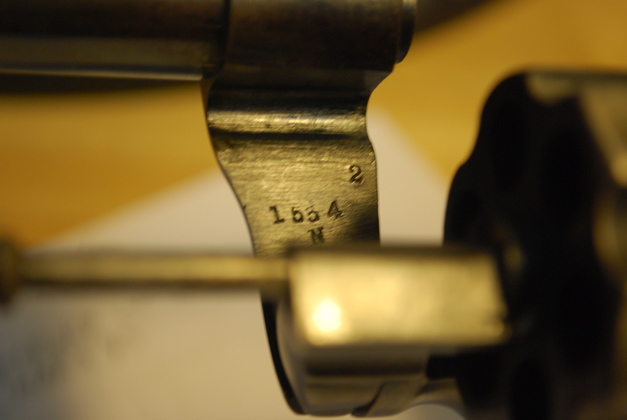
Assymbly no. 1534 with an 'N' under it and a '2' above it.
|
|
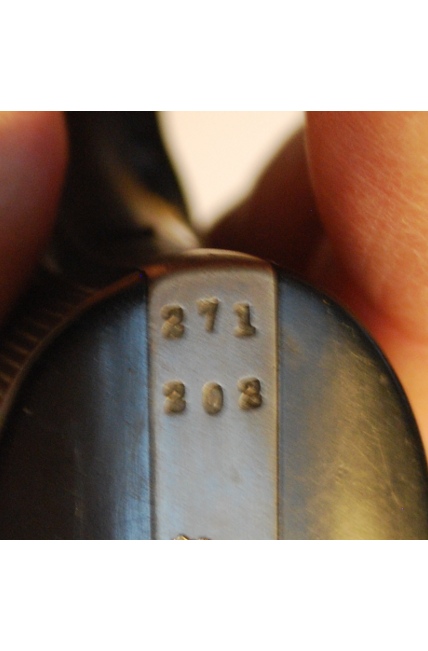
The serial number 271202 on the butt strap.
|
|
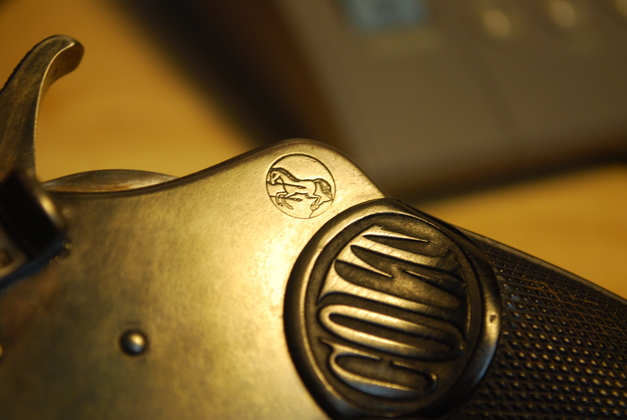
Colt firearms pony.
|
|
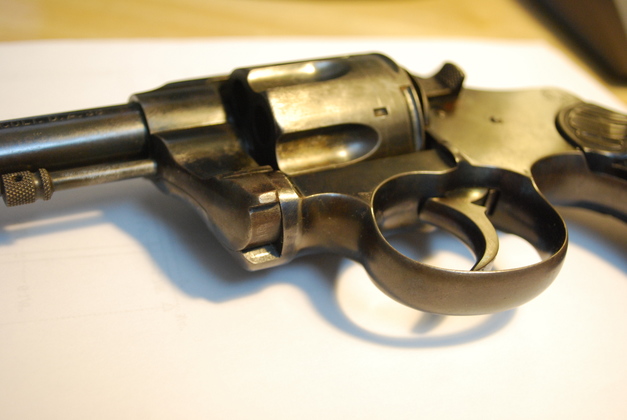
Right side behind cylinder.
|

|
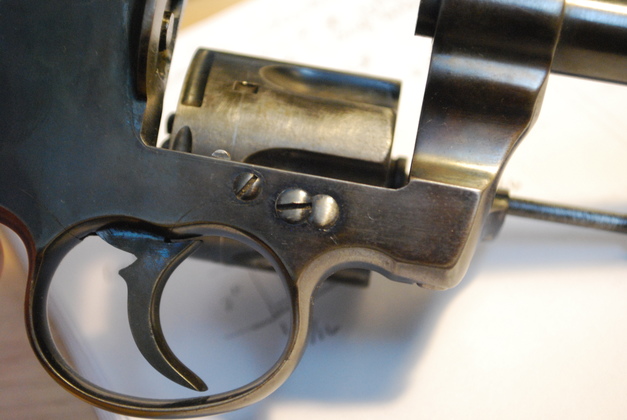
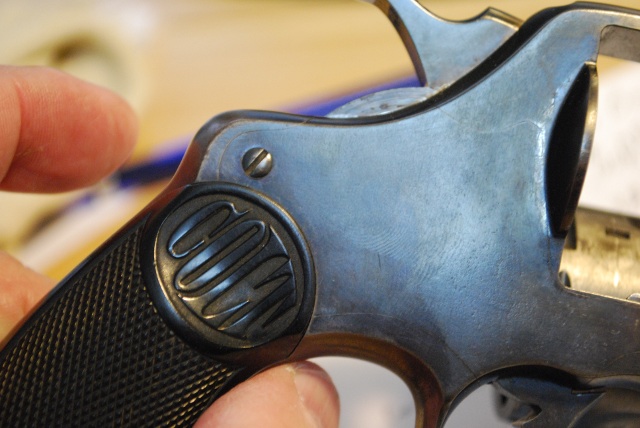
Trigger screw detail.
|
Shadow Box Construction Details
|
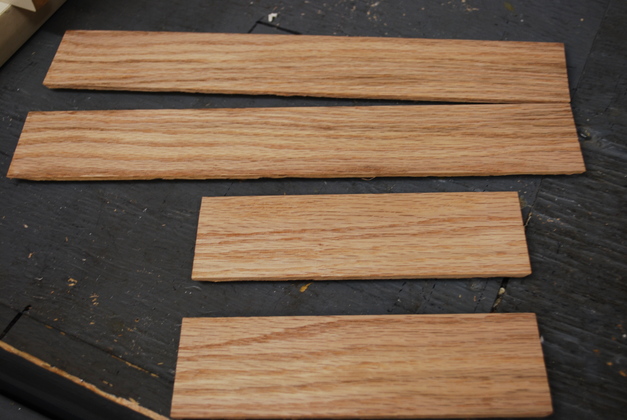
I cut a 1x3 red oak board to lengths (12-5/8" and 6-5/8") for sides and ends, ripped them to 2" wide then resawed them in half so I had 5/16" thick X 2" pieces.
For more info and pics about resawing please see my drawer page.
Here is another page that has a small box with mitered corners and resawed panels.
|
|
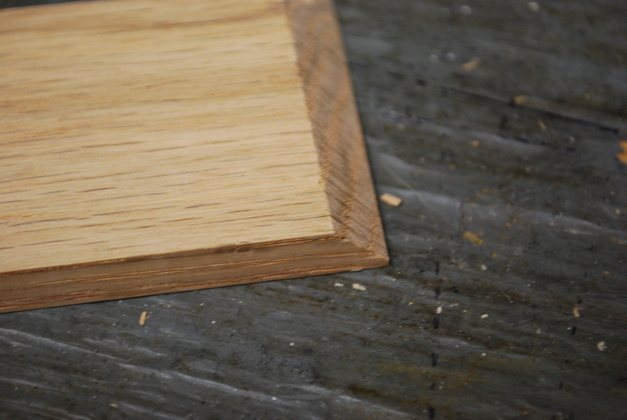
Then I mitered the end 45° for the box corners.
|
|
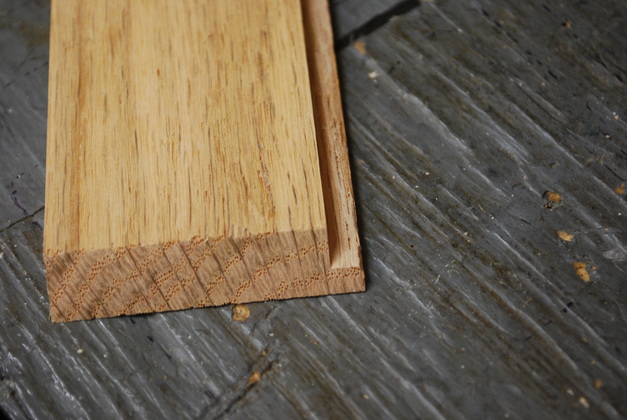
And rabbeted the sides for a bottom.
I plan to seal the box so that it is almost air tight and can't be opened, the bottom will be glued into this rabbet.
|
|
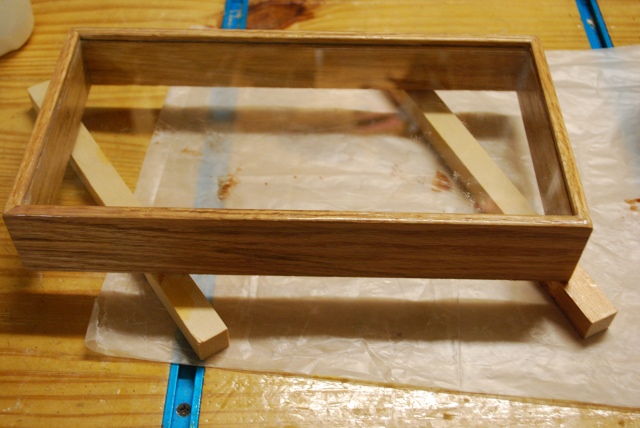
I bought a piece of glass 16" X 20" from the Depot then cut off a piece 6-1/4" X 12-1/4" for the case.
I also cut a slot in the box pieces for the glass.
Here you can see the glass inserted and sealed into the slot as the box is assembled.
The glass is sealed in with a small bead of clear slicone sealer.
|
|
The box frame, with glass, after one coat of poly.
I used a strap clamp with corner cauls and small ClampIt squares to glue the box.
|
|
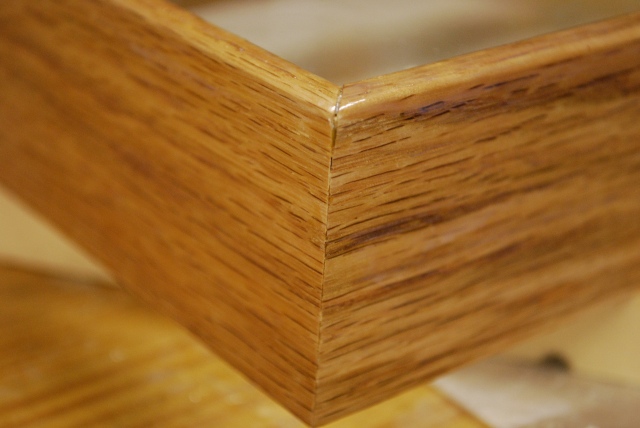
One of the mitered corners.
I have found this the be a very strong construction technique, as long as you use very good glue, spread it across the entire surface, and clamp it.
Remember, if you saw a 5/16" (.3125") thick piece at 45° you get a contact area almost 1/2" wide (.442").
My first attempt at mitered glued corners used 3/16" thick plywood to make a range box.
The 3/16" panels were so thin that I used glue blocks to reinforce, we've been using the range box for a couple of years and have had no problems.
|
|
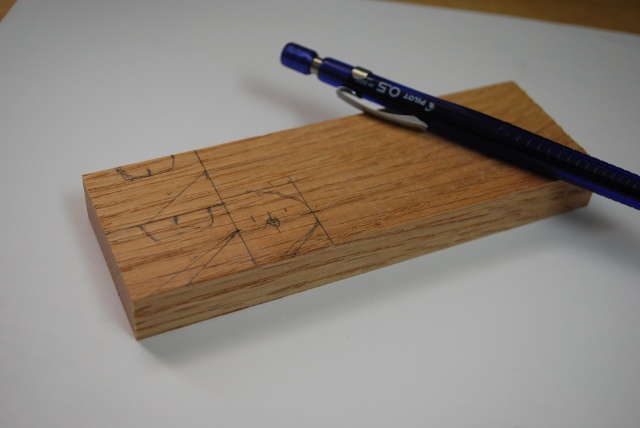
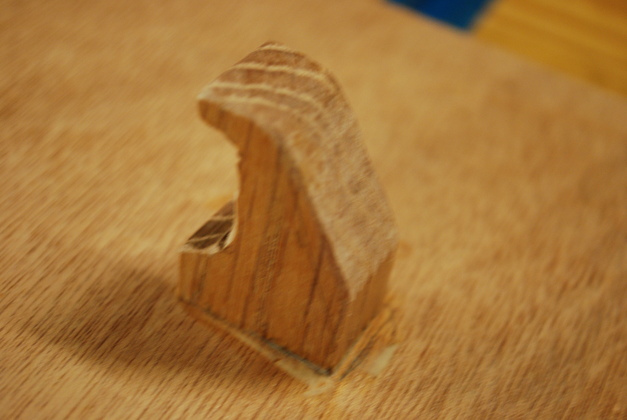
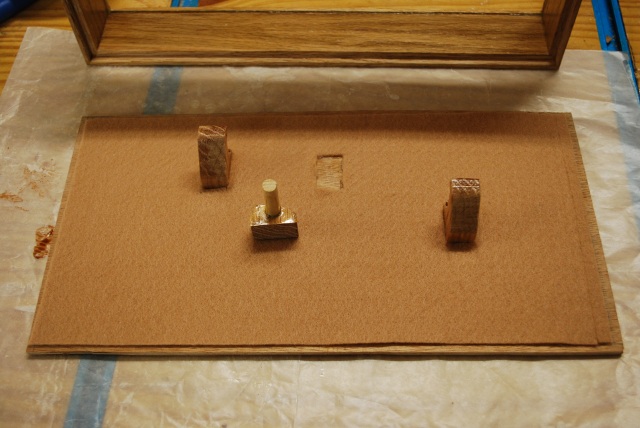
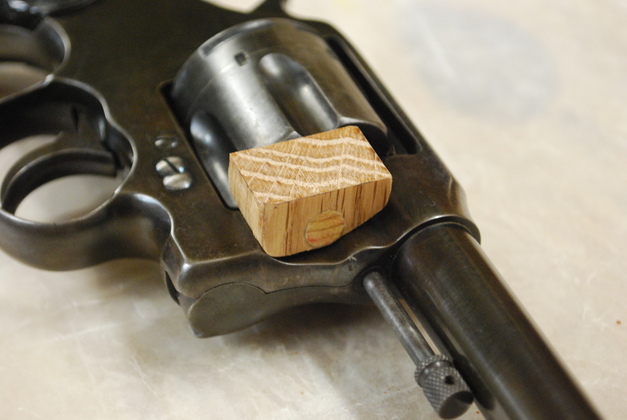
Next I resawed this piece of solid red oak flooring to 5/8" thick, then I drew out the shapes of the three mounting / support pieces.
|
|
Then I sawed out the three pieces and sanded them.
Here I am gluing one of the two cradling pieces (catch under the frame or barrel).
|
|
This piece will help maintain the revolver's position no matter which way the box may be turned by inserting the small peg into one of the cylinder holes on the back side of the revolver.
This in addition to the two other support piecs will keep the revolver in a fixed position.
|
|
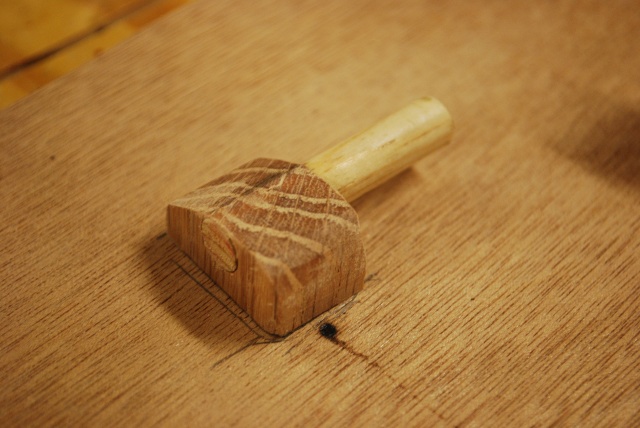
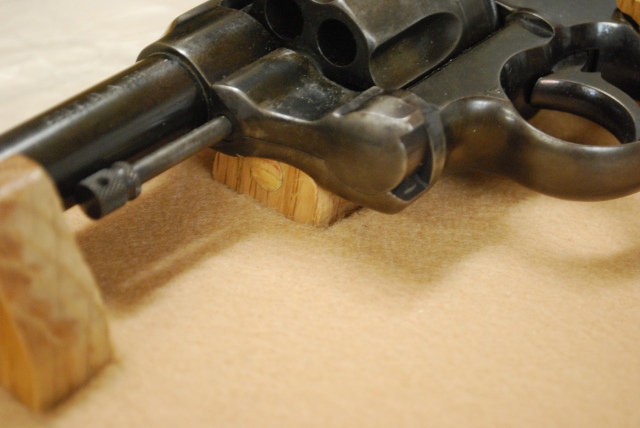
This is the barrel cradle being glued onto the back board.
After these are glued on I'll cut the backboard cover felt to hide all but the support pieces.
|
|
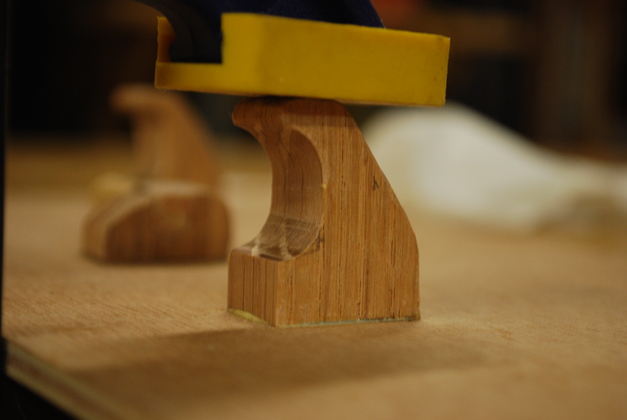
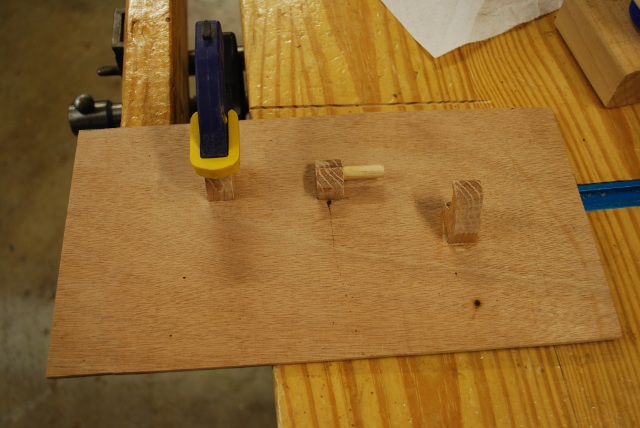
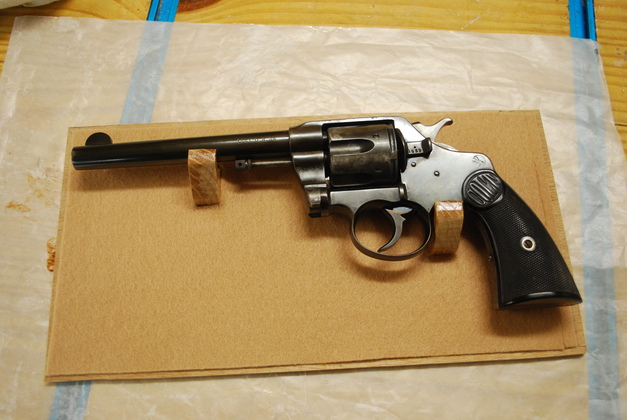
Here are the three supports in their approximate positions.
The left and right cradle pieces are actually glued down, the cylinder catcher will be the last thing glued down with the revolver attached.
|
|
The supports after felt backing is glued on, and holes cut in the felt for the support pieces.
The center support is ready to glue, you can see it's hole in the backing felt.
|
|
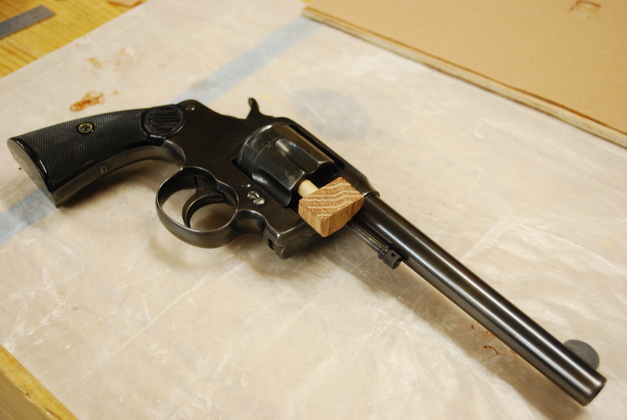
Showing fit of center support peg into cylinder hole.
The revolver will be displayed on it's right side (shown here), you will not be able to see the cylinder support, easily, after the revolver is glued inot the box.
|
|
How the peg fits into the cylinder.
|
|
With peg completely inserted into cylinder, the way it will be in the finished box.
A friend was looking at the backboard with the revolver attached when I picked it up and shook it upside down, he did a double take and asked how I did that, so I showed him the block and peg under the fram (almost invisible unless you know where to look.
|
|
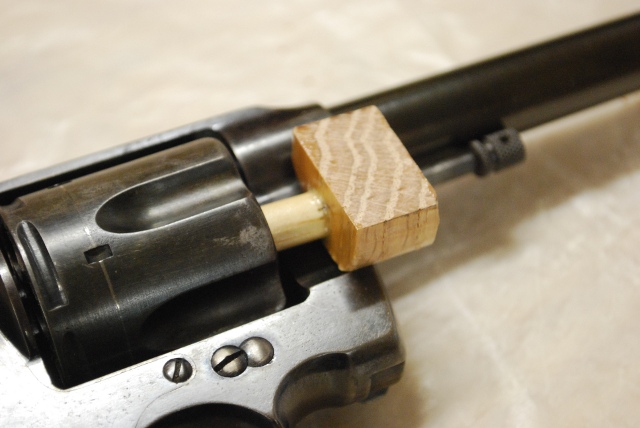
Peg inserted into cylinder from the front.
|
|
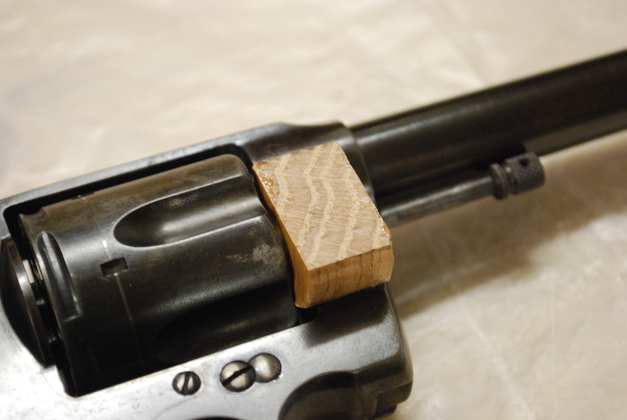
Gun resting on supports with center support insserted into cylinder.
|
|
close up showing center support under revolver frame.
This could be used to completely support the revolver if you didn't want it glued in permanently.
|
|
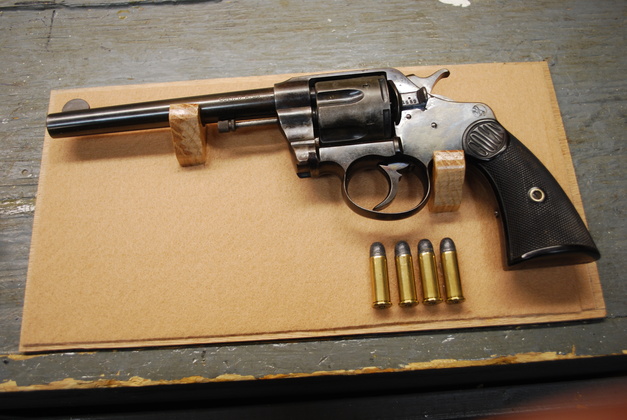
Revolver mounted with felt backing and .38 Long Colt cartridges.
These are the original cartridges that were with the gun.
I pulled the bullets, dumped the propellant, deprimed, and tumbled the cases, then reseated the original 150 gn. lead bullets.
The bullets are old enough that there was no lube ring around them as there is on modern lead bullets.
Typical of the reloading industry, dies for .38 Long Colt are still available.
I didn't buy a set of .38 Long Colt dies, I chamfered the inside of the case mouth and used a .40 S&W seater die to seat these 4 rounds.
|
|
I cut slits in the backing so I could seal the cartridges to the backboard.
In this view you can see the primers are missing.
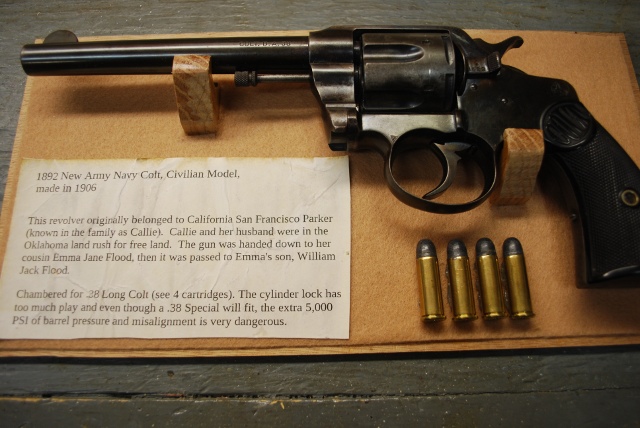
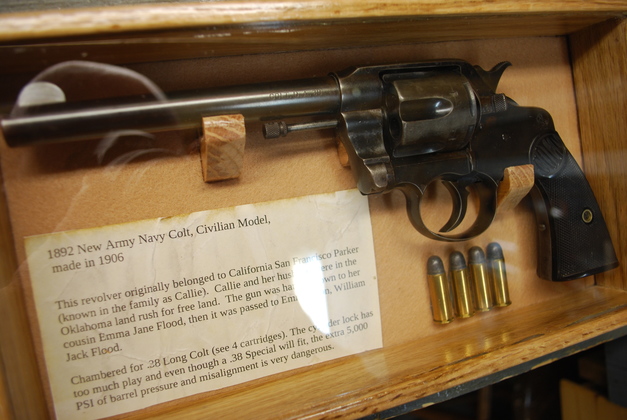
The display is ready for attachment of description card (Legend).
|
|
Mounted revolver with case top on the left.
|
|
The case top, you can see a slight reflection in the glass.
|
Legend
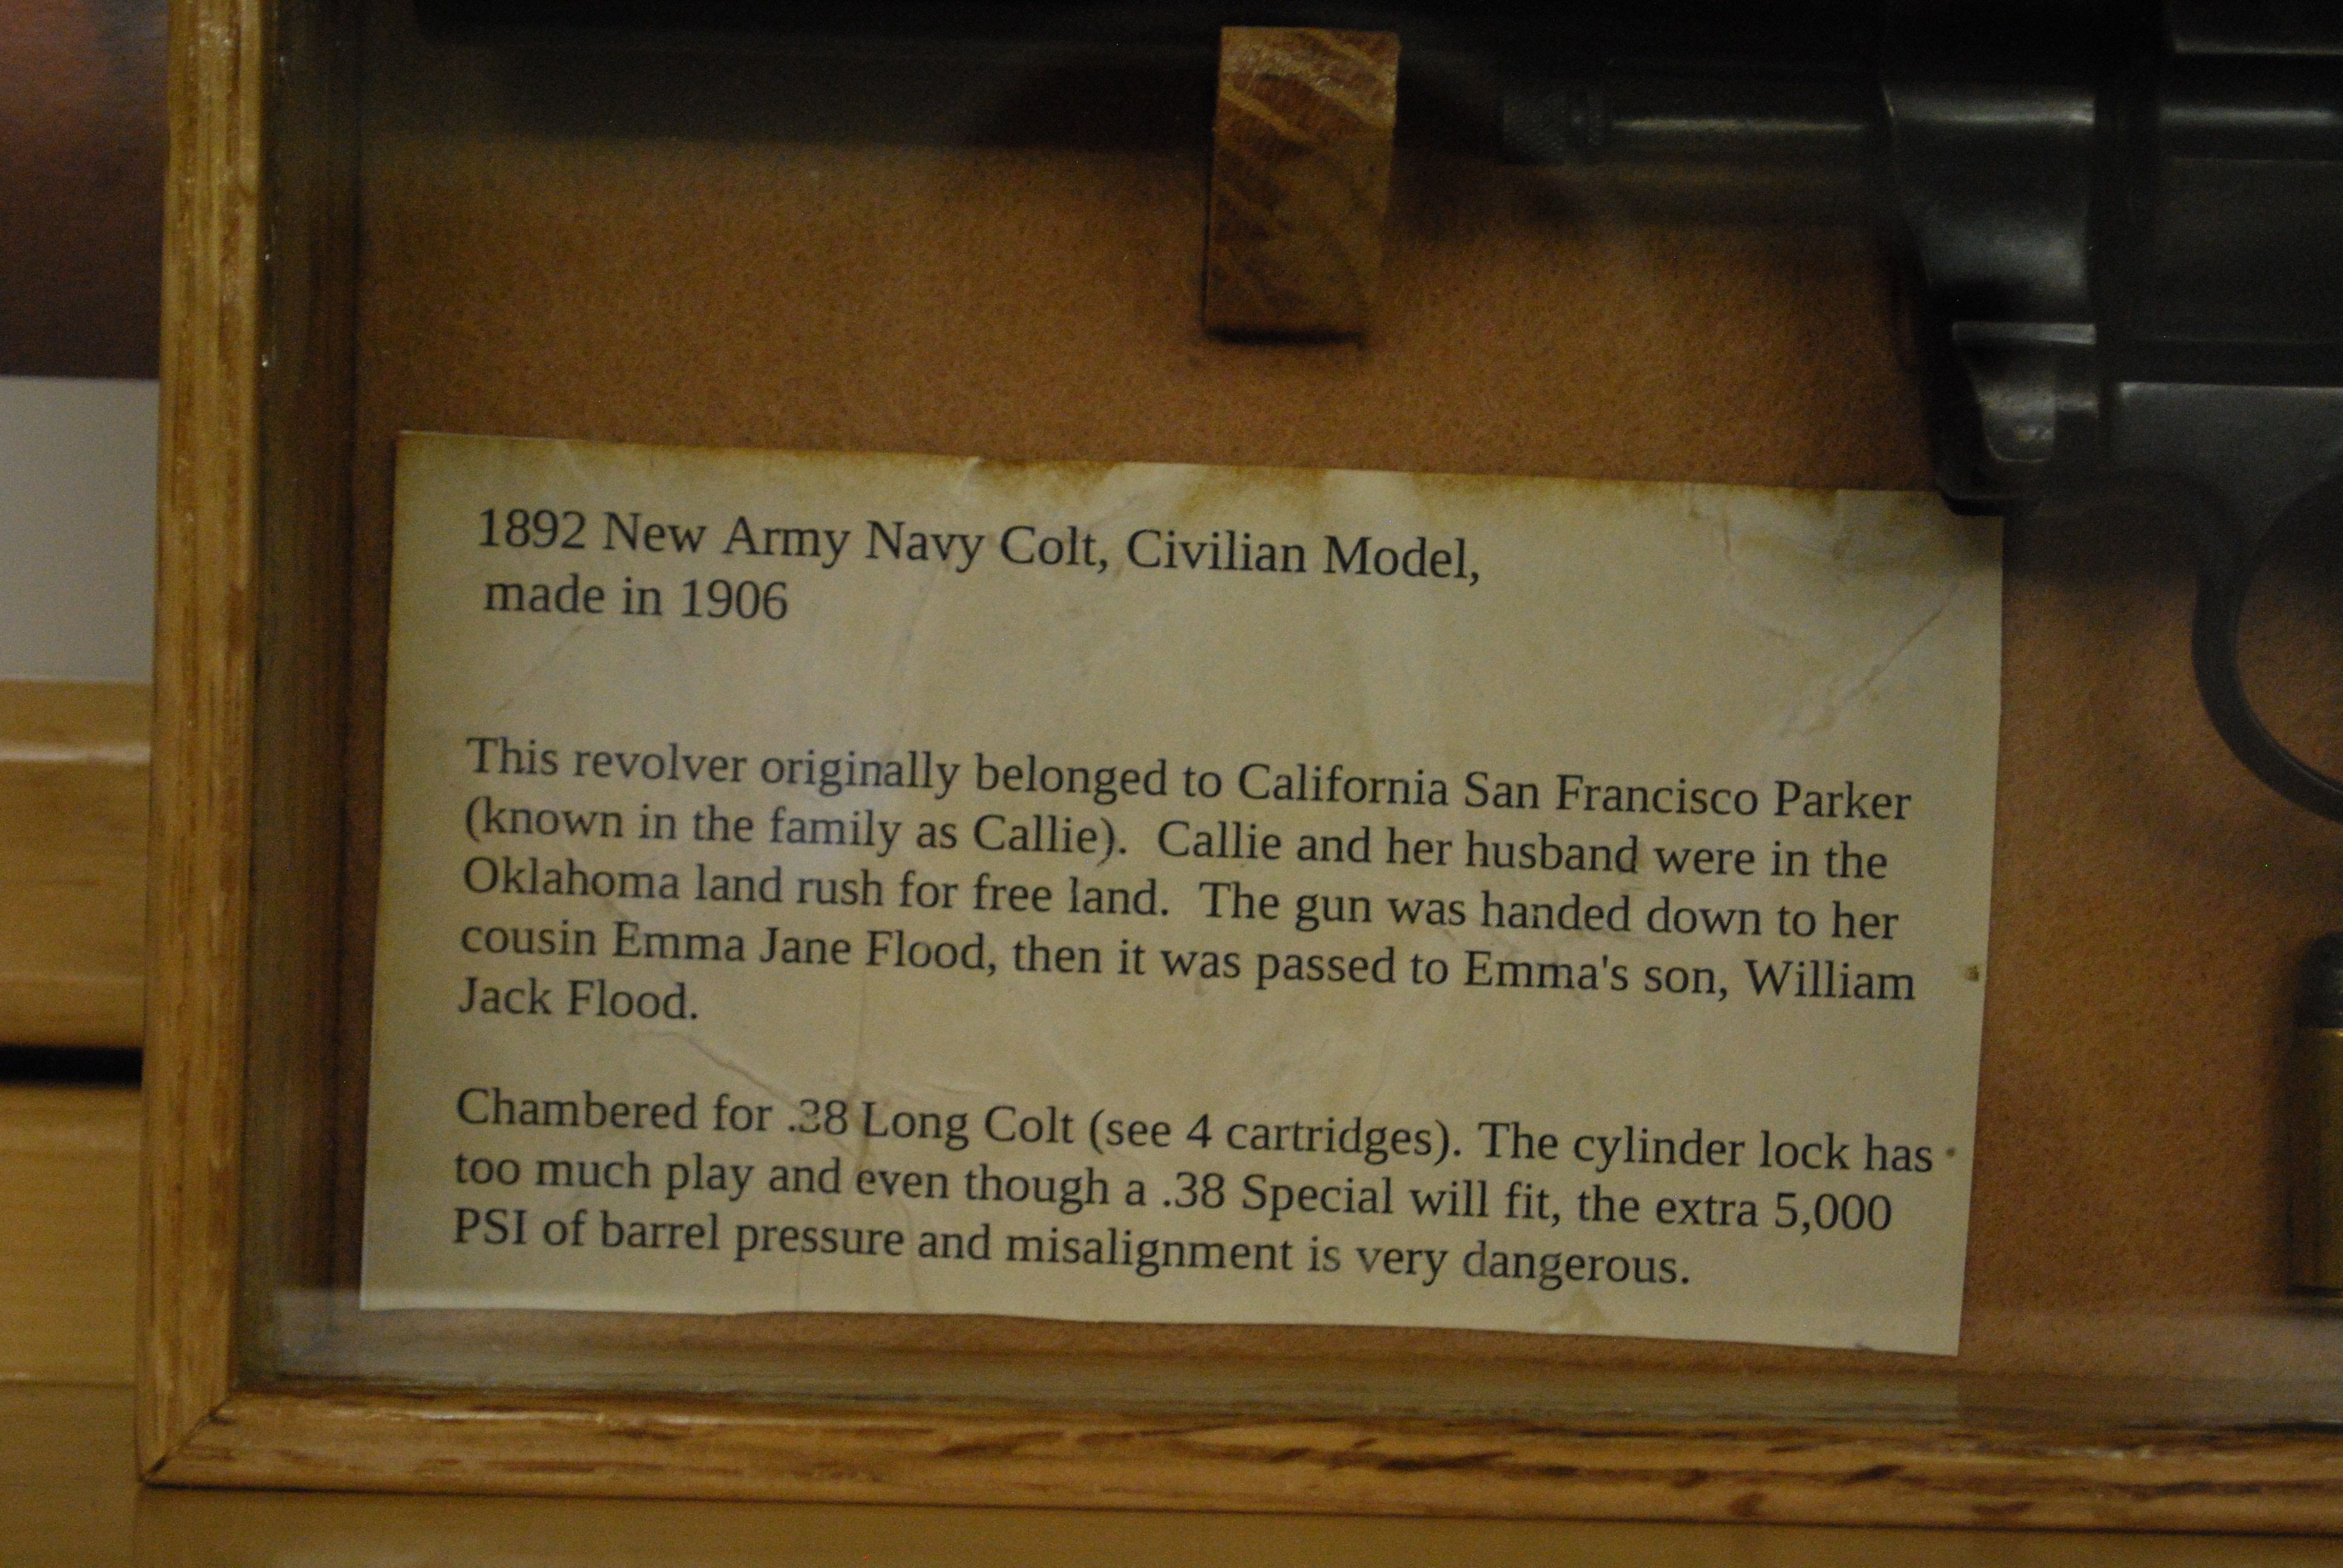
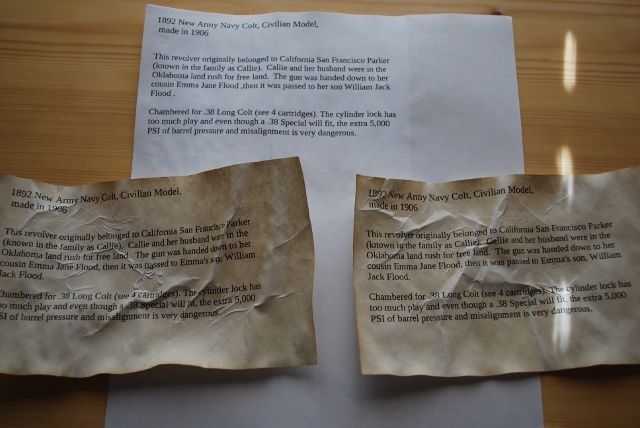
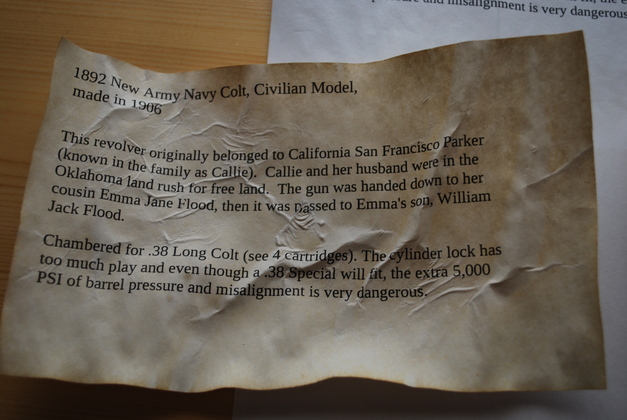
1892 New Army Navy Colt, Civilian Model,
made in 1906
This revolver originally belonged to California San Francisco Parker (known in the family as Callie).
Callie and her husband were in the Oklahoma land rush for free land.
The gun was handed down to her cousin Emma Jane Flood, then it was passed to Emma's son William Jack Flood.
Chambered for .38 Long Colt (see 4 cartridges).
The cylinder lock has too much play and even though a .38 Special will fit, the extra 5,000 PSI of barrel pressure and misalignment is very dangerous.
|
Preparing the legend.
I printed several copies on white 20# bond paper (regular printer paper).
Soaked them in coffee, slightly wrinkeled them while wet from the coffee soak, and dried them in the oven at 200° for about 5 min., this is the result.
|
|
Closer view.
|
|
Heres how it looks on the backboard.
I glued the legend to a card stock (index card) backing, then, after it dried, glued the card stock to the felt.
|
|
And inside the case.
I had to get over to one side to get rid of most of the reflections.
|
|
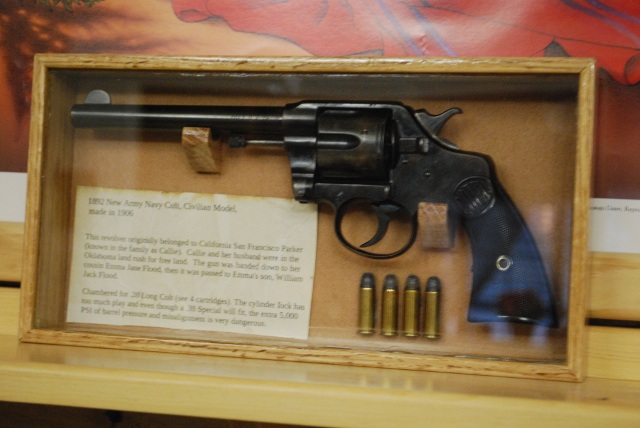
The finished shadow box.
|