08/24/15: replace a few pics with better ones.
10/01/14: Add more pics of drawer parts on the dovetail jig.
09/17/14: Add drawer dimension drawing and discussion.
02/28/13: Page Origin.
Most of the drawers I make are recessed front with the front frame part an integral part of the frame.
Another style is to build a drawer box with the front and back identical then attach a seperate front piece.
I have only made a box and seperate front once (see Betty's Closet).
I make the drawer sides and backs thinner than standard 1x lumber to lighten the drawer, and increase the storage area (besides a drawer doesn't need the extra strength).
When you resaw drawer backs and sides, you need to make sure the bandsaw blade is exactly square to the table, and that the guide is exactly parallel to the blade.
The boards you start with should not be cupped or warped.
When I refer to sides and backs, I mean the drawer frame side panels and back panels.
I have a Porter Cable Omnijig-16, so when you do half blind dovetails, the front and back panels of the drawer go on the top of the jig where the sides go on the front of the jig.
I cut the rabbets for the drawer bottoms in the front, sides and backs before dovetailing to help keep orientation correct.
Most jigs I have used work the same way, but yours might be different.
Please see my drawer making page (with links to construction).
Like in all furniture/workbench making, keeping things square and plumb are a very high priority.
If you don't keep the cabinet square and the drawers square, you'll have a rough time making the drawers work in a cabinet.
I use a square of some sort at almost every step.
I usually make the drawer sides and back shorter than the front to hide the slides.
The front sets the drawer to drawer spacing which may not be a standard lumber width but you can use standard lumber for the sides/back.
These are no exception and have a 5" high front with 3-1/2" high sides and back.
If you want to use Euro-Slides you have to make the sides/back shorter than the front, so you can lift the drawer up off the slides.
I'll cut the front from a 1x6 then trim with a bandsaw to 5" leaving it 3/4" thick.
The sides and back are 1x4s resawed in half resulting in 5/16" thick.
Since I'm making two drawers at a time I resaw one 3/4" back that yields two back drawer panels, and resaw two 1x4 sides each yeilds side panels for two drawer.
The machine benches and loading bench are made from pine lumber so I leave 1/8" space between drawers to accomodat a little changing when the lumber drys out after years.
If I dress the frame pieces before cutting and assembling, I could reduce the drawer clearances.
Drawer bottoms are glued into a rabbet at the bottom of the front, back, and sides instead of cutting a slot near the bottom.
By gluing the bottom in, the whole drawer is stonger, I have stored 40# of bullets in a large drawer with no problem.
Of course when you glue something in, you start with the dryest wood you can find and seal the wood after its glued to prevent cracks later.
The only problem I've ever had with cracks was a cabinet door in a trailer which spent a lot of time in Arizona after I built it in Texas, it should have been sealed better and/or I should have used dryer wood.
Click for larger pic
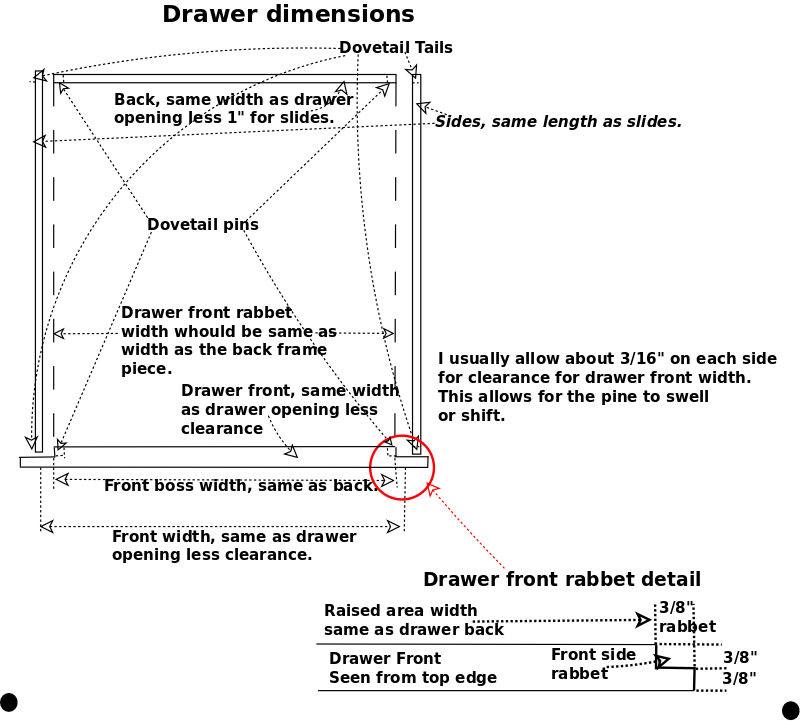
Heres how to dimension a drawer's parts.
I use full extension slides with a rabbet on the drawer front to hide them.
Full extension, ball bearing slides are 1/2" thick on each side making the drawer 1" narrower than the cabinet opening.
The drawer front must have some clearance between it's edge and the sides of the opening, I usually allow about 1/8" if the cabinet is made of pine.
The drawer back should be the exact width of the drawer and the sides are usually the same as the slides.
Since we made the drawer front 1/8" narrower than the opening we must reduce the end rabbet so the boss remaining in the center of the drawer front is the same width as the drawer back.
Slides being 1/2" on each side are concealed by the rabbet on each side of the drawer front, so you normally think the rabbet should be 1/2" but that doesn't account for the front's clearance.
If you allowed 1/8" clearance (1/16" on each side) of the front, you must reduce the rabbets to 7/16" on each side to make the boss' width match the drawer back.
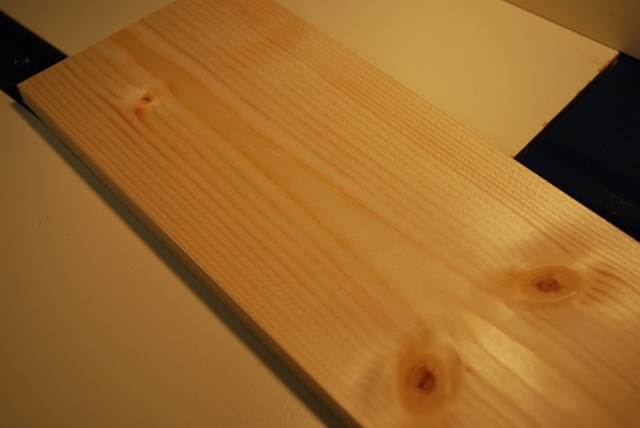
Ripping

|
Ripping: I make a lot of 5" tall drawers so I have to rip a narrow piece off of a 1x6.
You can see the edge of the blade just sawing the line.
This is different from resawing two equal pieces where I resaw down the center of the line.
|
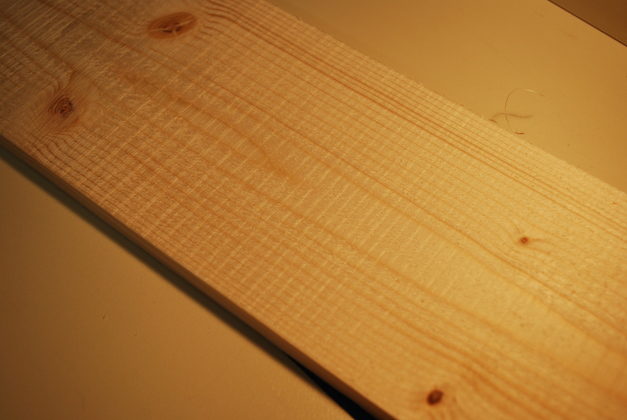
Resawing
Resawing is sawing a board edge-wise to get a thinner board.
|
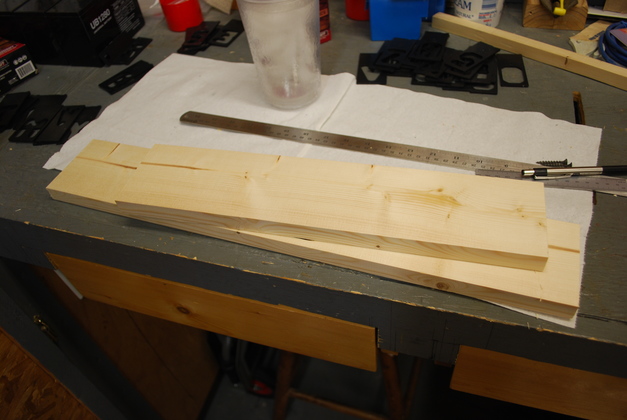
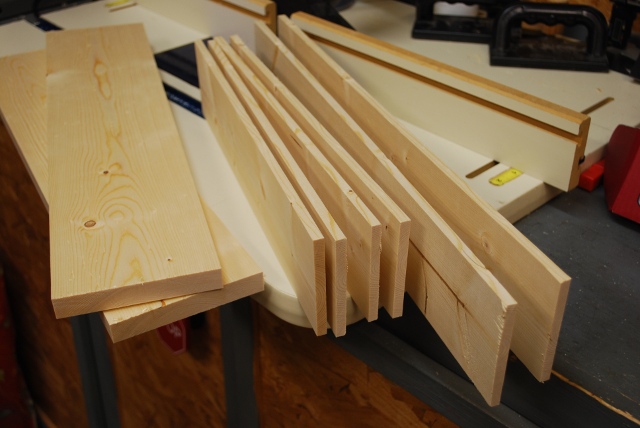
Boards cut to length for drawer back, and sides.
A drawer front is 3/8" narrower than the opening and the back must be 1" shorter than the opening width.
The front will be full 1x thickness (or 3/4").
The sides and backs will need to be resawn (sawn exactly in half down the long way) from a 1x (3/4" thick) so they end up about 5/16" thick after a pass across the jointer to clean up the bandsaw marks.
|
|
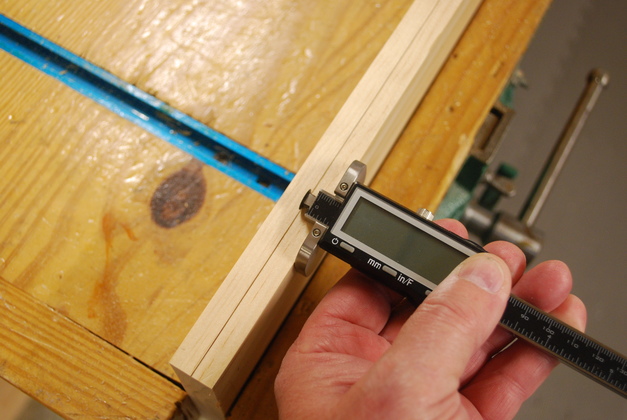
The drawer sides and back will be resawn from 3/4" boards, ending up about 5/16" thick.
By resawing exactly in the middle I can use both pieces of this board as drawer frame parts.
Here I'm using a marking wheel to mark the center of a side or back then resaw the board in half, edgewise.
Since 1/2 of 3/4" is 3/8", I set the marking wheel to 3/8", try it from both sides so I know its in the center (not all 1" boards are exactly 3/4").
|
|
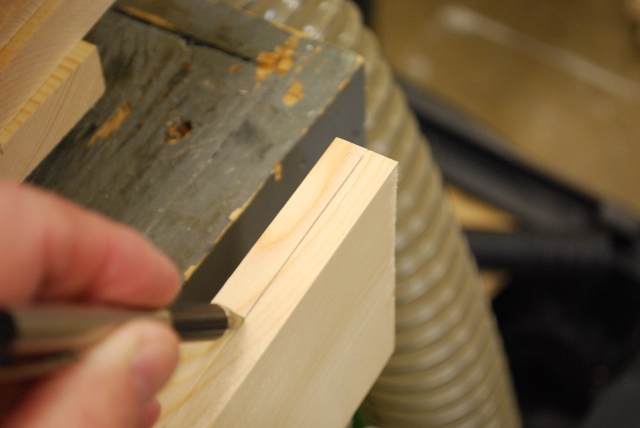
Since the marking wheel's cut is very narrow, I remark with a .5mm pencil to see it better when I saw.
|
|
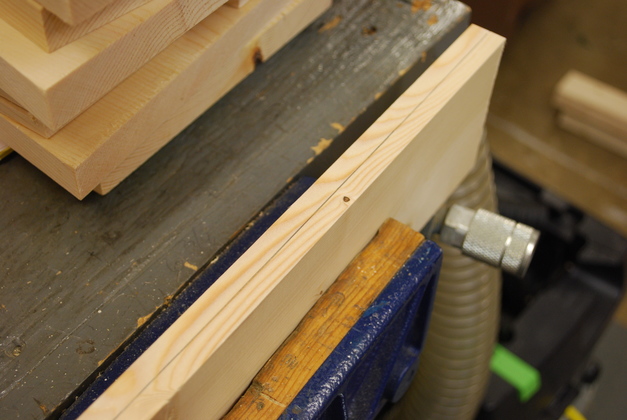
Here is a board, marked and ready to resaw.
|

|
Running the resawed boards through my thickness planer, guarantees the thickness is consistent across all pieces, and removes the bandsaw marks.
|
|
Voilla, no more bandsaw blade marks, it leaves the drawer side or back about 5/16" thick which is fine for everything I've done so far.
Of course you could make the sides/back as thick as you want but you would waste the remainder of the original board.
|
Bottom Rabbets
|
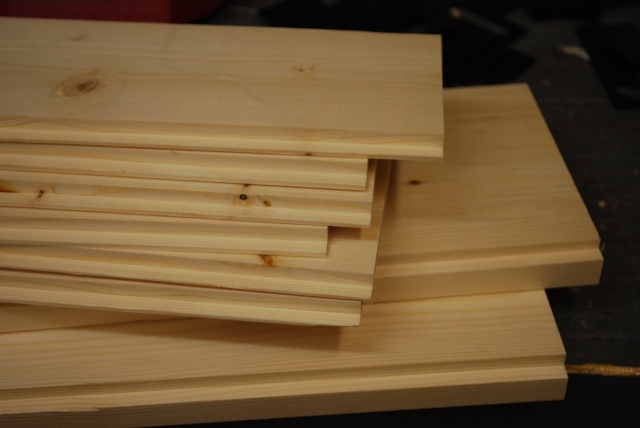
Here are the fronts, sides, and, backs cut to length and resawed to the proper thickness, on my router table ready to rabbet.
Fronts, backs, and sides all have a rabbet at the inside bottom edge for gluing the drawer bottom into.
Additionally, the bottom rabbets help orient the panels when dovetailing.
The fronts have rabbets on each end to hide the slides.
The drawer front is longer than the drawer back by the sum total width of these two end rabbets.
|
|
I usually use thin plywood as the drawer bottom, 3/16" or 5mm thick.
The drawer bottoms are glued into a 1/4" wide by 3/16" high rabbet.
You cut the bottom rabbet on the inside of the drawer, then use this rabbet as a handy reference edge in the dovetail jig.
I ran these across the router table set to cut a 1/4" wide by 3/16" high rabbet for the drawer bottom to be glued into.
Here you may notice the two drawer fronts (on the bottom) have not had the end rabbets cut yet.
|
|
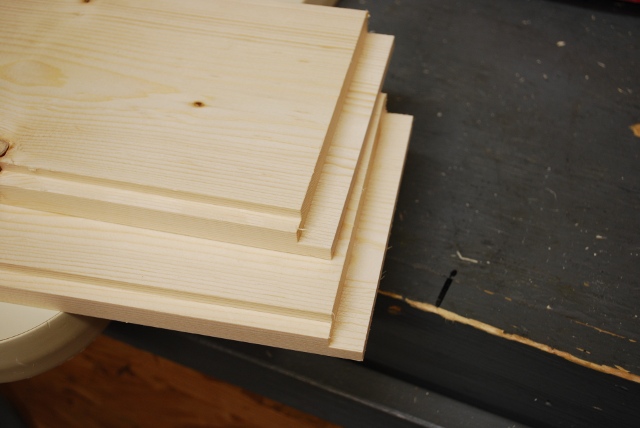
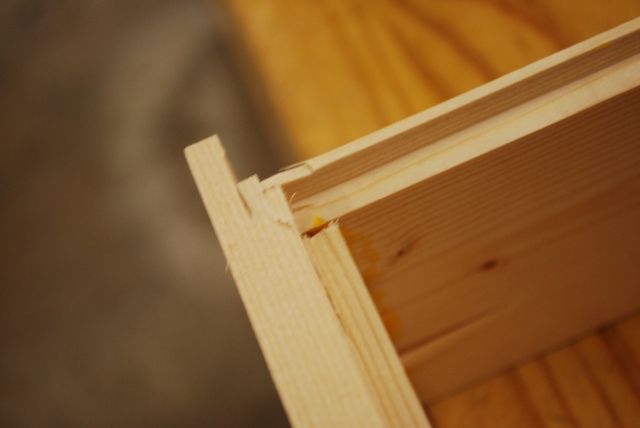
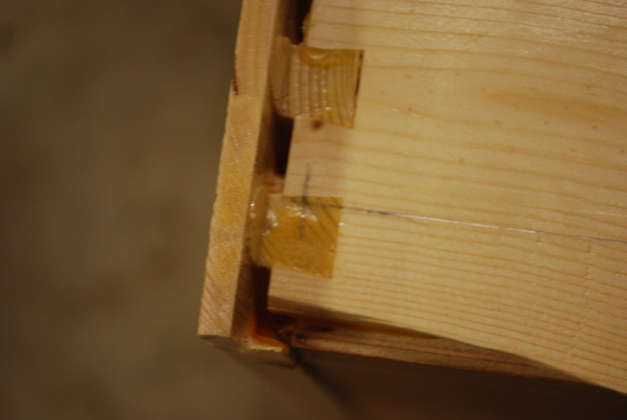
These are the two drawer fronts after I cut a 7/16" wide by 1/2" high rabbet across the end to conceal the slides.
The drawer front must be 2 x 7/16" (2 x 7/16" = 7/8") wider than the drawer back.
The remaining part of the front (sticking up in pic), I call the boss, should be the exact width of the drawer back.
You can also see the bottom rabbets.
|

|
A complete drawer set, front, 2 sides, and one back (in foreground), ready to dovetail.
|
Dovetailing
|
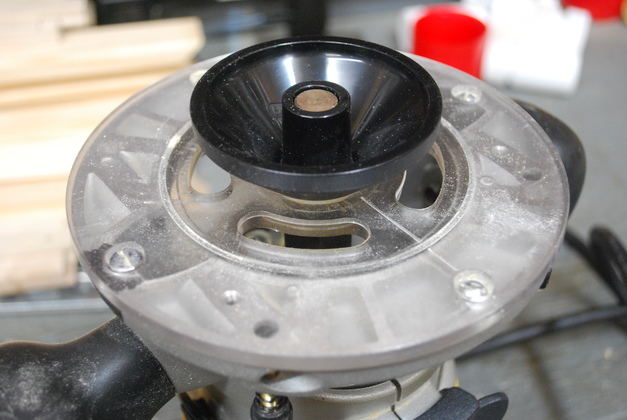
Aligning the bushing base plate on the router using the cone tool.
-
Loosen the screws holding the bushing plate to the router, so the plate moves freely.
-
Clamp the cone's 1/2" rod in the router's collet.
-
Push the cone down so the bushing plate is centered.
-
Tighten the bushing plate holding screws.
They also make double ended plastic tools to do this that let you use a 1/2" or 1/4" collet.
|
|
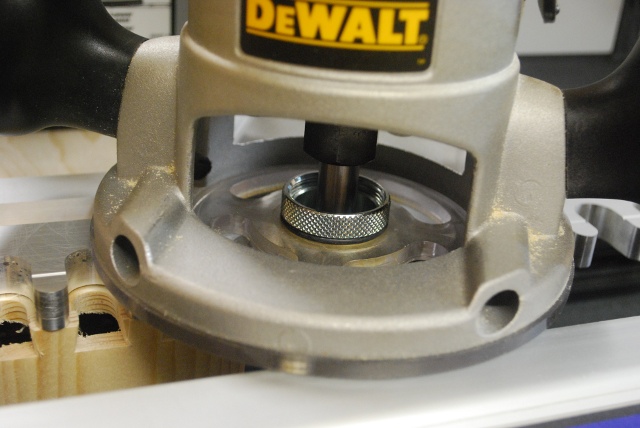
The bushing installed.
|
|
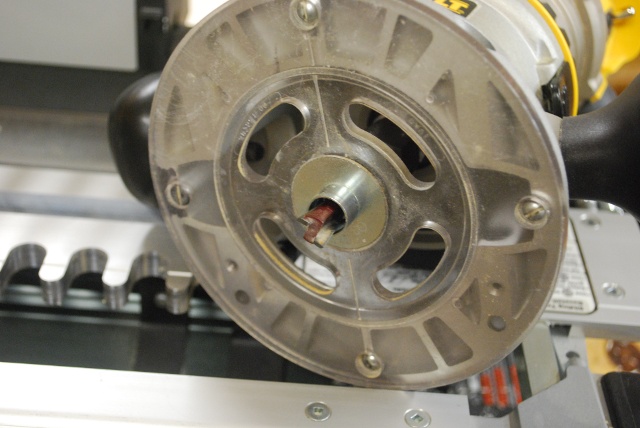
Heres the dovetail bit sticking out of the bushing, ready to route.
|
|
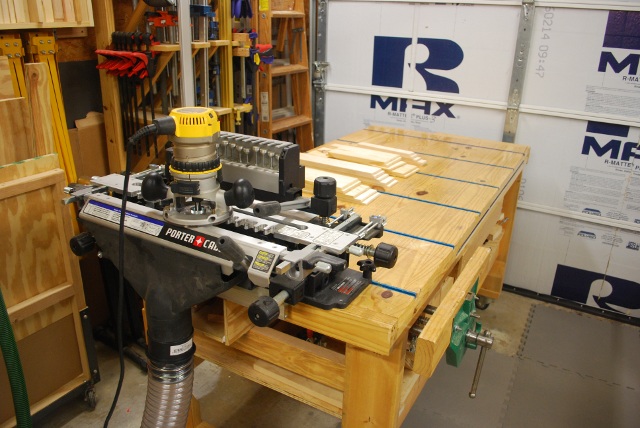
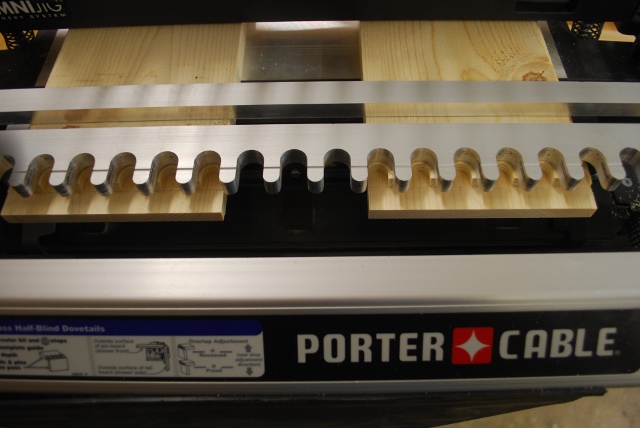
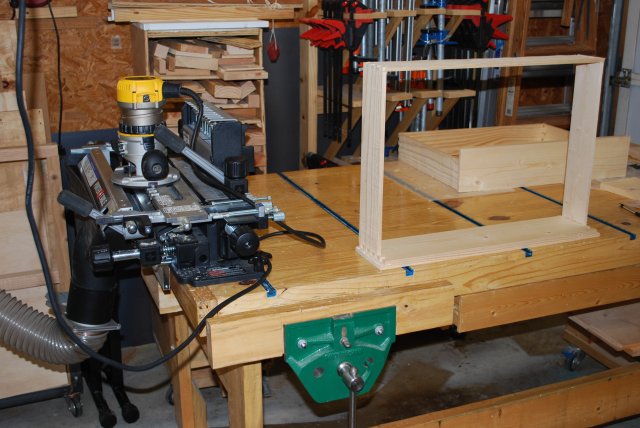
The dovetail jig on my WoodWorking Bench.
I lay the drawer parts out on the bench then run them through the dovetail jig.
The adjoining parts are run through in sequence.
I also use the 4" dust hood.
|
|
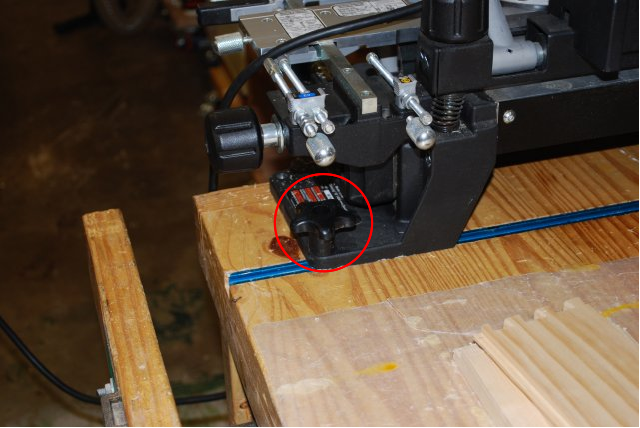
Porter Cable 16" Omnijig dovetail jig is held down by tee bolts in a tee track, red circle .
I already had a tee track 6" from each end of the woodworking bench, the Omnijig fits perfectly.
|
|
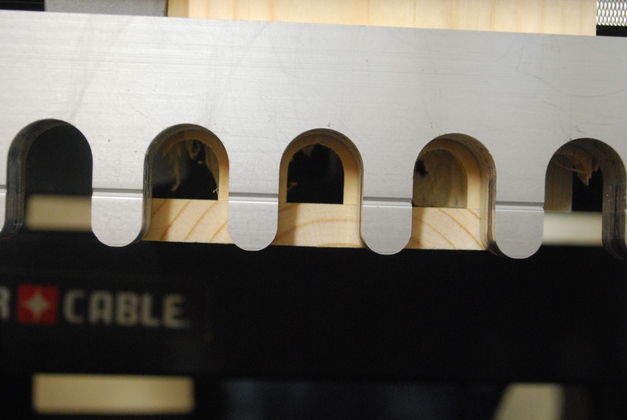
It is very important to keep track of the orientation of each board during this operation, thats one reason I cut the 1/4" X 3/16" bottom rabbet before dovetailing.
The bottom rabbet is the reference side for each dovetail, and always goes against the side stop during the cut.
Make sure the drawer's front and back go on top of the jig and the drawer's sides on the jig's front.
Here, note the drawer's side is vertical, up against the underside of the template and the drawer's back is laying flat on top of the jig and up against the drawer's side.
Also notice the bottom rabbets are against the jig's left stops.
When you have every thing aligned you are looking at the inside surfaces of the drawer back and side.
Since the fronts are 3/4" thick and the backs are 5/16" you have to adjust the jig's top hold-down.
I cut fronts at the same time, then adjust the jig's top clamps down for the drawer backs (5/16").
In the pic (left side of jig), a drawer back (top of jig) and a drawer side (front of jig), notice both rabbets against the jig's left stop.
|
|
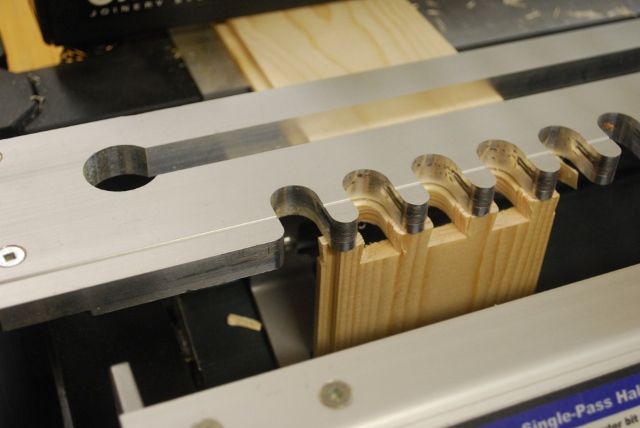
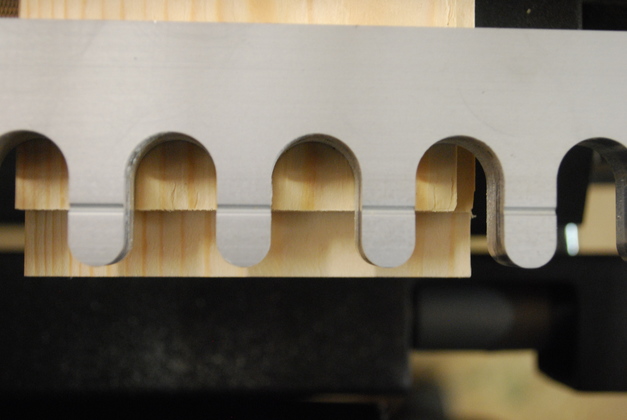
When cutting the other end of each piece, move to the right side of the jig and align the rabbets to the jig's right stop.
Again the drawer back is on top and the side is on the front of the jig.
Note the side (in front) butts up against the bottom of the jig's template, and the back (on top) butts up against the side piece.
|
|
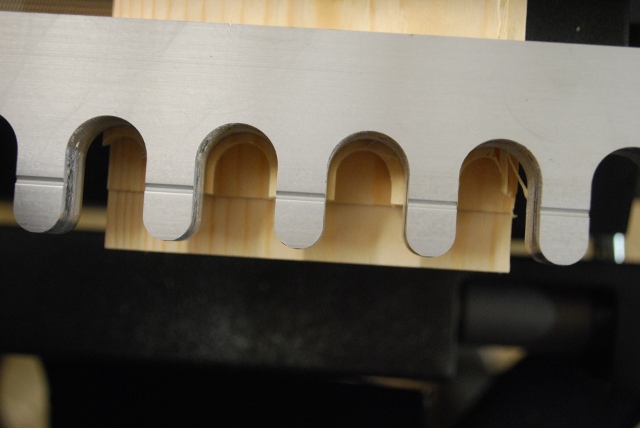
Pic showing how the pieces align with the template.
The drawer side should butt up against the bottom of the template and the drawer back should butt up against the side, the place where they butt should align with the marks on the template.
|
|
Another shot showing the alignment, the template marks should align with the front of the jig.
Here I'm cutting the second drawer side, butted against the drawer back which was dovetailed when I cut the first side.
Butting the drawer sides to the drawer backs prevents tear out.
|
|
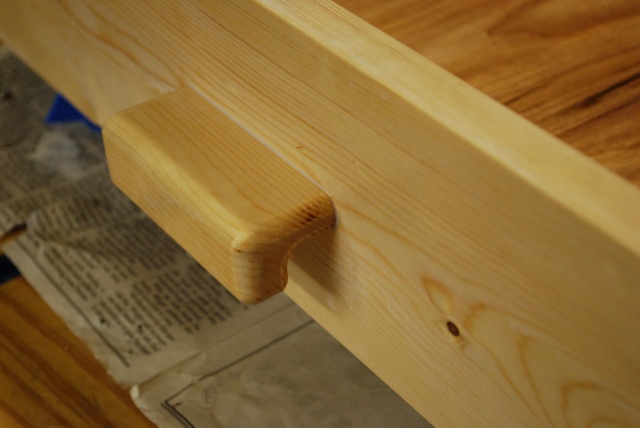
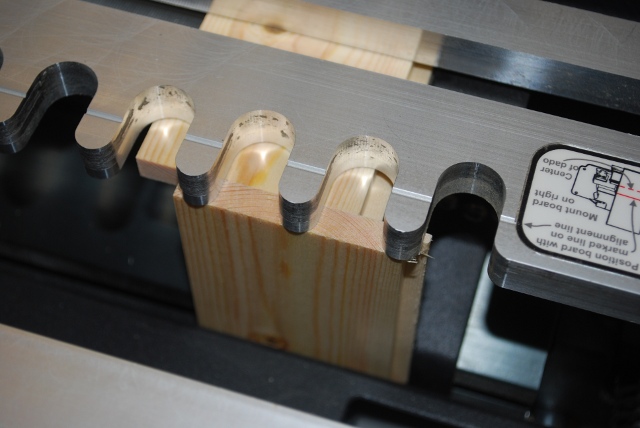
This is a drawer front, the end of the boss should align with the marks on the template and the side of the front should be against the jig's side guides.
The drawer front's boss is the part that sticks up after cutting the side rabbet.
Link to Drawer Boss example.
|
|
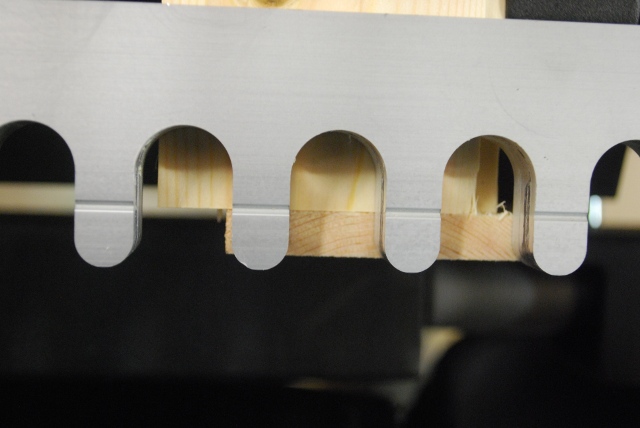
Front after pins are cut.
|
|
I can cut two pieces with one setting when cutting the back and sides, the fronts must be cut by themselves because of the rabbet and the font's thickness.
Here are two drawer fronts after I cut their pins.
|
Trial Fits
|
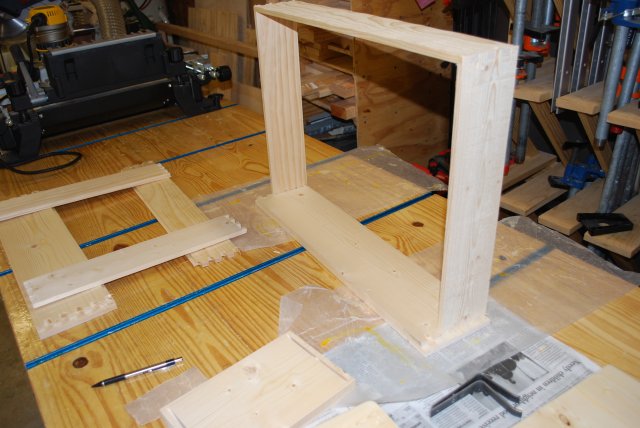
Trial fit of the drawer parts.
Note one of my drawers in the front of the work bench, it holds tee track parts, clamps, blocks, etc.
It must close flush so I can clamp large items to the front of the bench, so it has no handle just a lip under the bottom edge.
|
|
A little closer look at the fit.
Note another drawer laid out (already dovetailed) on the left.
|
|
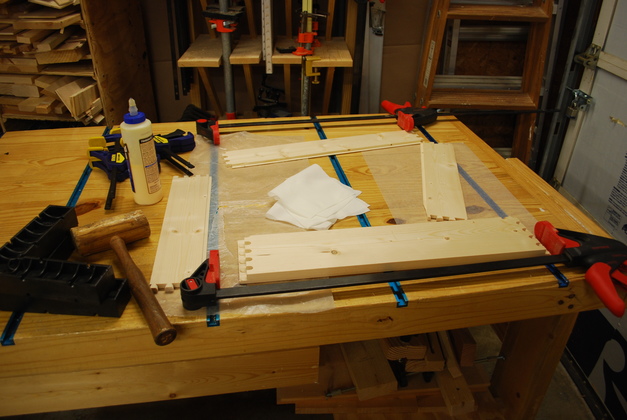
Ready to glue, all parts laid out, clamps, squares, glue, and wipers.
Also note the waxed paper on the bench to keep glue off the workbench.
I use waxed paper every time I glue, after all, don't you think it would be a little embarrasing to glue your project to your work bench.
|
Gluing Drawer Frames
|
|
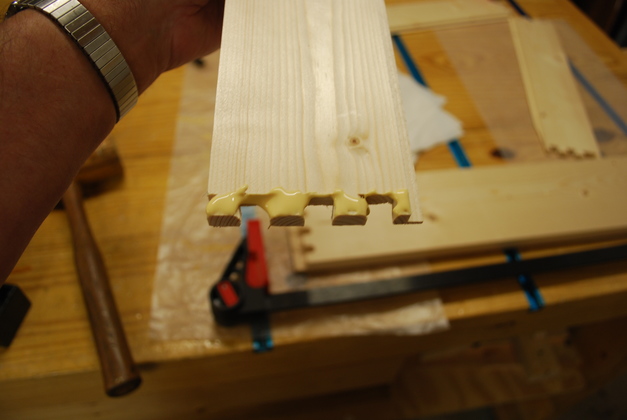
This is a side (Pin Board), and since these are half blind dovetails, this will be inserted into the back or front (Tail Board), so I put the glue on here.
Once again note the bottom rabbet, on the right, I am still using it for reference, the bottom rabbet always goes down during gluing.
|
|
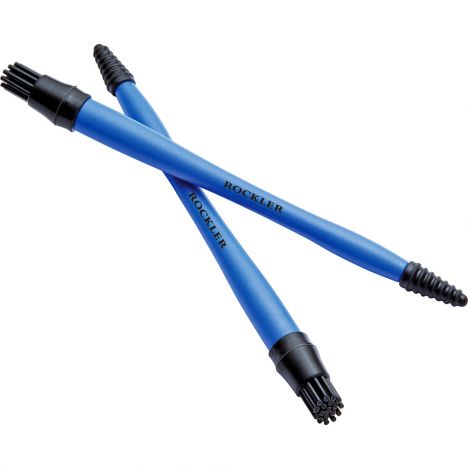
This little round glue brush (Rocklers) is great for spreading glue inside dovetails.
|
|
|
|
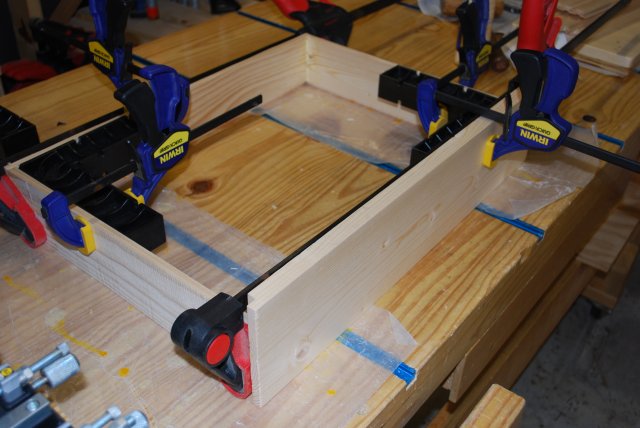
In the glue clamps.
The longer clamps force the dovetails to fully engage while the glue sets.
The "ClampIt"s clamped in a corner make sure the drawer will be square.
Make sure the dovetails fully engage, but stay flush with the other side of the dovetail.
The bottom of the drawer is on the bench the front to our right.
I make sure the bottom is down on the workbench while the glue is setting, helping to keep the whole drawer frame square, this'll be important when you try to put the drawer in a cabinet.
|
|
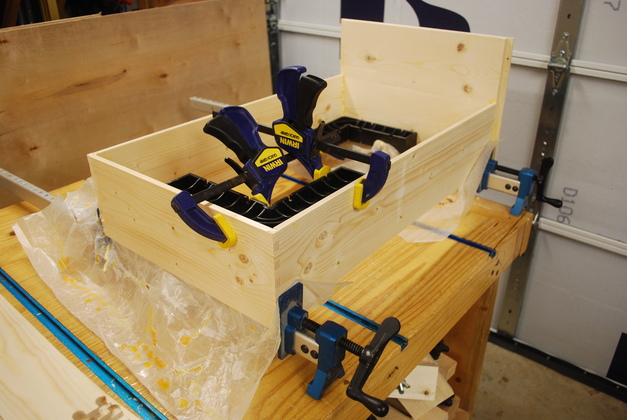
Heres a taller drawer where I'm using Rockler Sure Foot clamps.
I've started using these because they help keep things straighter.
And straight and square is the name of the game in drawer making.
Recently I have begun to not use side clamps, I make the dovetail joints a little snug, tap them until flush then put the ClampIt in a corner and let the glue set.
|
|
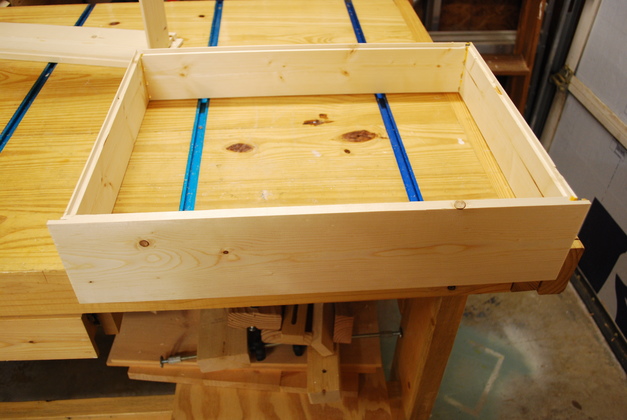
Drawer frame glued.
Shown upside down, you can see the rabbets for the bottom panel.
|
|
A front (Pin) to side (Tail) joint, you can see both the SureFoot and the Clampit here.
|
|
A back to side joint.
|
Gluing in the Bottoms
|
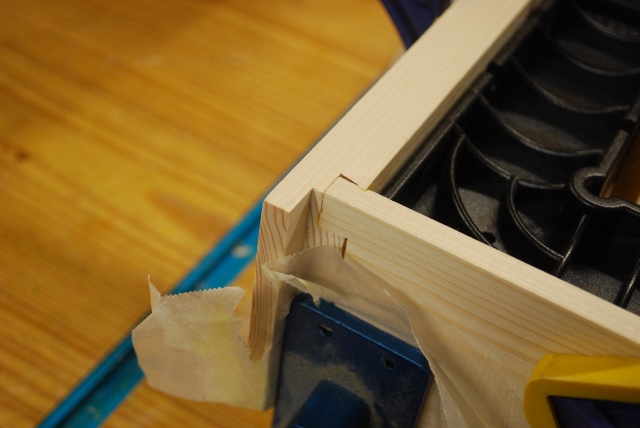
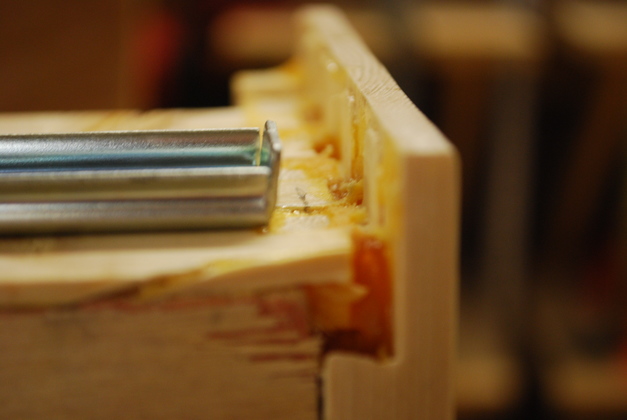
The bottom rabbet.
Sometimes you get a little squeze-out at the corner joints, and the bottom has to lay flat and flush with the frame.
|
|
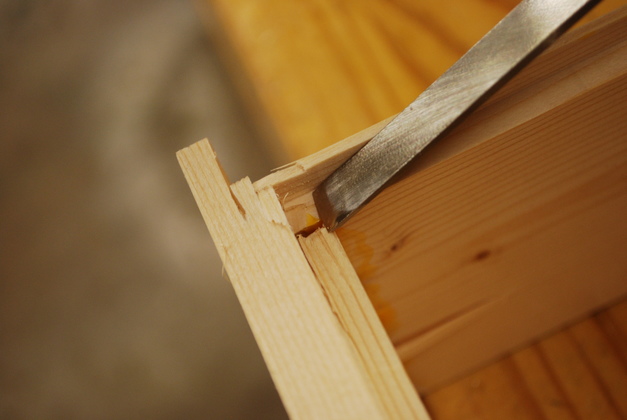
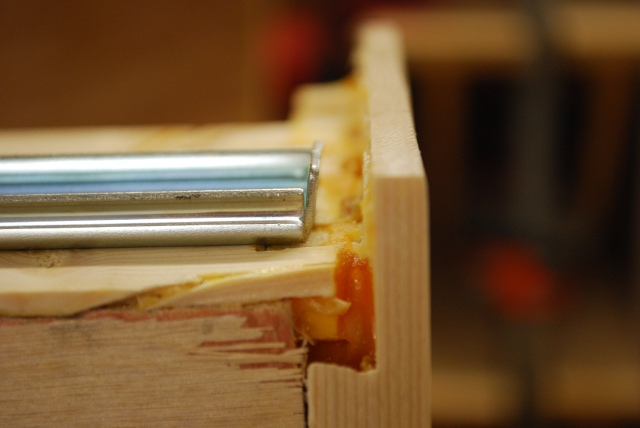
A chisel quickly takes care of this.
|
|
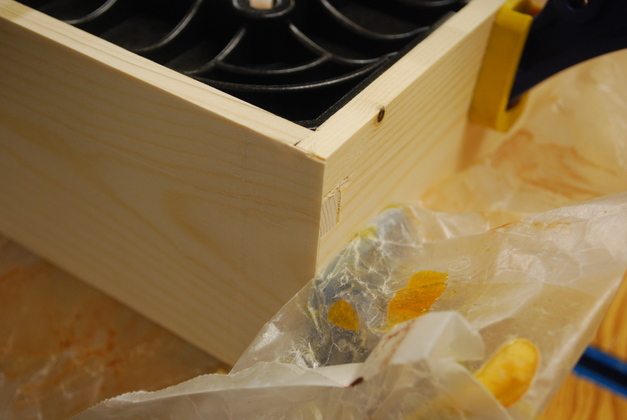
Now its ready to glue the bottom on.
|

|
Ready to glue the bottom on, Note mallet, glue, wipers, hammer, nails, and sharp nose pliers.
You can also see the two bottoms cut out and the other frame sitting on it's front behind the glue bottle.
|

|
Note, Drawer frame upside down, since the front is taller than the sides it hangs over the edge of the bench to the frame is flat.
|

|
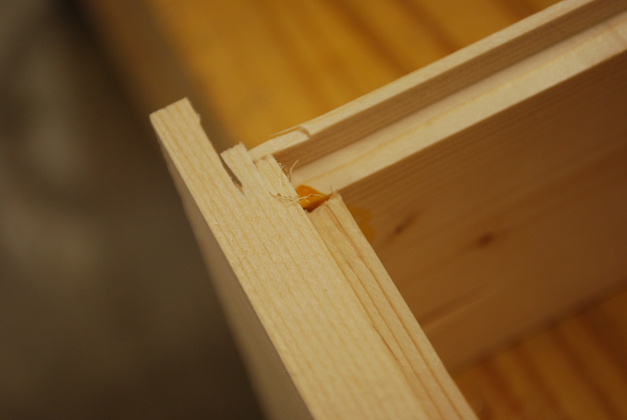
You can see the bead of glue in the back corner of the rabbet.
After the bottom is nailed in, you should see a little squeeze-out on the inside of the drawer that will need to be wiped away.
|

|
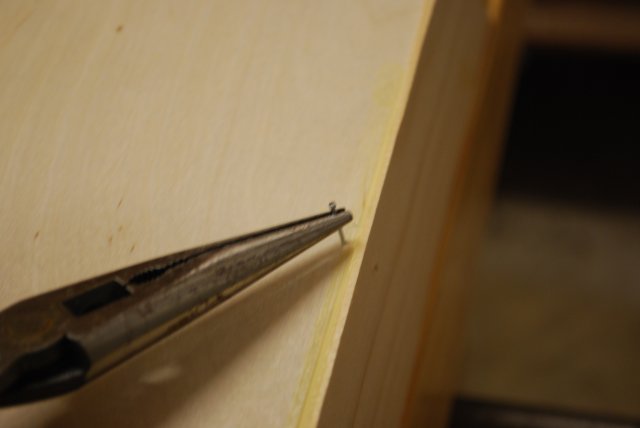
The glue has been applied all the way around the rabbet, and the bottom set in place, now I'm preparing to nail the bottom in to hold it while the glue sets.
The bottom plywood is 3/16" thick hardwood, its tough and has a good smooth surface for the drawer.
I use small wire nails or 'brads' as my grandfather used to call them, to hold the bottoms in while the glue sets up.
I do the same thing with longer wire nails to hold the 1/2" frame panels in while the glue sets.
Its a lot easier than trying to clamp the bottom.
|
|
Nailing the bottom on for gluing.
|

|
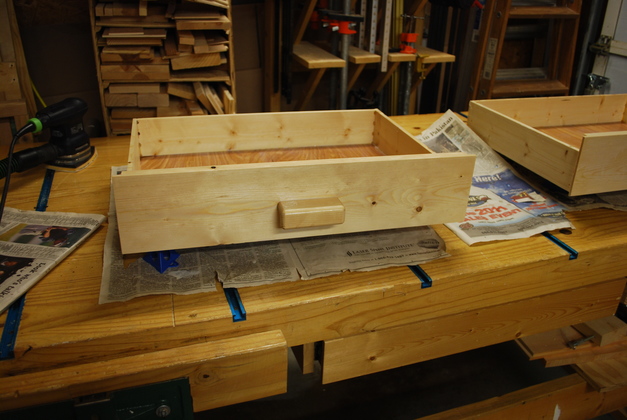
Bottom is glued and nailed.
After this dries I'll sand the excess glue off the corners and fine sand the entire frame for paint.
|
|
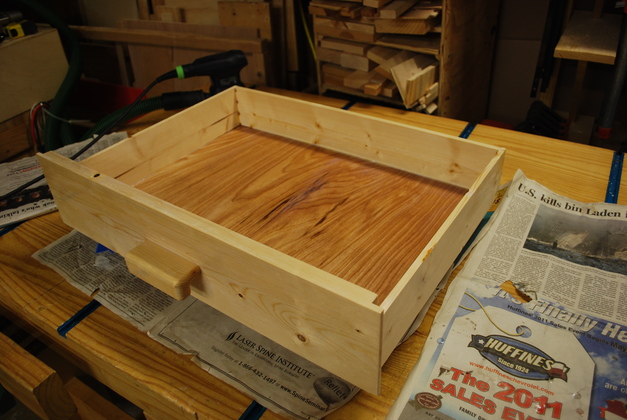
Drawer, with first coat of paint.
You can just see the little blue pyramid hootus under the left front of the drawer, I got those at Rockler and they are really nice for keeping the wood being painted up off the paper so it doesn't stick.
|
|
I used what Home Depot calls Luan plywood for the bottom, and the clear polyeurethane really brings out it's grain.
|

|
Here are the slides, with the center, or drawer section removed.
|
Mounting Drawers

|
In the cabinet I marked a horizontal line for the slide's centerline, with a vertical mark 1/2" from the front lip of the drawer.
The vertical mark is to align the front edge of the slide.
These drawers are 5" high and I place the slide 1" from the drawer bottom, so the horizontal line is 4-1/8" from the inside top of the storage bay.
This allows 1/8" clearance above the drawer.
In a pine cabinet, I have to leave a little extra clearance for top and bottom drawer edges.
BTW, the second horizontal line would be 9-1/4" (5" for the drawer plus another 1/8" for space) from the under side of the top.
I only consider center lines when setting up slides, as long as the slide is less than 2" wide, I can put the slide 1" from the bottom of the drawer.
|

|
The top horizontal line, 4-1/8" front the underside of the top.
The key to putting drawers in a cabinet like this (or any cabinet) is to get the cabinet (frame) as square as possible.
Thats what makes the drawers slide easily (no binding at front or rear).
Also note the cabinet side panels are glued into a rabbet so this inside is flush for the cabinet slides.
|

|
The second horizontal line is 9-1/4" from the top of the cabinet.
This allows 5-1/8" for the top and bottom drawer with the slide 1" from the bottom of each drawer.
|
|
The slide center line 1" from the bottom of the drawer, and a mark 1/2" from the front face of the drawer will be the front of the slide.
The cabinet slide and drawer slide must be the same distance from the front of the drawer frame in order for the drawer to close flush.
I already marked the front of the cabinet slide at 1/2" from the front edge of the drawer hole.
The protruding edge of the front is 1/4" thick so I want the end of the drawer slide to be 1/4" from the back of the protruding edge.
|
|
Here you can see the slide laying on the horizontal line, and approaching the front mark.
|
|
Now the slide is aligned and ready to mark for drilling pilot holes.
I like to use pilot holes to ensure the screws are exactly where the alingnment marks are, then the oblong holes give me better adjustments.
I always use the oblong holes nearest the back, front, and middle so I can adjust the drawer's flush closing.
If I were building furniture instead of work benches, I would use closer tolerances, and spend a little more time fitting the drawers to the cabinet.
|
|
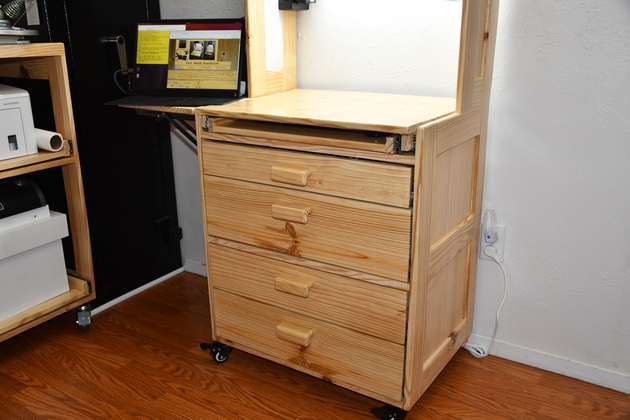
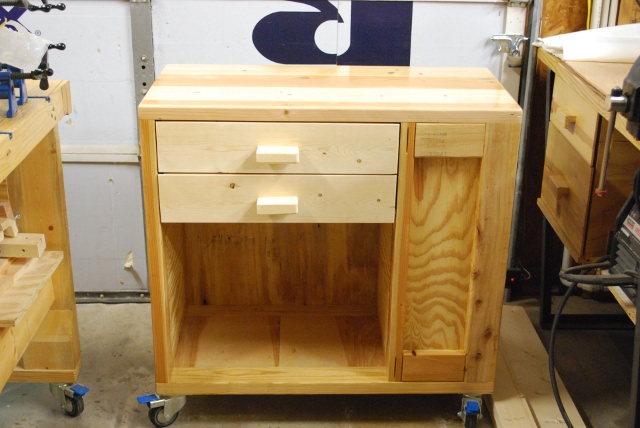
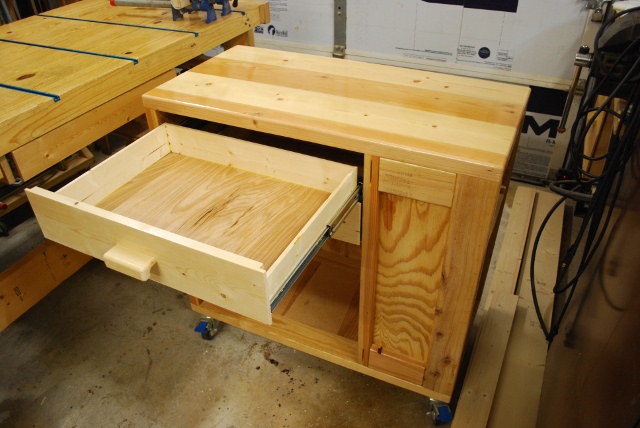
The drawers installed in a loading bench.
You can see fairly symmetrical gaps on all sides of the drawers, top, sides, and bottom.
|
|
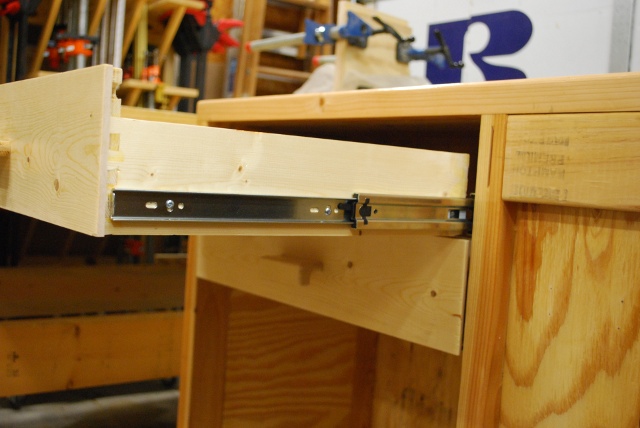
Top drawer open showing extension of "full extension slide".
This particular kind of cabinet can be a little trickey to keep perfectly square, sometime because of the center vertical is part of the entire right end.
|
|
You can see the slide mounting screw in the vertical oblong hole at the front to allow the drawer to be adjusted up and down a little.
If you get in a bind when fitting the drawer to it's cabinet, move the screws to other holes.
|