06/23/12: Add pics at top, clean up text.
12/06/11: Origin.
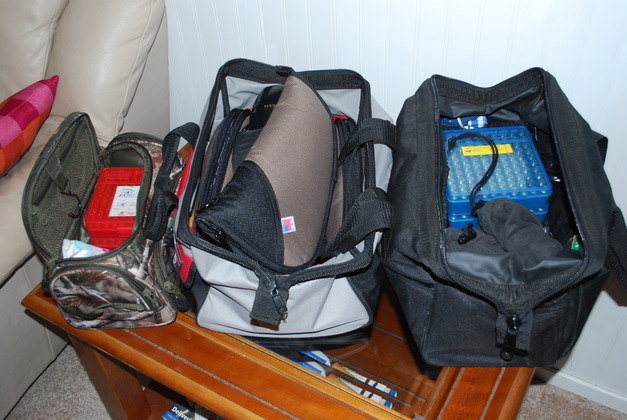
When we go to the range to shoot we carry all our stuff (firearms, ammutition, earmuffs and eye protection, magazines, stapler, etc.) in two or three range bags (see pic below).
The ammo alone is very heavy (250 rounds of .45, 250 rounds of .40), the earmuffs and pistol rugs are very bulky.
When we take a beginner along we need a third bag for the extra ammo, firearm, magazines, earmuffs, etc.
This is heavy, bundlesom, and unhandy.
We felt we needed a range box with wheels but couldn't find what we wanted, a recurring theme was handles too short or wheels too small.
So I decided to build an experimental range box and see what that would be like to build and use.
I measured some of the items we commonly carry in the range bags to get some idea of size for the range box, ammo boxes, firearms (in gunrugs), ear muffs, etc.
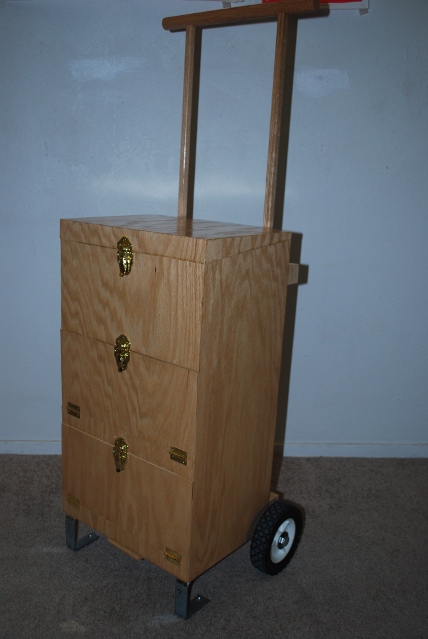
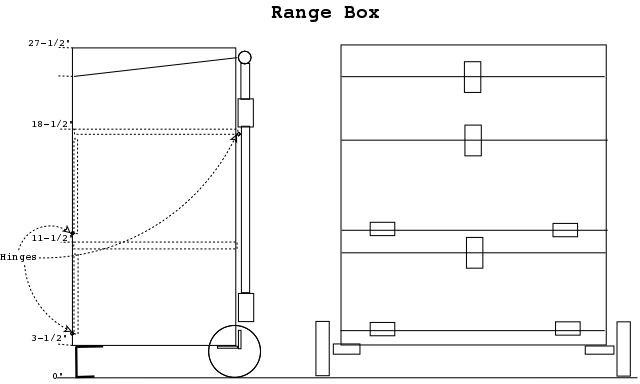
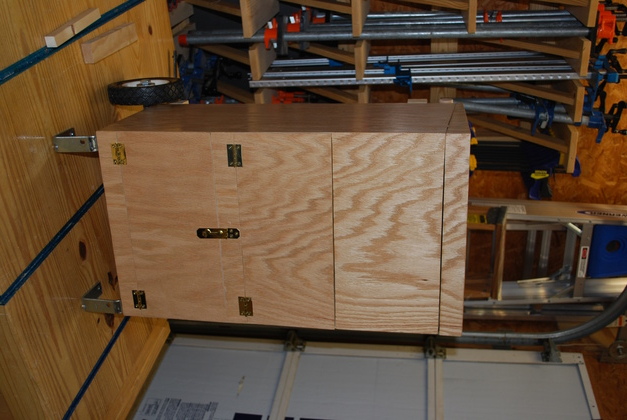
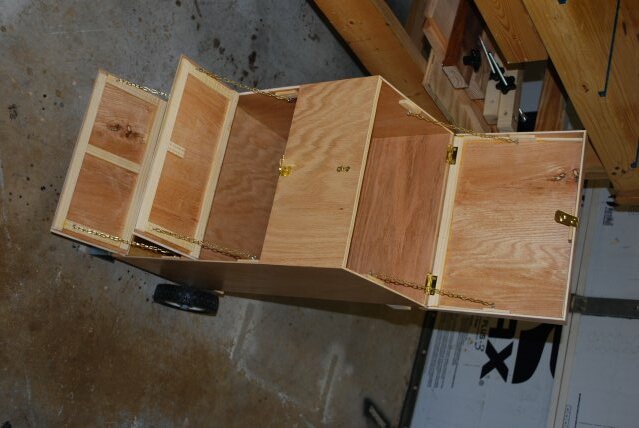
I decided, for the experiment, three compartments, 10" front to back by 14" wide, by 8" high, one at the top under a lid, the other two with doors in the front.
The final box itself is 24" high, 14" wide, and 10" deep
It sits about 3 1/2" off the ground making the top 27 1/2" high.
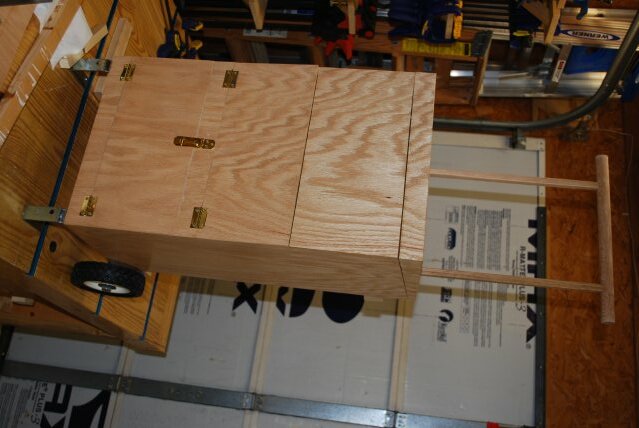
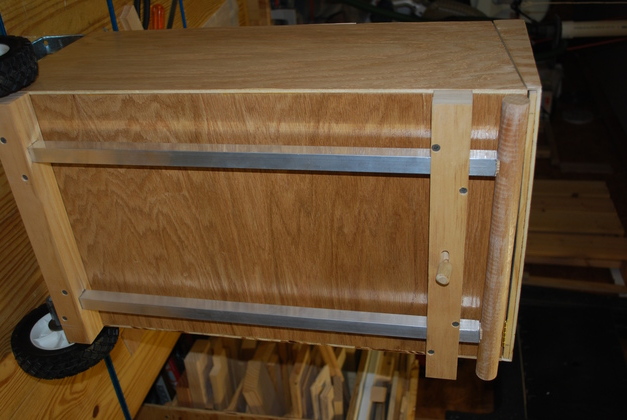
The handle may be extended up to 16" above the box.
I wanted a telescoping handle on the rear that could be 'locked' into position while moving the box, then locked down, out of the way, while using the box.
I couldn't find aluminum tubes (square or round) that could telescope without being very sloppy, so I decided to try a square tube with a 'squared' oak dowell as the center sliding part.
This is gonna be interesting!
I looked around and found some oak verniered 3/16" plywood I had been using for drawer bottoms.
I cut a piece of 3/4" plywood for the bottom, then a piece of 1/2" oak verniered plywood for the back, and 14" of 1"x1" angle iron for the axle.
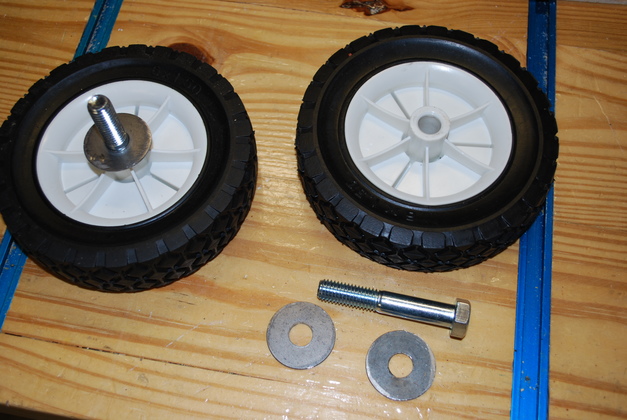
I bought two 6" lawnmower wheels from Home Depot with 1/2" axle holes, two 3 1/2" long 1/2" lag bolts with washers from Lowes, and two 1/2" threadded rod couplers.
I welded the couplers to the axle then marked, drilled, and counter sunk the holes for mounting to the 3/4" bottom and 1/2" back.
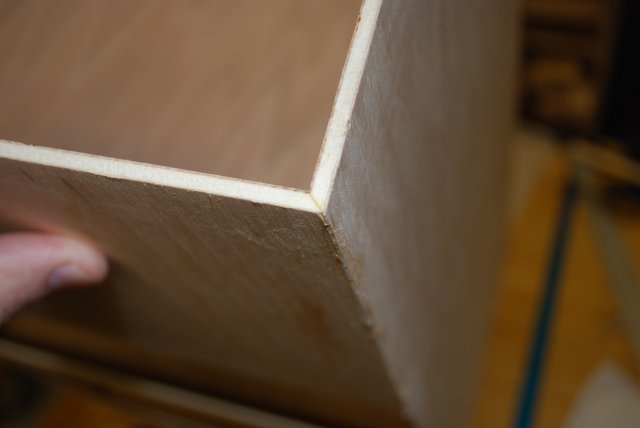
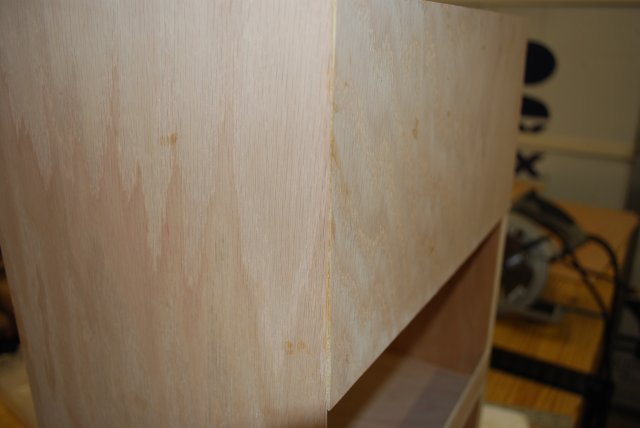
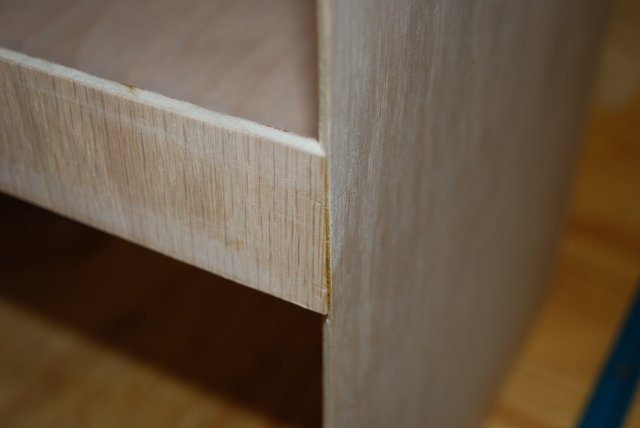
I don't like the looks of the plywood edge when you overlap at a corner so I decided to try a mitered corner.
Even the sides of the front doors will be mitered.
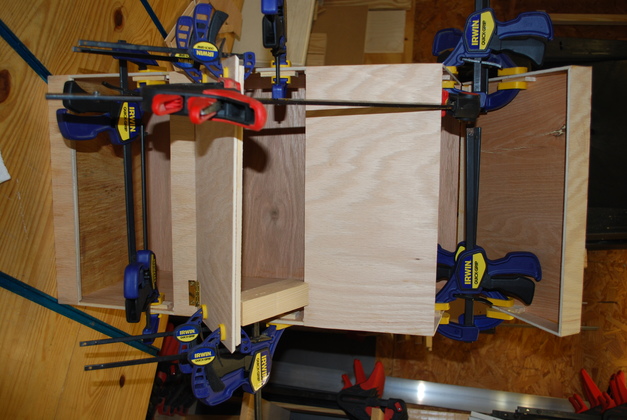
I tried picture frame strap clamps while glue sets, but it didn't work well at all, I still need to come up with a better way.
Later, I discovered Rockler has some cauls for finger joint boxes which will work well for this kind of gluing.
I used a 45° bevel bit in my router to cut the miters.
I initially chose some pretty little brass hinges and brass hasps for the hardware, the hinges worked ok but I had to replace the hasps with draw-latches.
I also initially put the handle latch pin and knob on the back of the clamp block but I'm thinking about moving it to the top of the clamp block.
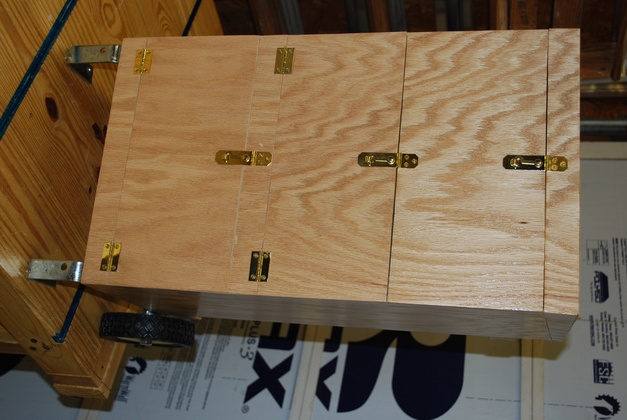
After using this box for most of a year, I am well pleased, its plenty strong, the wheels are large enough to negotiate any ruts at the range, and the volume of the compartments works well.
Of course there have been lots of comments and questions from other folks at the range.
|
Three range bags, ready to go to the range, heavy, bundlesome, and very full.
I want to consolidate these into one roll around range box, now if I can just lift it into and out of the trunk.
|

|
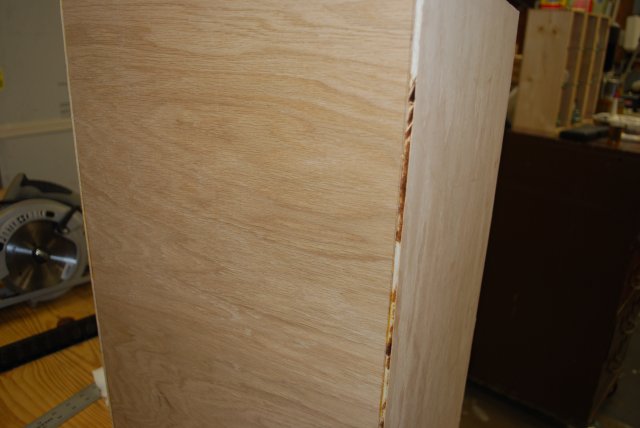
Front of the box without doors, axle, wheels, etc.
You can see into the two front compartments, the top compartment's opening is visible.
Note the top is cut at an angle.
|
|
Mitered corner.
I haven't glued in the corner glue blocks yet to strengthen the corners.
I need a better way to clamp these while the glue sets.
|
|
Another look at one of the mitered corners.
You can't see the edge of the plywood, just as I hoped.
|
|
Mitered corner of the lip seperating the two front doors.
You can see the miter on the edge of the door opening, if you look close at the next pic, you can see the mitered edge of the door.
|
|
The box with top door and lid attached, but not adjusted.
If you look close you can see the mitered edge of the door.
|
|
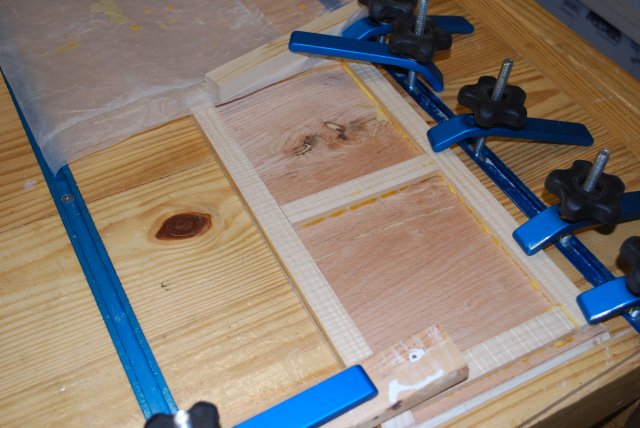
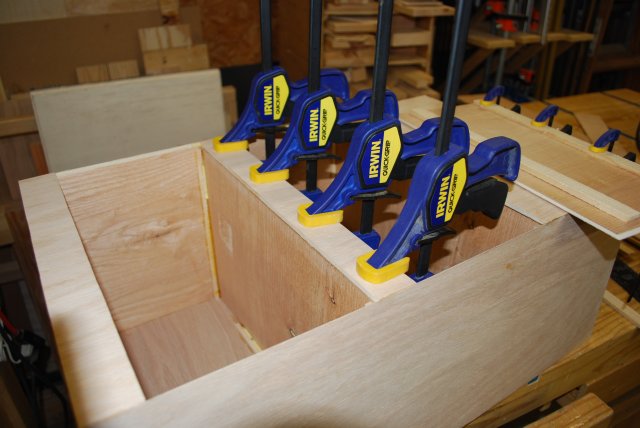
Bottom door clamped.
Since this is an experiment, I used two pieces of plywood and butted them together to make the lower door, you can see the backing piece in the center of the door.
|
|
Back of the box.
I didn't worry about the overlap here, but you can really see what I mean about ugly.
|
|
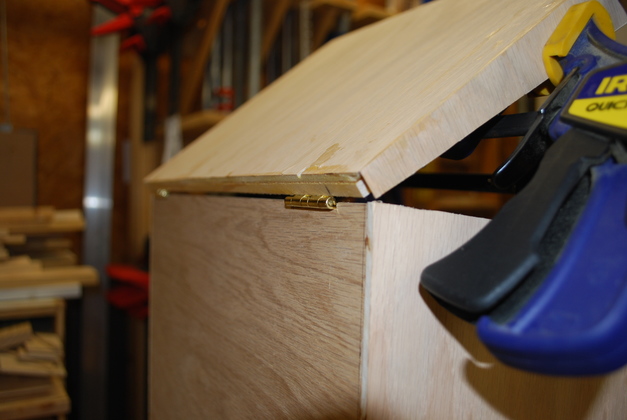
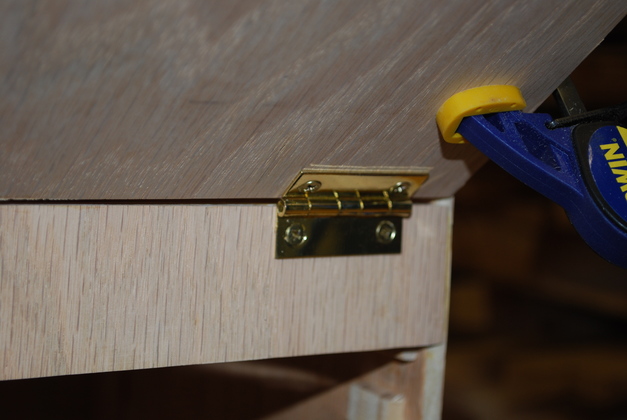
The lid hinges, I used the same hinges on all the doors but the front door hinges are not hidden.
|
|
Lip support clamped.
The inside backing block being glued, this will supoort the latch from the door below and the hinges for the door above.
|
|
Door hinge, up close.
|
|
The axle angle iron with 1/2" threadded rod couplers welded (I know the welds look like a drunk dirt dobber did it, but it'll look better after I grind it).
|

|
Axle drilled and counter sunk but not cleaned and painted yet.
|

|
With the range box laying on it's back, the axle aligned for a test fit, with it's proper position on the bottom rear of the box.
|
|
Axle end coupler, the blurry thing in the center of the bore is the coupler on the other end.
|
|
The wheels and lag bolts, the lag portion just clears the hub.
These are 1/2" lag bolts, the thread 'lags' by not going all the way to the head, it is not a shoulder bolt where the shoulder is usually larger than the thread.
Also not to be confused with 'lag' screws for wood.
There is a 1/2" washer on both sides of each wheel.
|
|
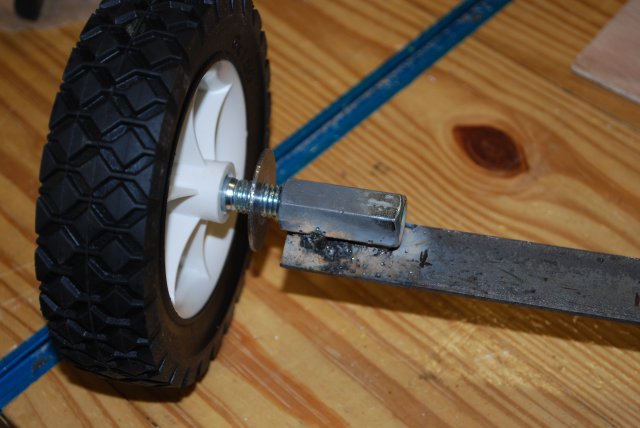
Axle with wheel trial fit, you can just see the lag (non-threadded) part of the bolt emerging fron the hub.
The bolt threadded part (see pic above) is long enough so I can use a jam nut and lock washer if it won't stay tight.
I did clean up the axle welds and spray it with Krylon after these were made.
|

|
Back of the doors and lid being painted with polyurethane.
The doors are made of 3/16" oak plywood, you can see the 1/4" X 3/4" pine reinforcing strips around the edges (and in the center of the lower door which was made from 2 different pieces of 3/16" plywood).
|
|
Back of the main box being painted with polyurethane.
|
|
Box with doors still needs two hasps.
I later replaced all three hasps with draw-latches.
|
|
Box with handle extended.
Note the lid is cut at an angle, the back is thin so it doesn't interfear with the handle and thick in front to give it more strength and room for the latch.
|
|
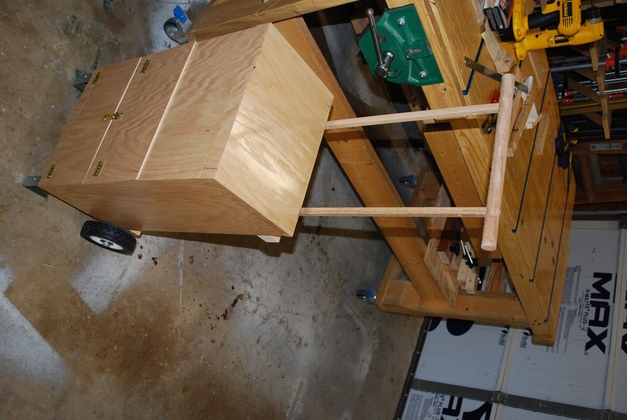
View from above with handle extended.
|
|
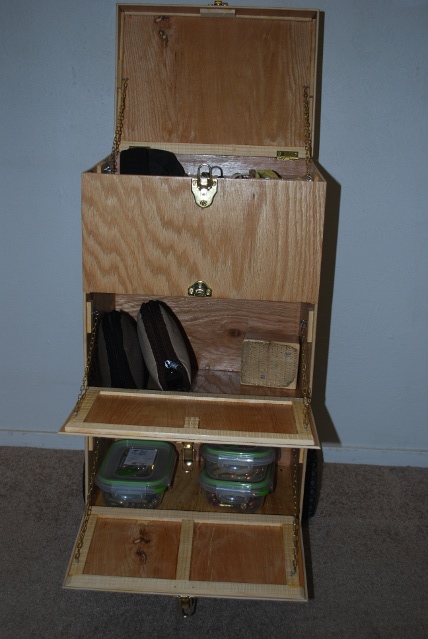
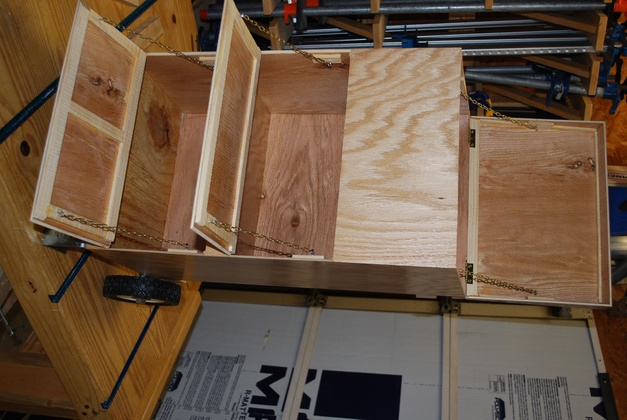
Front view with doors open.
|
|
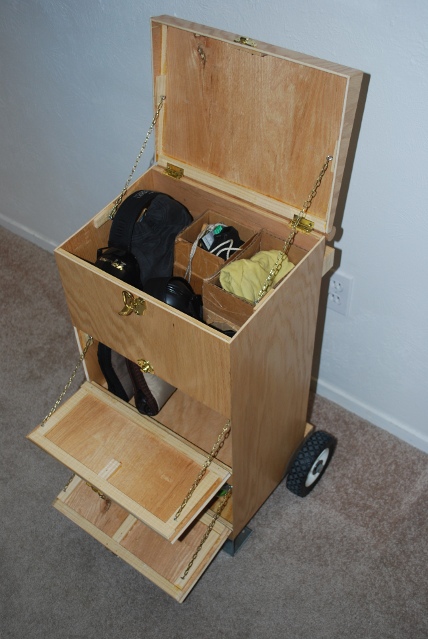
Inside top compartment with all doors open.
|

|
Clearance of handle with lid open.
Note the handle has been sanded for a second coat of poly.
You can see the unlock pin sticking out the back, I will later move it to the top of the lock block so I can lay the box on it's back without the weight resting on this pin.
|
|
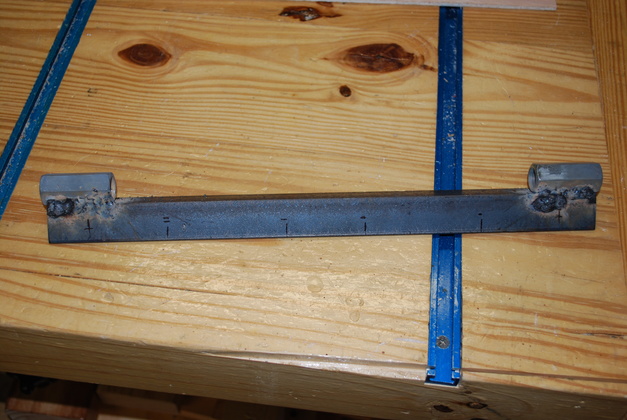
Back of box showing handle tubes and clamp/supports.
The lower wooden block clamps the tubes, the upper wooden block keeps the tubes in allignment and contains the latch mechanism (two metal pins that pass through holes in the tube and handle dowels.
|
|
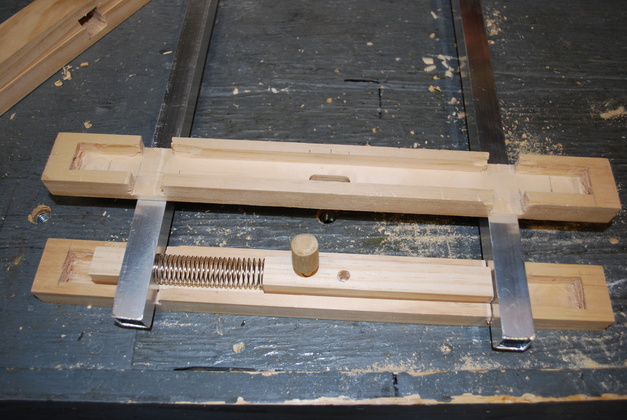
Internal latch mechanism removed (top facing us), opened up.
The latch slider bar (with round knob & spring) has two metal latch pins that protrude through the square tubes and the oak handles inside to lock the handles in position.
The metal latch pins are 6d common nails with the heads cut off and points rounded off.
I grooved the nail's shank (like ring shanks) with a triangular file then glued them into drilled holes.
The spring came from a spring assortment package at Lowes.
The slider bar is shown in it's normal, locked, position, it would move to the left, further compressing the spring, when unlocked.
If I do this again, I'll probably move the latch knob to the top of the latch box (towards us), so it'll protrude through the joint between the latch box halves.
|
|
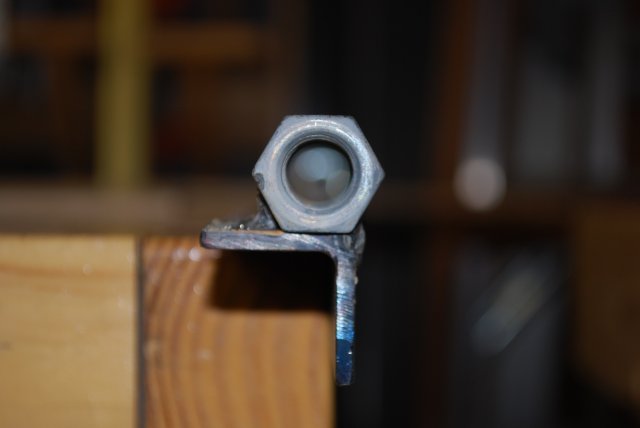
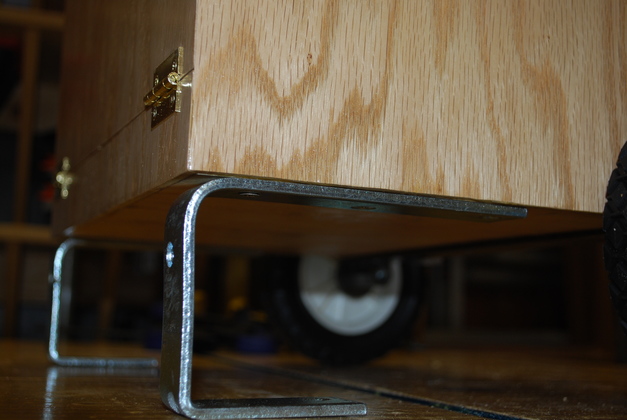
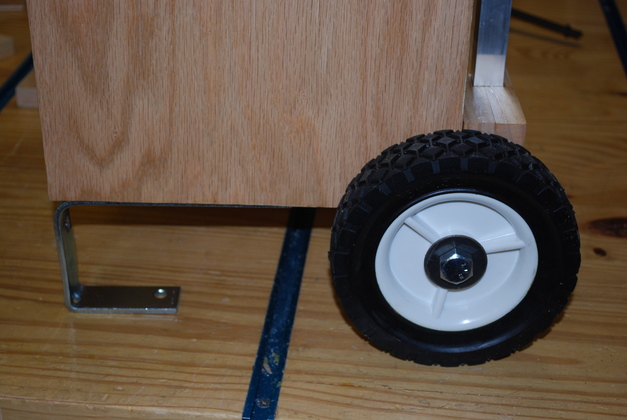
Front feet.
Just Stanley 5" angle supports, bent over at the bottom to make a foot.
|
|
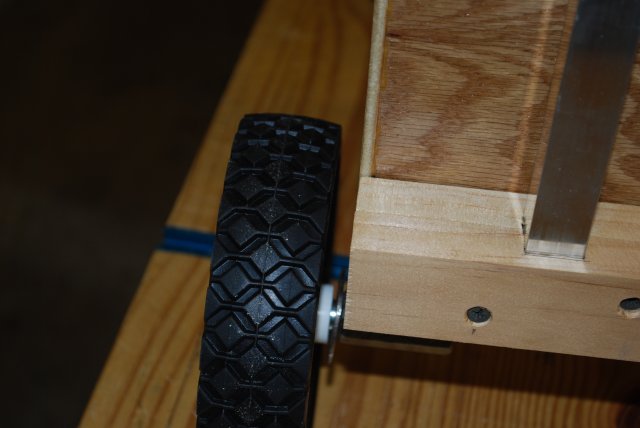
Wheels from the side.
|
|
Wheel clearance with bolt tight.
|
|
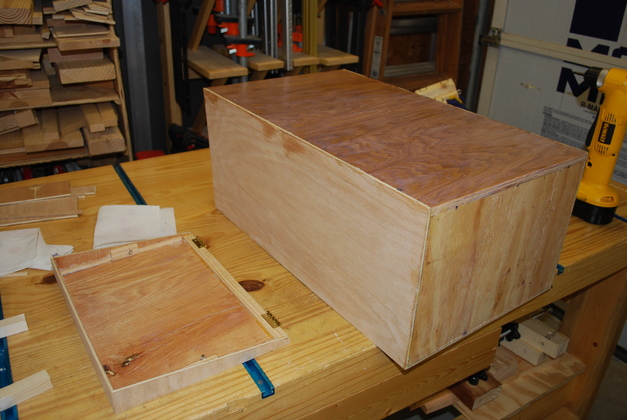
Another shot of the completed box, sitting on the woodworking bench.
|
|
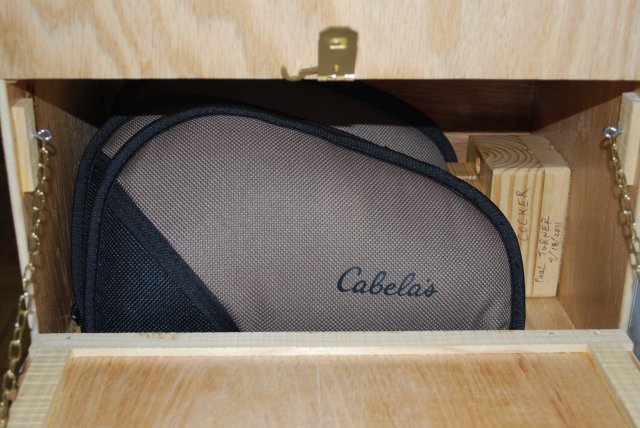
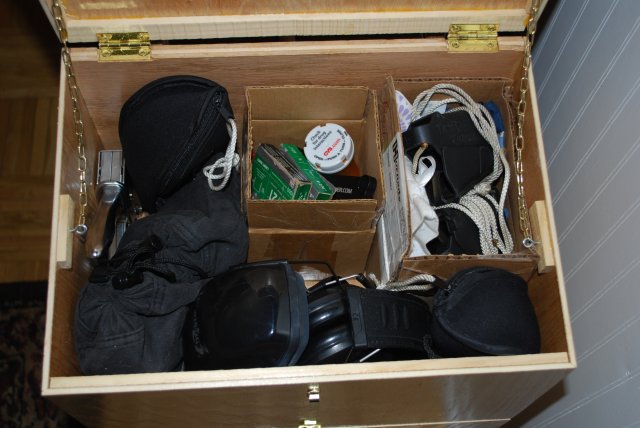
Top compartment loaded with misc. stuff: earmuffs, stapler, magazines (in draw string bags), speed loaders, tools, etc..
The cardboard box on the right has the speed loaders (UPLULAs) and some larger draw string bags for taking home fired brass.
|
|
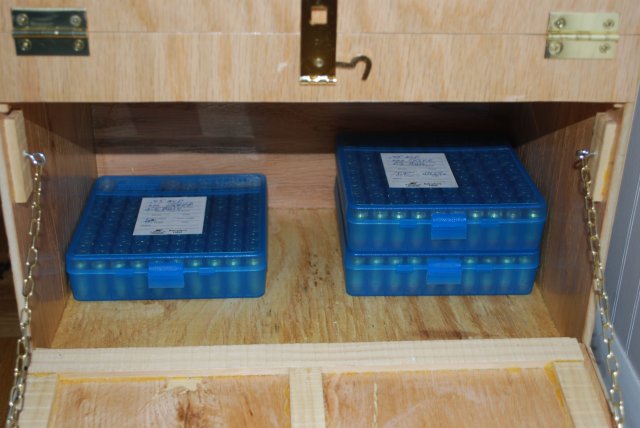
Bottom compartment loaded with ammunition.
|