Cheap (and dirty) Plywood Ripper (Like a Cheap Table Saw)
10/13/15: Tweak the text.
06/27/15: Add Dust Collector adapter pics.
04/09/15: Page Origin.
For some time I have felt the need for some way to quickly cut up plywood with straight, clean edges.
A table saw or a panel cutter are some of the best ways to do this, but I don't have room for either.
So I started thinking and came up with a different idea.
I usually clamp a sheet of plywood on my workbench, then mark where to cut and use a circular saw to make the cut.
When I make the cut I open a vise on the workbench and saw between the workbench edge and the extended vise to partially support the piece being cut.
But the marking and clamping takes more time and the cuts aren't perfectly straight.
When straight matters, I clamp the plywood, mark it, and clamp a long straight edge on the plywood which requires a second mark to compensate for the shoe of my circular saw, even more time consuming, but better edges.
I got an EZsmart edge guide, which worked well but, if you need to rip a narrow piece, the clamps on the plywood get in the way of the EZsmart's frame.
I thought about attaching my old Makita circular saw (a right hand saw), upside down, to the front edge of my workbench and using a straight piece of wood held down with tee bolts as a fence.
The bottom of the saw's shoe would have to be flush and parallel with the top of the table and it would have to be stable, so the frame holding it would need to be very square.
There is a wide drawer in the front and just under the top of my workbench.
I had previously thought of a tee track on the front of my workbench, to hold one end of large items clamped in the front vise.
I added the tee track along the front edge of the workbench.
I welded a steel frame, from 1" and 1/2" angle, keeping it as square as possible.
This would hold the saw against the front of my workbench.
I also bought a foot switch, the tap on tap off kind, that could handle the current from my saw and bought a dust port for my Makita circular saw.
The pics show the rest.
|
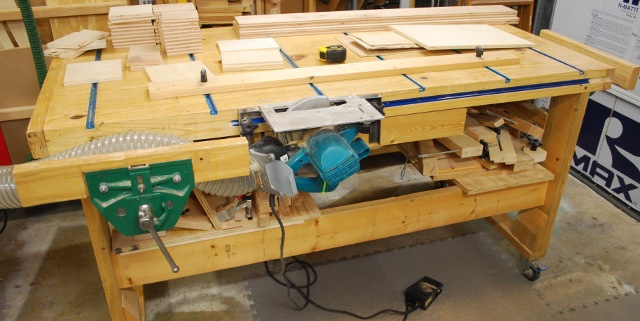
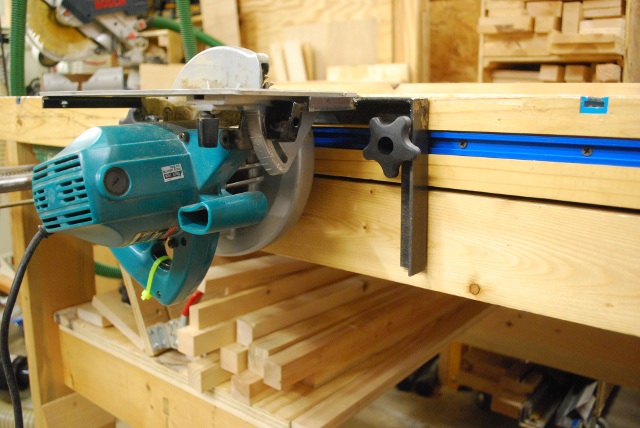
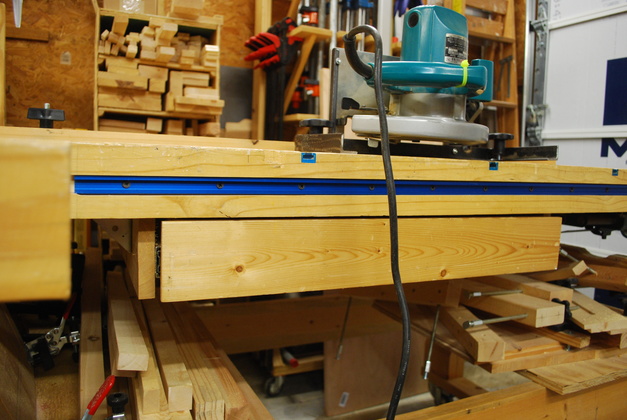
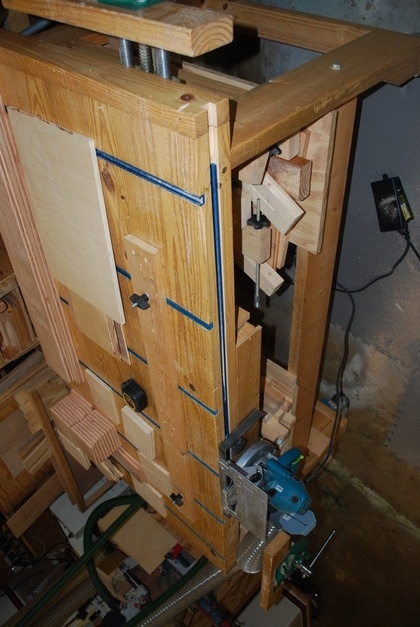
My PlyWood Ripper, hanging on the tee track on the front of my woodworking bench and resting on the front of the drawer.
We're looking at the output end.
If I need to rip a really long piece of plywood (like a full sheet) I'll clamp a piece of wood in the vise at the far end to help support the sheet on the input end.
Thats my old right handed Makita 7-1/4" circular saw in the steel frame.
The workbench is made with the front side flat, so I can clamp large pieces (like doors).
Thats what enables me to use it this way.
|
|
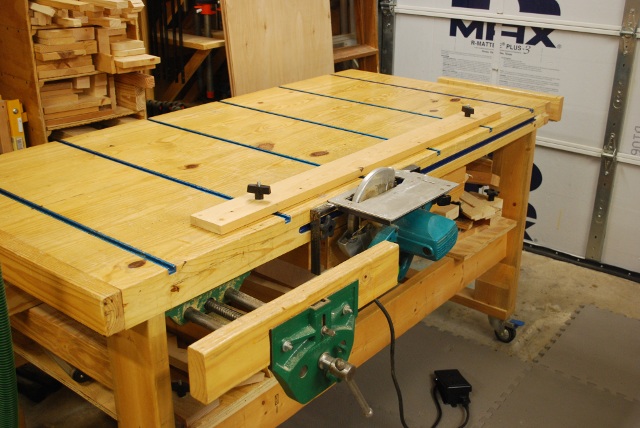
View from the input end.
I hold the outside edge of the plywood in my left hand, pushing it against the fence as I feed it into the blade.
The cut pieces on the work bench are pieces I cut for the ceiling dust plenum.
|
|
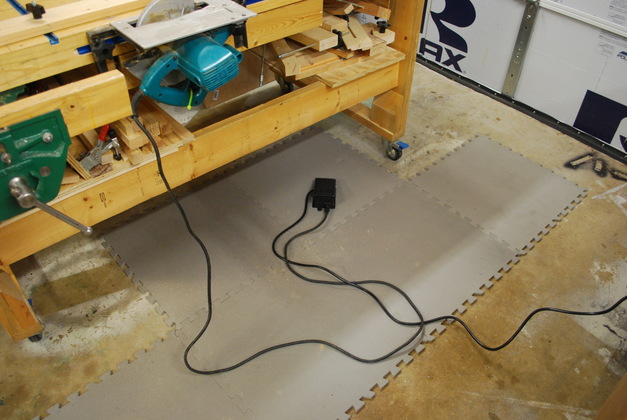
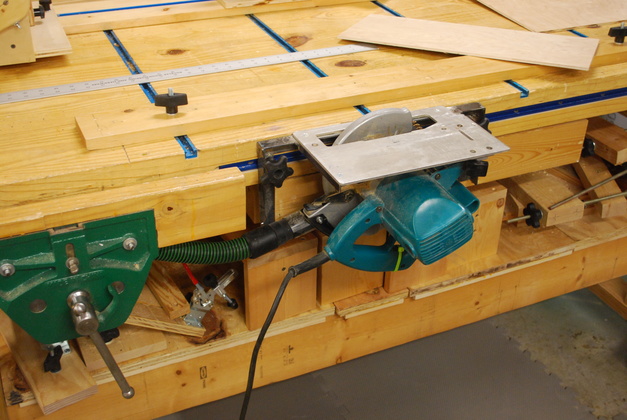
The foot switch, one tap its on, another its off.
You can just see the green tie wrap that holds the saw's trigger down.
|
|
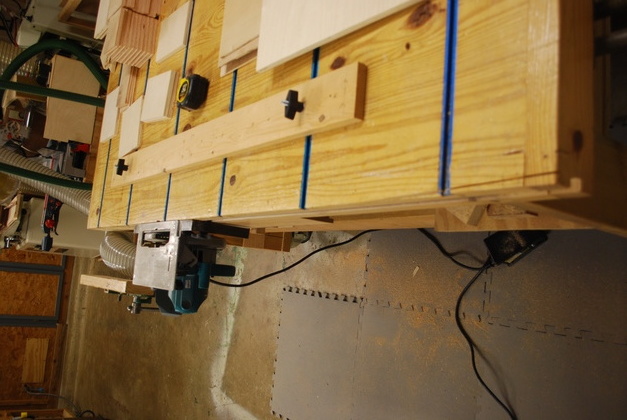
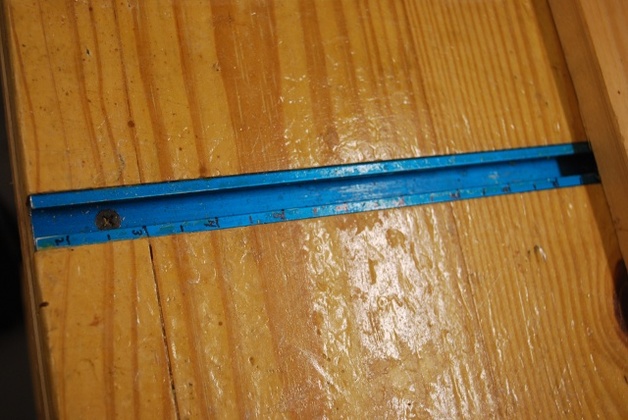
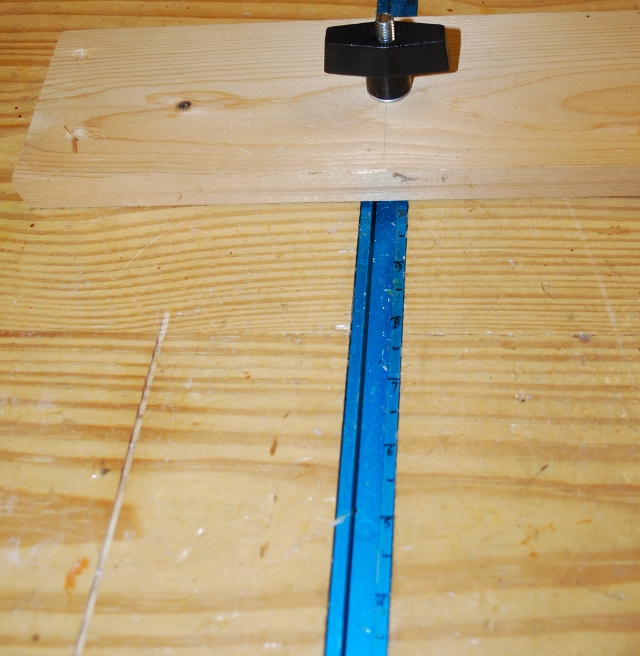
I marked one of the tee tracks on each end every 1/2" so its easy to keep the fence square.
|
|
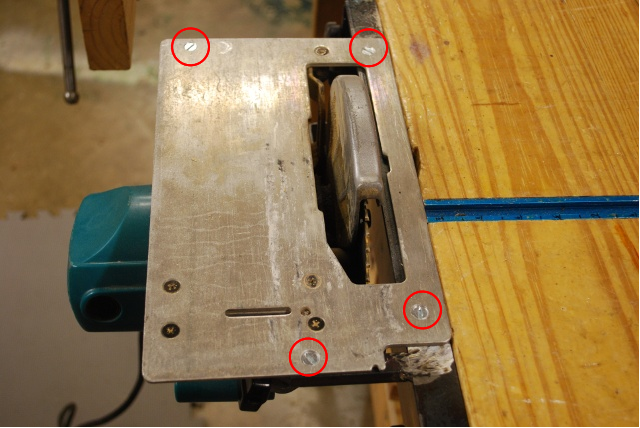
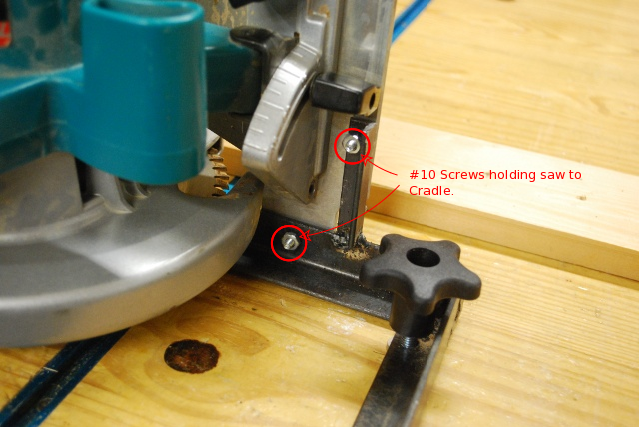
A little closer look at the upside down saw, in it's cradle.
The bottom of the shoe (top in this pic) is flush and parallel with the top of the workbench.
The red circles indicate the heads of the #10 flat head screws holding the saw to the cradle.
|
|
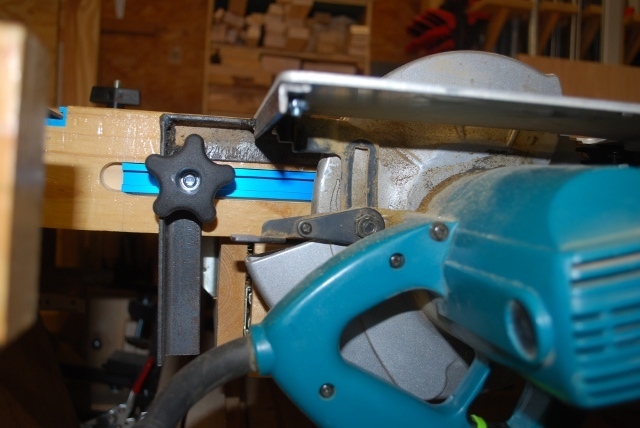
A look from the side.
Here the tee track and front of the drawer is holding the saw cradle, you can see one of the tee knobs holding the cradle in place.
|
|
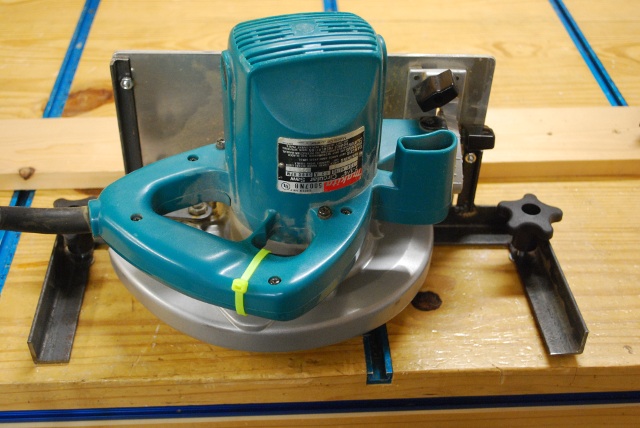
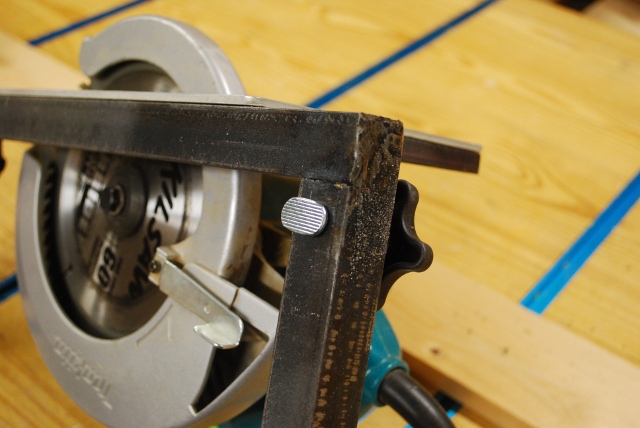
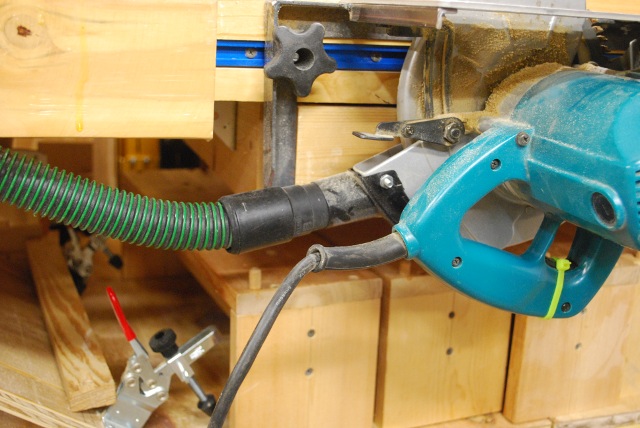
The other tee knob and tee track, this pic was taken before I installed the Makita's dust port.
Notice the depth of cut adjuster, it still works as does the blade guard.
You can also see the 1/2" angle part of the cradle, sticking out under the saw's shoe.
|
|
The front edge of the workbench without the plywood ripper cradle, you can see the tee track and the wide drawer front.
The drawer front is flush with the front of the workbench when closed (there is a lip under the front to pull the drawer open.
|
|
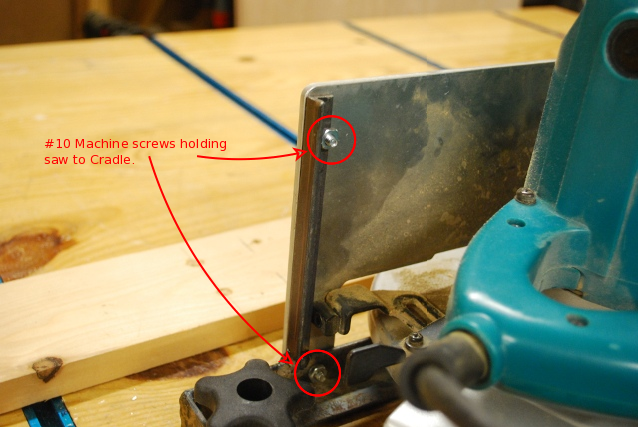
Close pic of the bottom front of the cradle, you can see two of the #10 bolts and nuts (Red Circles) holding the saw to the cradle.
The small support piece, under the saw's shoe, is welded from 1/2" angle.
|
|
Back and underneath part of the cradle, you can see two more #10 bolts and nuts (Red Circles) holding the saw to the 1/2" angle.
|
|
Since most circular saws don't have a trigger lock, I had to use a tie wrap to hold the trigger down.
I use the foot switch to start and stop the saw.
|
|
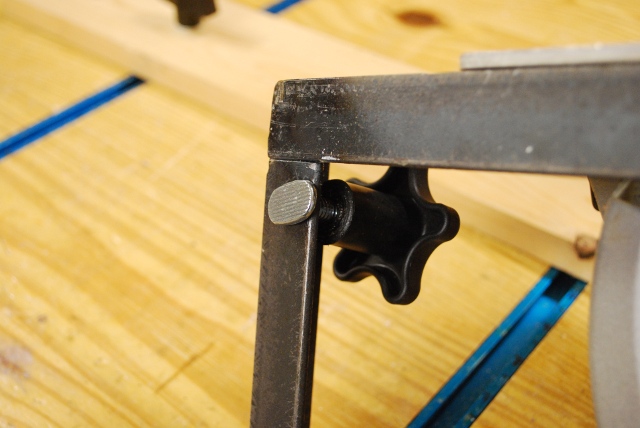
The cradle side that attaches to the workbench, you can see one of the tee bolts and it's knob.
|
|
The other tee bolt and knob.
I welded the main frame of the cradle from 1" angle.
|
|
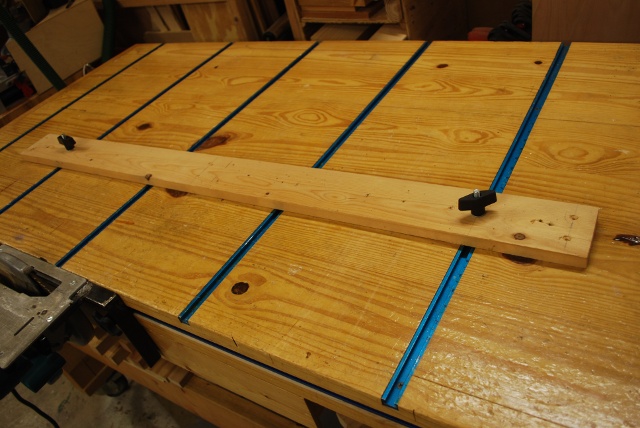
The rip fence, a piece of 1x4 with two tee knobs and bolts.
|
|
The marks, every 1/2" help keep the fence square to the saw's blade.
|
|
Some 48" pieces of 1/2" birch plywood I ripped for my ceiling dust plenum and updraft valves, using this ripper.
|
|
I was concerned about the wood chips (sawdust) so I tried using one of the free 4" hoses on the big ; dust collector, but it didn't work well withoug a tight connection (see pic at top).
So I ordered one of the Bosch dust adapters for the Makita and connected it to my 2" dust coll sys and plugged the foot switch into the ceiling drop that connects to the CT-22 dust collector.
Now when I turn on the saw the dust collector turns on also.
|
|
The Bosch uses the original opening at the rear outside of the blade housing, I had to use a heat gun to make the Bosch fit a little better.
|