| | |
|

|
| 
|
|
Paul's Office
|
04/02/12: Origination.
07/10/12: Add console project.
Our smallest bedroom has been turned into an office (where the computers live), its about 8.5' by 10'.
The size of this room indicates the size of our entire house.
I do all my bookkeeping, project planning/design, tax prep., computer work, etc. in this little office.
It also gets used for storage of all office supplies, gun powder, primers, gunsmithing DVDs, etc.
There is a rolltop desk, a small computer desk (with my workstation), a 4 drawer file cabinet, a small bookshelf, a wicker trunk, a closet, our range box, and a 19" relay rack containing the poor mans blade rack (servers), network switches, keyboard, mouse, 18" monitor, wireless AP, and a large UPS.
Needless to say its cramped and we always need more storage space.
So I decide to do some renovation on the office.
The room before mods.
Storage Wall Shelf
I noticed a large area of wall space, on the east wall, above the roll-top, filing cabinet, and relay rack so I decided to build a large storage shelf to fill it and to provide a lot of storage in this room.
The wall is 101.5" wide and has about 45" vertical space clear.
I will have to build the shelf in sections (difficult to move through house and place in position if it fits exactly), so I decided to make one long section 72" and the other 29" wide both 37" high.
The extra 1/2" would allow insertion into wall space and be covered up with cap strips or corner mould like in Betty's office, also modern houses rarely have square and plumb walls so you have to allow a little misfit.
I learned the thing about square and plumb walls in my first house after being spoiled living in a house built by my grandfather for the first 20 years of my life.
In fact the book shelf in Betty's office is an example of a one piece wall storage shelf, it was very hard to get into position.
I build wall shelves from pine 1" x 12", 1" x 2" supports under alternate shelves, 1/4" plywood back, and 1" x 2" front and rear under bottom shelf.
The 1" x 2" under the bottom shelf adds strength and leaves room for a flourescent light for work areas below.
The 1/4" plywood back provides a lot of support as well as keeping everything square.
After construction, I run a router around all front edges with a roundoff bit (in this case a 1/8").
The short wall shelf will be built just like the long shelf only shorter.
I will have to build trestles to supoort the shelf while I'm screwing it to the studs in the wall.
The top shelf allows the shelf to be attached to the ceiling joists in addition to the wall studs.
No damage is done to the walls by this kind of attachment execpt wall board screw holes.
If I ever want to remove this shelf I can unscrew the screws and then spackle the holes and repaint.
Large storage wall shelf Pics.
Computer Console & Storage
I decided to make a console to replace the server rack in the North East corner.
The console will have storage underneath for a UPS, the internet access modem, slot for a modified server blade, a desktop, keyboard and mouse tray, monitor, a case of printer paper, toner and ink cartridges, shelves for network switches, and wireless AP (access point).
I'll probably vertical mount the monitor to save desktop space.
Since there are lots of wires behind the computer, keyboard, mouse, net switches, etc, the console will have lots of holes in the back and some space for the wires to run, also casters allow the entire console to be pulled out from the wall to work on the equipment.
There will also be lots of openings to allow air to circulate for cooling the electronic components.
Every joint is glued, I am an avid believer in Titebond, the places you see screws are glued also, the screws hold better than clamps until the glue sets.
I am making almost all of the console out of plywood, which always has an ugly edge, so I made and glued cap strips for every piece of plywood.
Computer console Pics.
Wall Shelf Construction and Installation
|
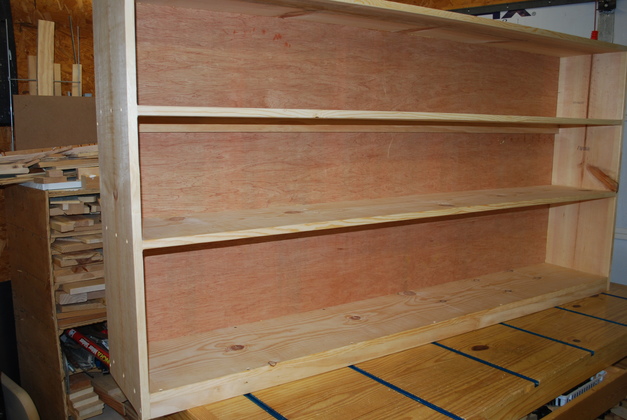
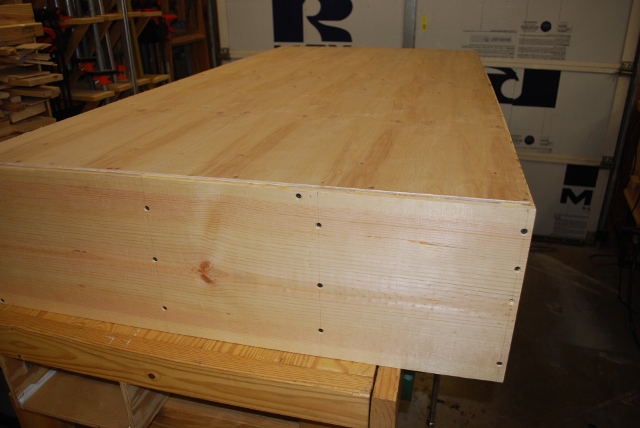
New shelf for office east wall.
The 1/4" plywood back is glued to sides, shelves, and cross braces to add strength to the long shelves.
You can see a cross brace under the shelf above the center section.
Also note lots of knots.
This shot is after assembling but before spackling, sanding, and painting.
|
|
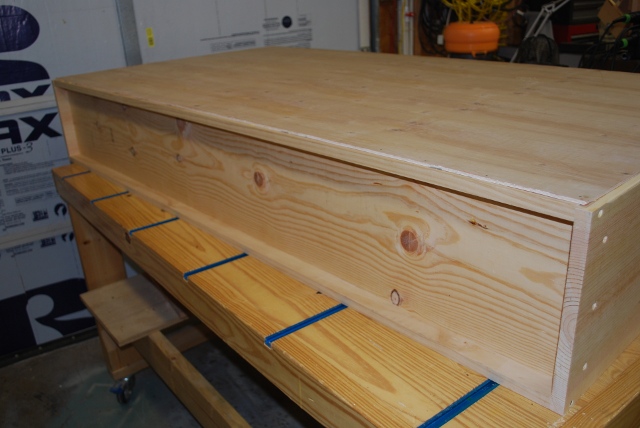
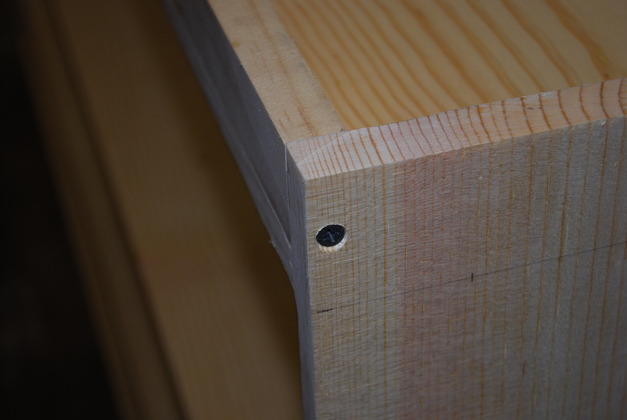
End showing countersunk wallboard screws holding ends of shelves and cross braces.
|
|
Under bottom showing front and rear cross braces.
This kind of construction increases strength as well a providing a place for fluorescent lighting for surfaces below shelf.
|
|
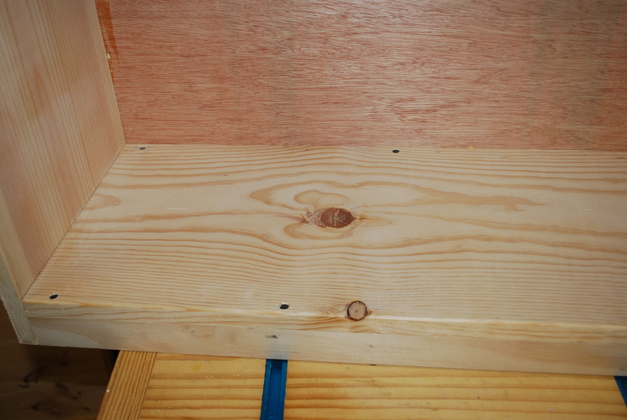
Note countersunk wallboard screws attaching bottom cross braces to bottom shelf.
|
|
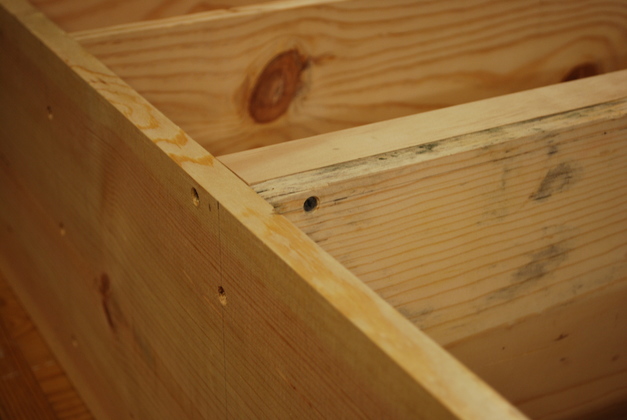
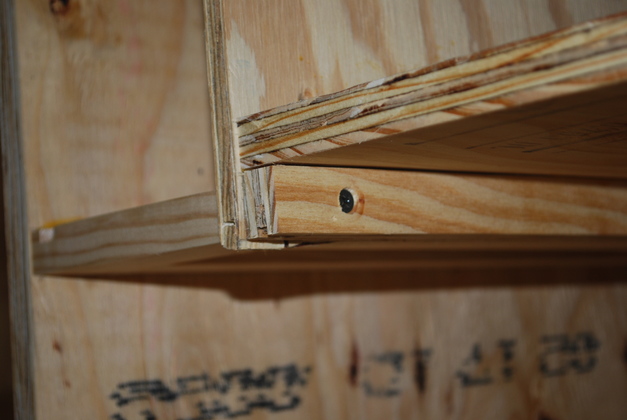
Middle cross brace before back attached, showing countersunk wall board screws holding end and shelf to brace.
|
|
Close up of countersunk wallboard screw holding end of a bottom brace, note the shelf end screw countersinks are marked but not drilled yet.
|
|
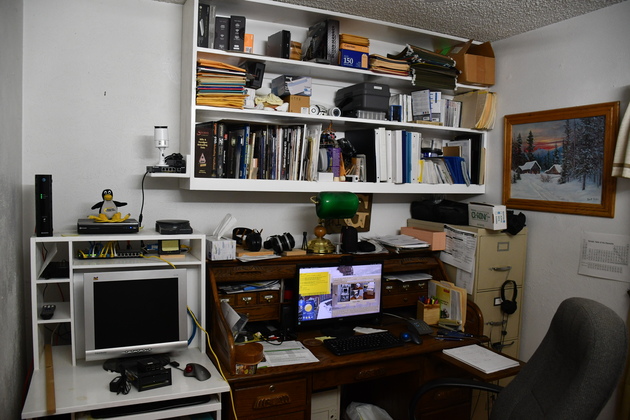
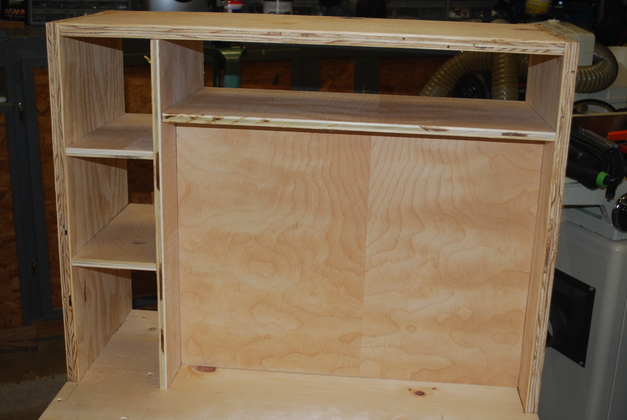
The east wall after the new shelf and console are installed.
Note top of roll-top is much neater, so is top of file cabinet.
The gap to the left of the shelf will have another shelf, with a different shelf spacing.
I use 2-1/2" coarse wallboard screws to hold it to the wall.
Compare with the old east wall.
|
|
And an even later (2021) pic of the wall shelf.
|
|
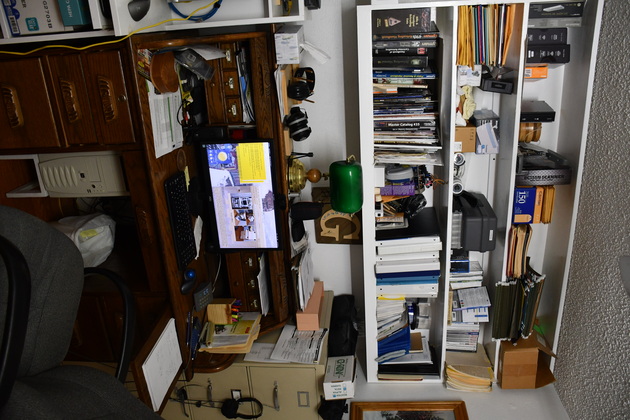
Floor to ceiling pic of roll-top and wall shelf.
|
|
The south wall after the shelf is installed.
Note no junk on floor to right of computer work station, just the range box.
Compare with the old south wall.
|

|
The west wall after the new shelf is installed.
Note no book case, no junk on floor, range box is now in the corner.
Compare with the old west wall.
We are discussing adding a single or double shelf to this wall.
|
Console Construction
|
|
|
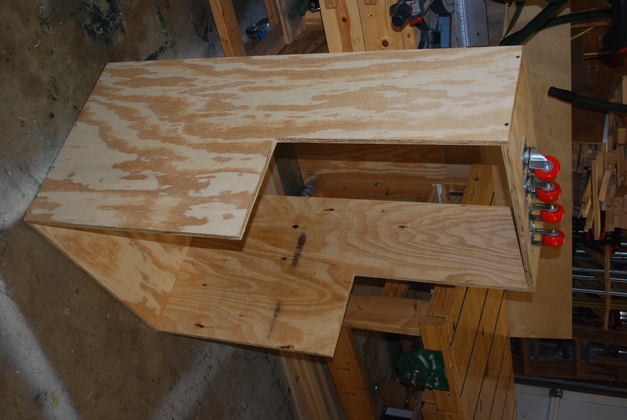
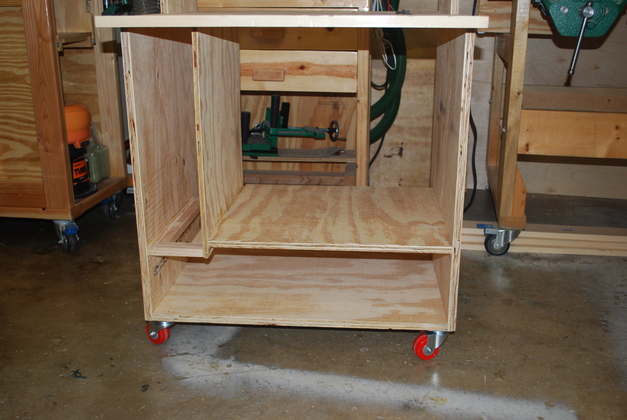
Frame glued up.
Yes, the casters will end up on the bottom.
Since all the woodwork I built in the office is painted white, I'm going to use plywood construction and paint it white.
|
|
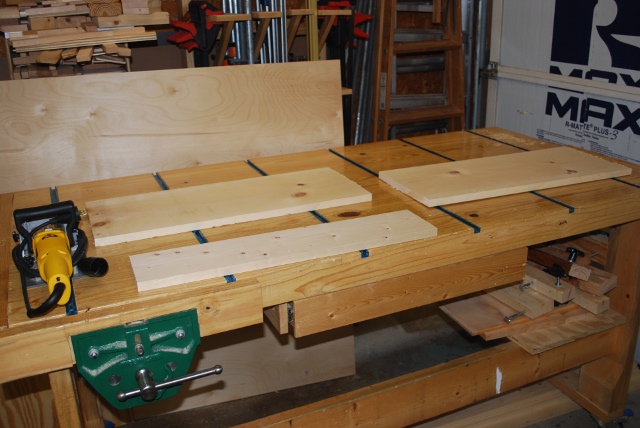
Desk top parts cut out.
|
|
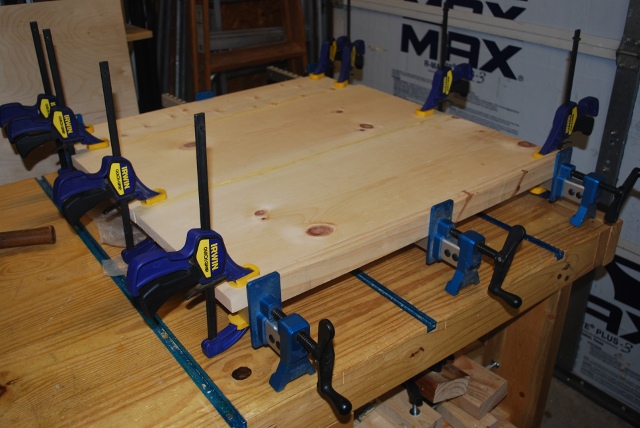
Desk top being laminated.
A little sanding and you won't be able to feel the joints.
|
|
|
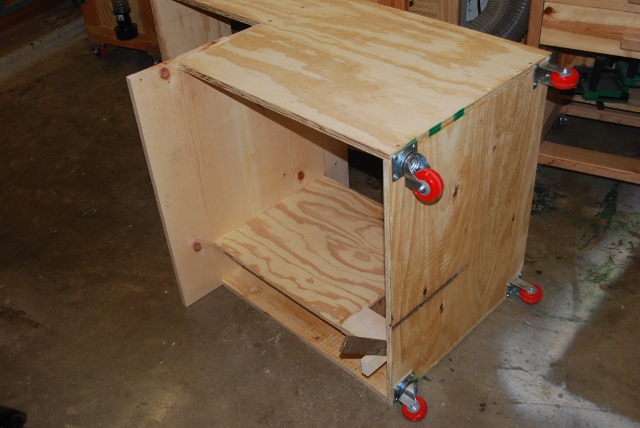
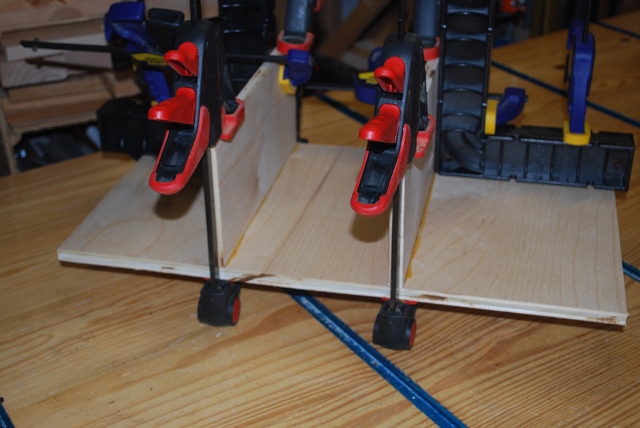
The desk top being glued on then after glue sets.
Casters attached.
|
|
|
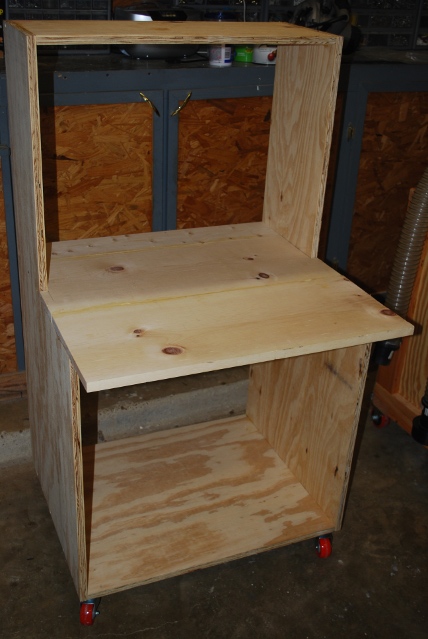
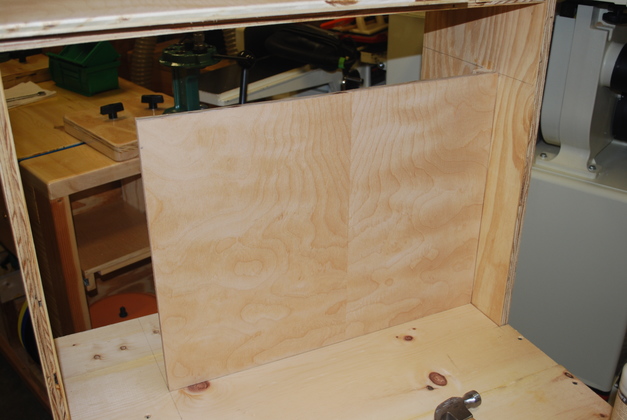
Lower partition glued in.
This partition forms one side of the single blade slot and supports the paper shelf.
|
|
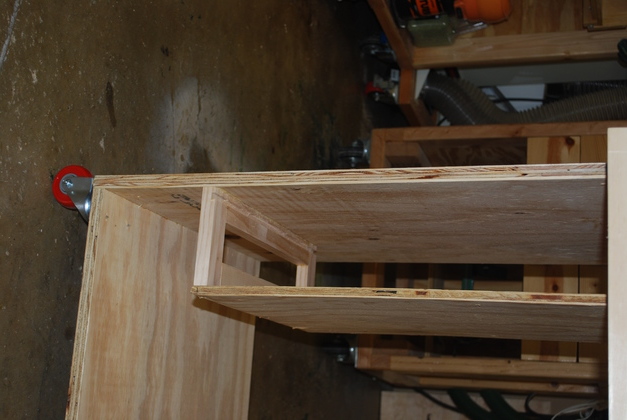
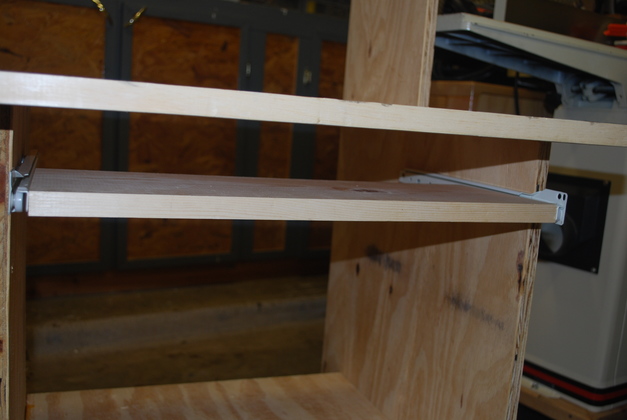
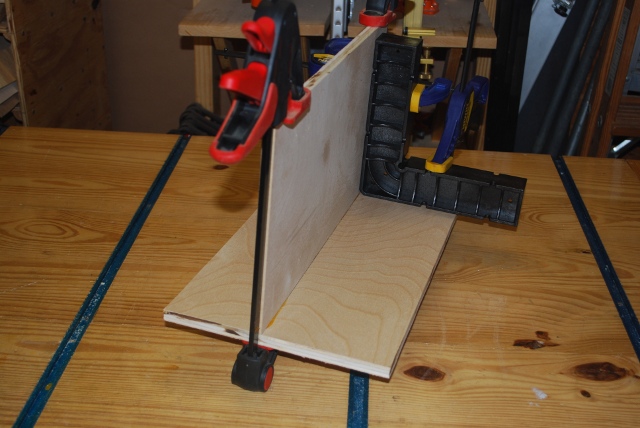
Lower blade computer slide with tennons glued.
Next, I'll slot it and glue it in.
Note the hole in the center is for cooling air.
|
|
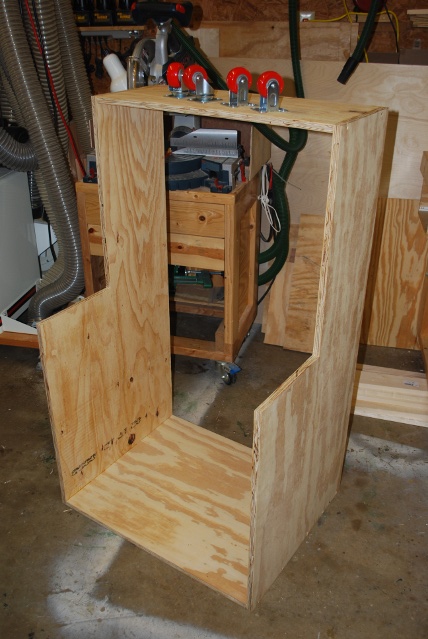
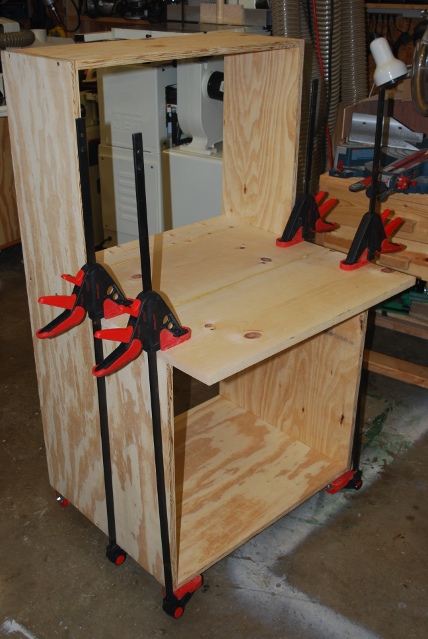
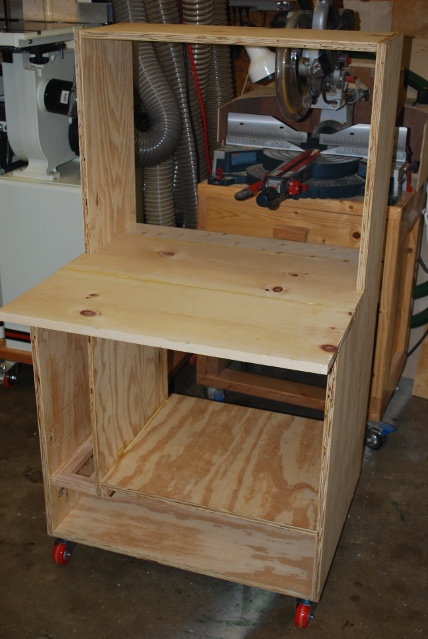
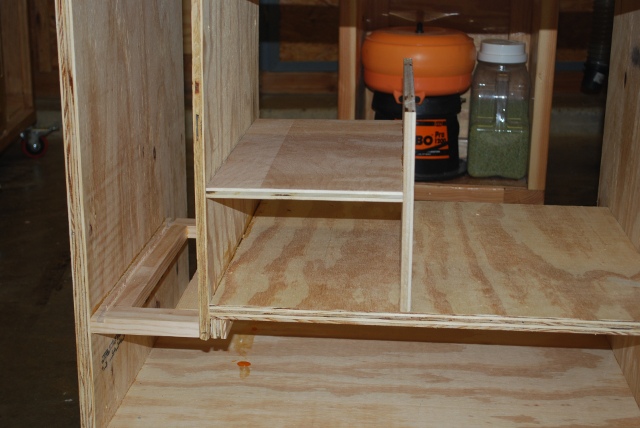
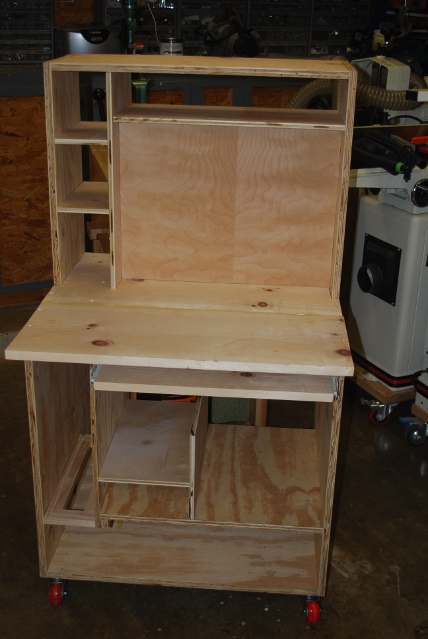
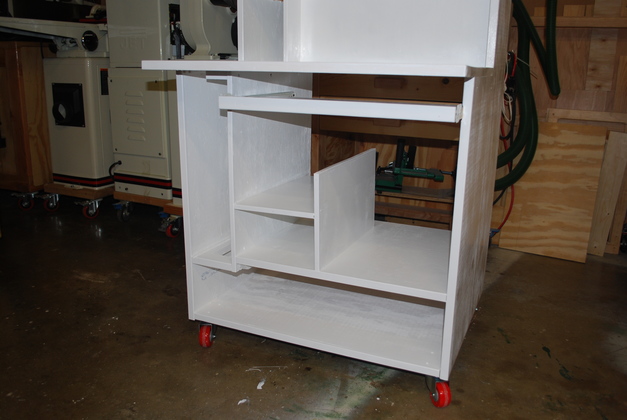
Console with lower shelf and blade shelf glued in.
|
|
Closer look, single blade rack, bottom partition, and paper shelf installed.
Note, the hole in the bottom of the blade cage, allows air to circlate upward.
The perspective makes the blade rack look like the vertical partition is not plumb,, but it is!
|
|
Blade bottom slide groove detail.
Since the blade is 1/4" thick, I cut this slot 5/16" wide.
The open bottom is for cooling.
|
|
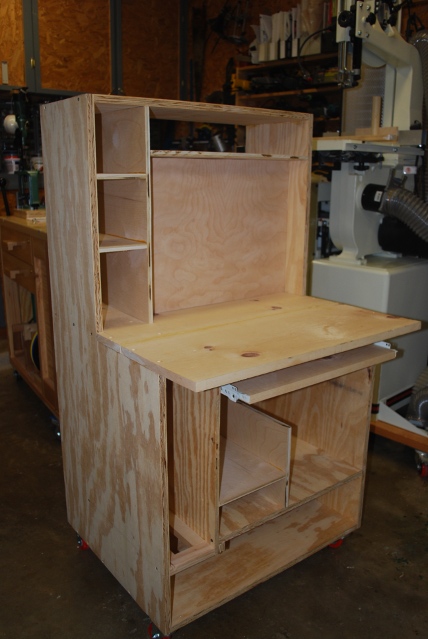
The paper shelf, to the right of the single blade rack.
The internet modem and UPS will go on the bottom shelf, a case of computer paper will go on the shelf beside the blade with an ink shelf between for toner and cartridges.
I thought of putting drawers in a column next to the computer paper, for ink and toner cartridges.
All that remains for the bottom is the slide out keyboard shelf.
|
|
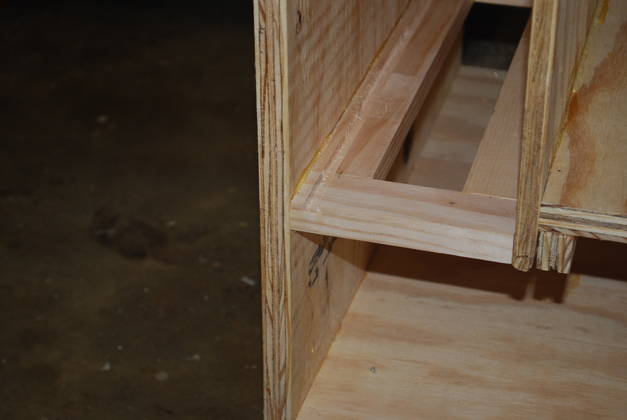
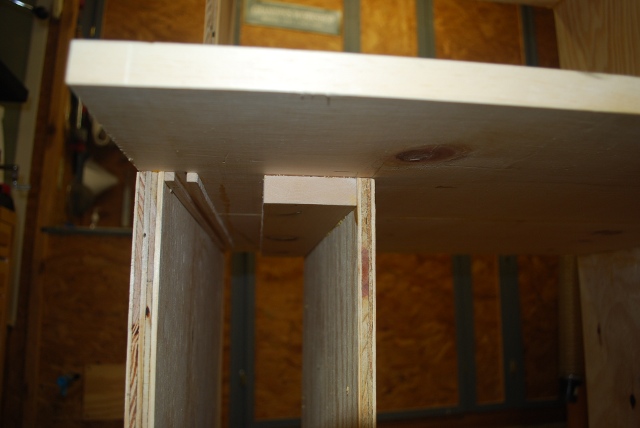
Paper shelf glue block.
Allows the lower partition to support the paper shelf.
The paper shelf had to be a little higher so the UPSes below would clear, the blade rack had to be 18-1/2" tall so the two shelves aren't the same level.
|
|
Blade cage top support glue block at top.
The block is glued and screwed to the underside of the desktop and the the partition.
You can see the two guides, at the top left, that direct the top of the 1/4" blade.
|
|
Monitor support panel glue blocks.
|
|
Monitor support panel ready to glue in.
|
|
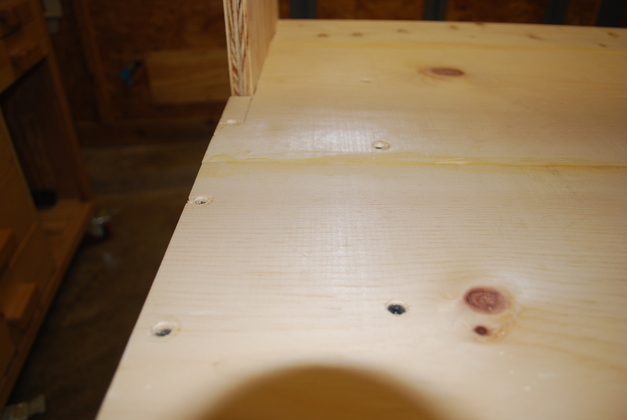
Screws for lower partition support counter sunk into desktop.
|
|
Keyboard tray retracted.
|
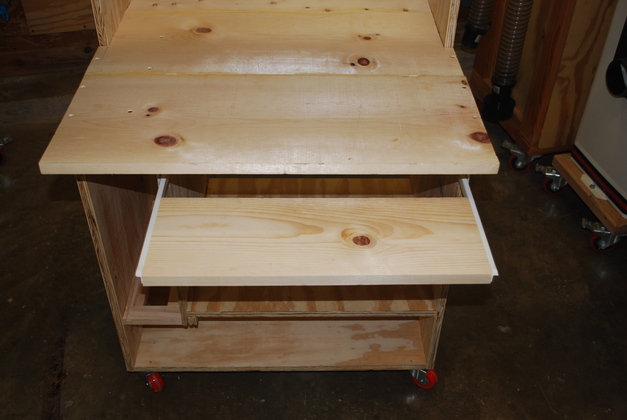
|
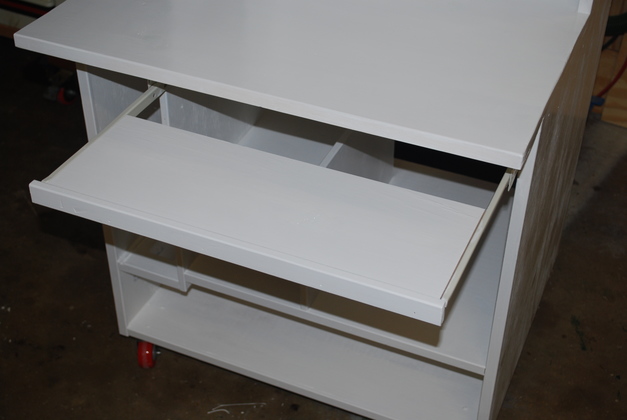
Keyboard tray extended.
|
|
The ink cartridge/toner shelf glued up.
Note the "Clampit" holding everything square while the glue sets.
|
|
Ink cartridge/toner shelf trial fit.
I'm going to make a small drawer for the ink carts in the lower section here.
|
|
Top shelves glued up.
|
|
Top shelves trial fit.
|
|
|
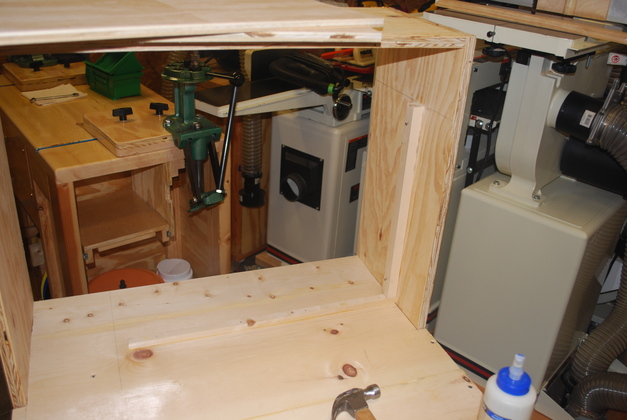
Complete trial fit of all shelves etc.
I'm going to paint the inside of the shelves before I glue them up.
|
|
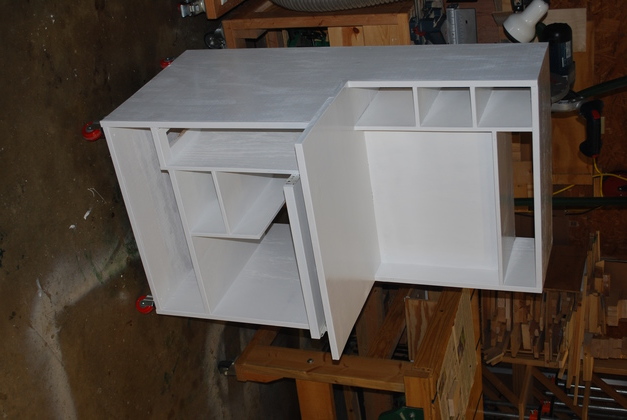
Finished painting.
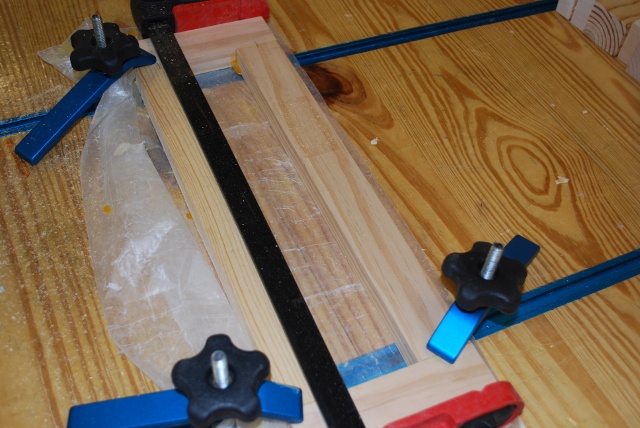
I didn't show it but I made cap strips for the front of all plywood, heres how I do it.
|
|
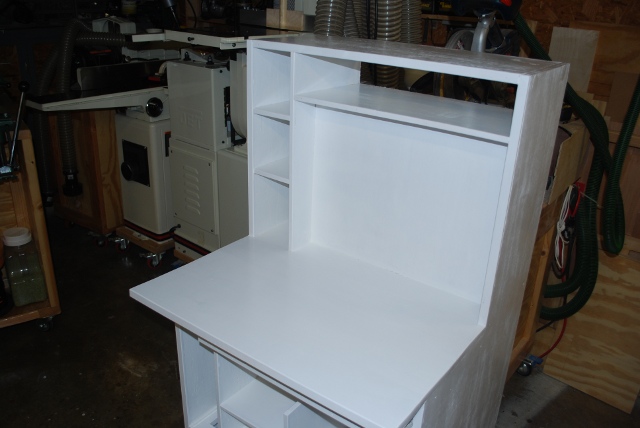
Closer view of top.
|
|
Closer view of bottom.
|
|
Keyboard tray extended.
|
|
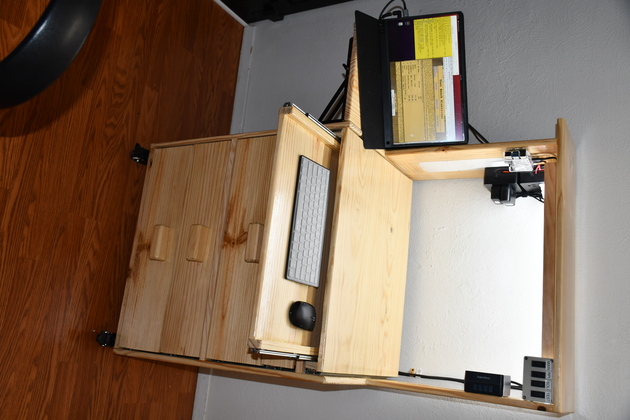
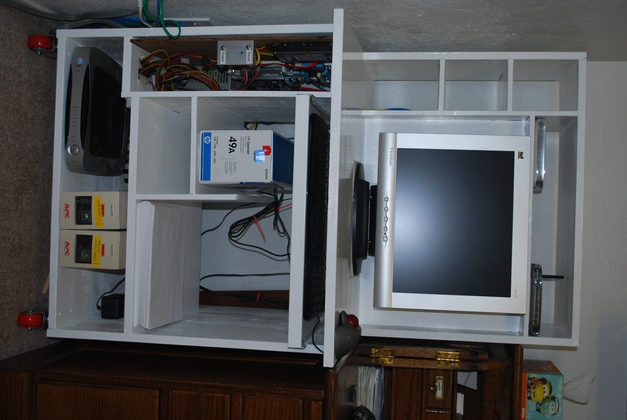
Console installed, computer up and running.
Compare to the old blade rack.
Top
The network switch and wireless access point on the top shelf.
The monitor on the desktop, keyboard shelf just below the desktop.
Second Shelf
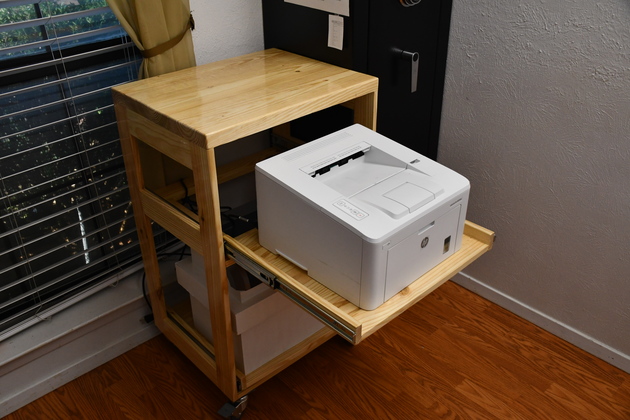
The second shelf from the bottom has the blade server, ink/toner, and printer paper.
The blade server runs the entire domain ary.com (along with several other domains) including serving this page.
I no longer need dvd drives, nowadays when I load an OS I use a flash drive.
I still need to build a drawer for the ink cartridges under the toner shelf.
The second shelf isn't continuous since I needed more room for the UPS below and the server blade needed about 3/4" extra height.
Bottom Shelf
The bottom shelf, internet modem on the left, the two APC UPSes.
I decided to use these two small APC UPS instead of the larger APC 1400 since our power either just blinks occassionally, or goes off for more than an hour about once per year, and I was tired of replacing 4 batteries at a time instead of two.
the 500 VA on the left carries the computer, the 200 on the right carries the network and modem (note yellow labels).
|
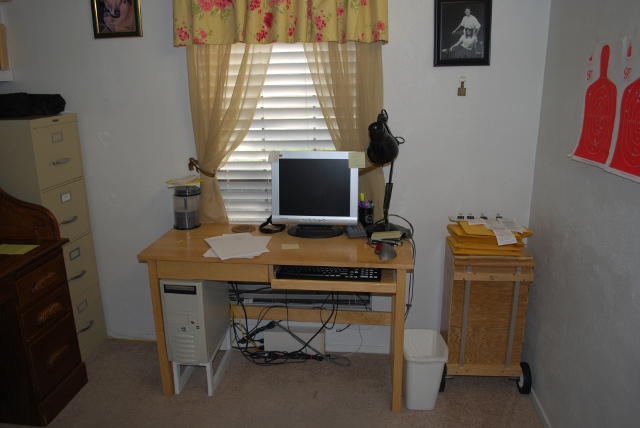
Room Pics Before Project Began
|
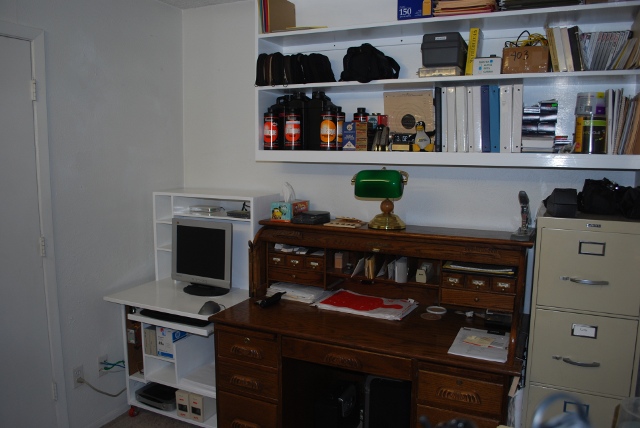
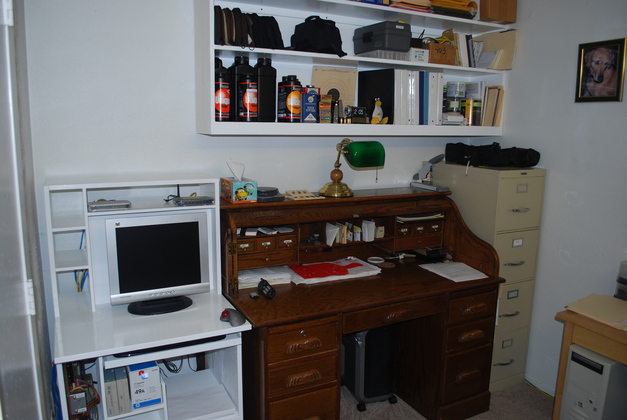
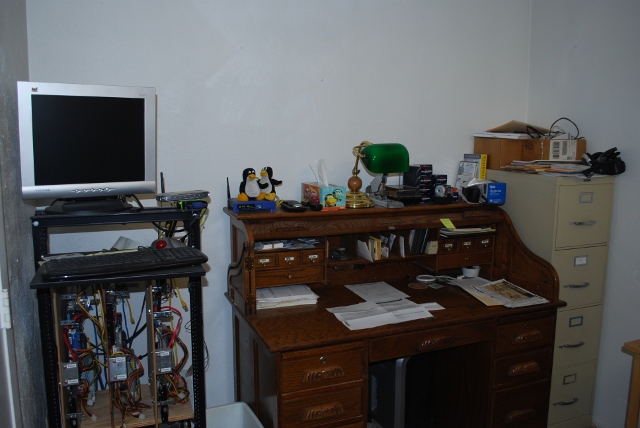
East Wall.
Note the large empty wall area above rack, roll-top, and file cabinet.
The center blade is hosting this web site as you browse.
BTW: All computers in our house (except one) run Linux, I have one old lap top running XP to program our GPS, Harmony-1, and Turbotax, I wish Garmin, Logitech, and Intuit supported Linux, I would feel much more secure.
Also note junk piled on filecabinet and roll-top.
Compare with the new east wall.
|
|
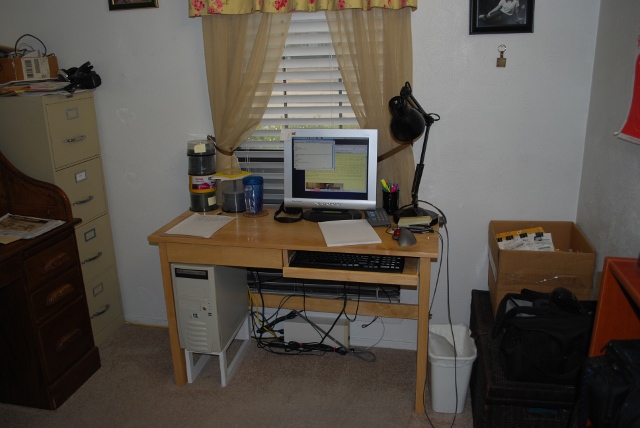
South Wall
Wicker storage trunk on floor in south west corner, and bookshelf corner on far right.
Note junk piled on wicker trunk, top of file cabinet, rolltop, and floor.
Compare with the new south wall.
|
|
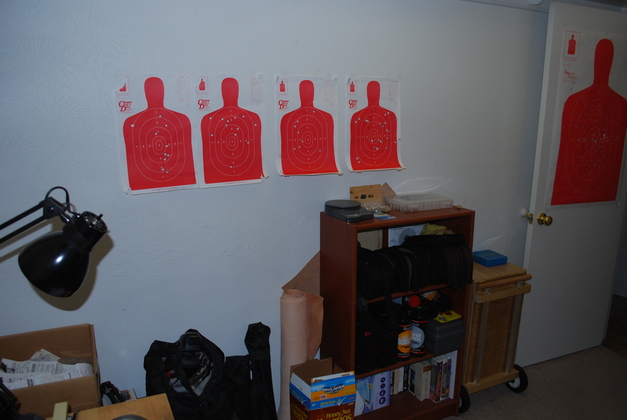
West Wall
Small bookshelf, range box, leather storage, you can't see wicker trunk in left corner on the floor.
You can just barely see the shelf at the top of the wall for the flourescent light bar.
Note more junk on floor, top of bookshelf, range box.
Compare with the new west wall.
|

|
North East Wall.
Entry on left, closet door, and server rack on right in north east corner.
|
|
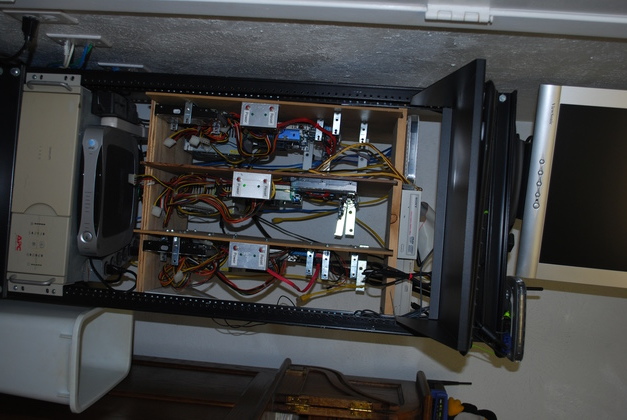
Closer shot of the old rack.
Originally, Bill and I hosted Linux Castles on two computers with a third for backup.
Now everything runs on one machine and I have one backup server.
Since I don't have automatic fail-over, in the future I'll only need one slot, the other blade can stay in the closet.
|
|
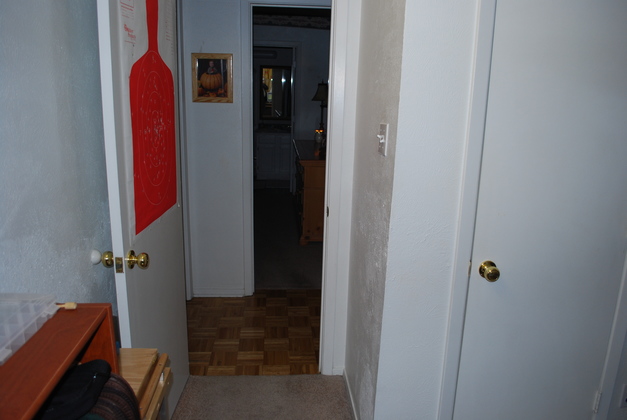
Entry and closet door.
Note entry door holds one of Betty's targets.
|