09/09/15: Page Origin
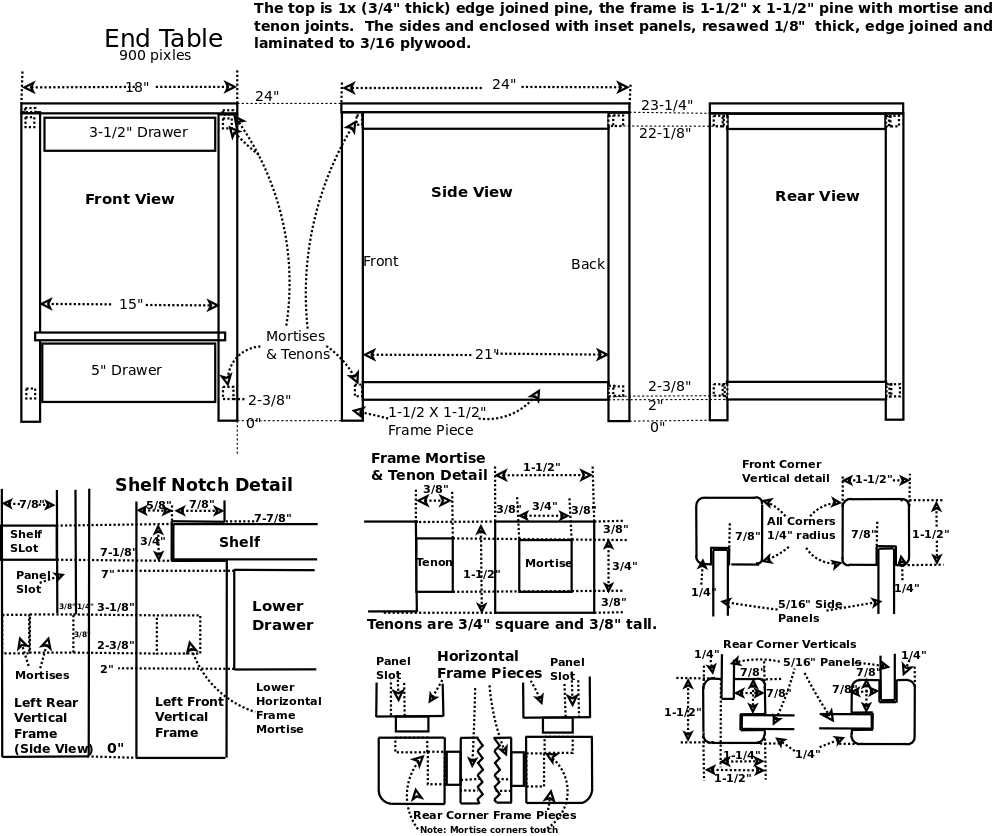
The end table's frame will be 1-1/2" X 1-1/2" pine (ripped from 2x4s) with mortise and tenon joints.
I machine off the rounded edges of a 2x4 then rip 1-1/2" wide frame pieces.
The square edges makes for nice butt joints at the corners.
The top and internal shelf will be 3/4" pine made from edge joined 1x6s.
The sides and back are enclosed with 5/16" thick inset panels resawn from 1x6s and edge laminated.
Two drawers in the front (one 3-1/2" deep and the other 5" deep) with sides and back from resawn 1X4s.
The drawer fronts are 1x (3/4") pine with a rabbet at the end to conceal the slides.
The 3/16" plywood bottoms are glued into a 3/16" rabbet along the lower inside edge of all sides, back, and front.
I use the same technique for all drawers and some in the shop have over 50#s in them with no sagging.
I am building two end tables in this batch.
The first end table used euro slides, these will use full extension slides.
The first end table had very deep rabbets cut for the inset panels these new end tables will have only grooves, meaning a little bit more to glue all at once.
Assembly:
I will glue each side section of the frame together with it's inset panel.
After the glue is set on the sides, glue the two rear cross members and inset panel.
Next I will the glue the shelf into it's slots.
Last I will glue on the top to the four tenons on the top end of the verticals with biscuits between.
BTW, the background for this page is one of the inset panels I made for this project.
|
|
Click for larger printable image and cut list
|
Frame

|
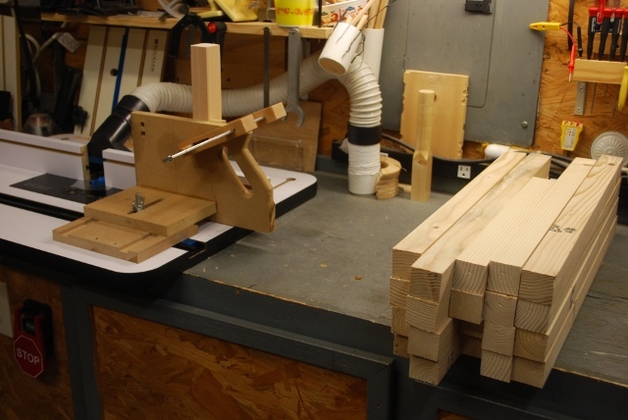
I run the 2x4s across the jointer to get them square, on the left is a 2x4 from supplier, on the right after its run across the jointer.
I only remove wood from the edges so the 1-1/2" thickness is the same.
The square corners make butt joints nice and smooth.
BTW, it is apparantly OK to call it either a Jointer or Joiner, I see both used by the manufacturers.
For more info and pics see the square board page.
|

|
After squaring, the marked lines are ready to rip.
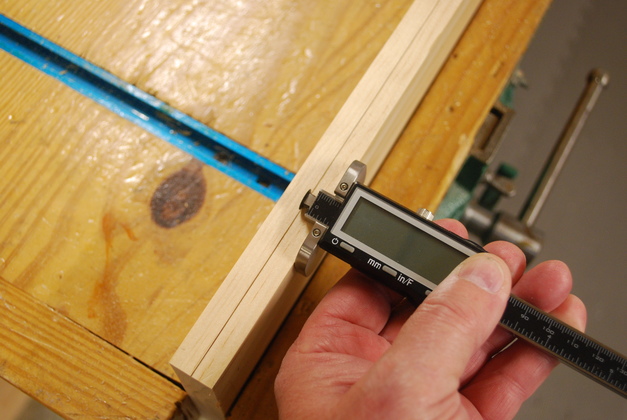
I removed about 1/8" from each edge (3 or 4 passes at 1/32" per), on the jointer, to get the nice square corners without changing the thickness (1-1/2").
I am marking 1-17/32" from each square edge, the extra 1/32" is so I can run each piece across the jointer (set to take off 1/32") again to make the bandsawed surface nice and smooth and flat.
The resulting frame piece will be exactly 1-1/2" square.
|

|
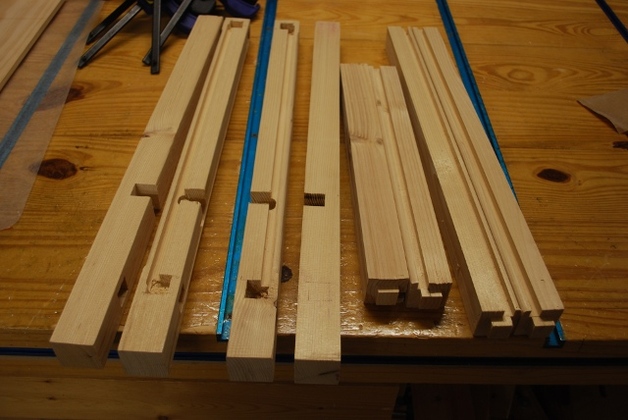
Frame members ripped then machined to 1-1/2" square.
|
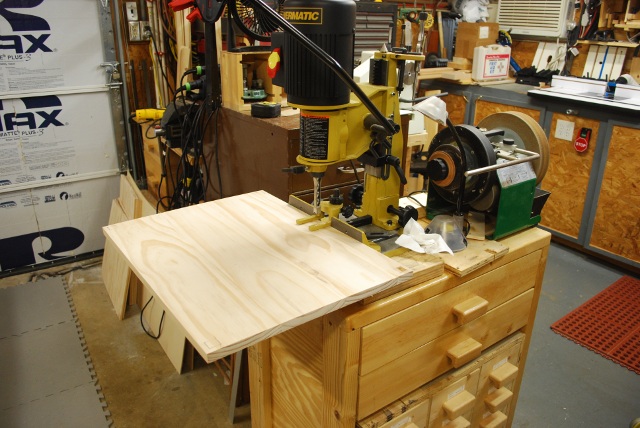
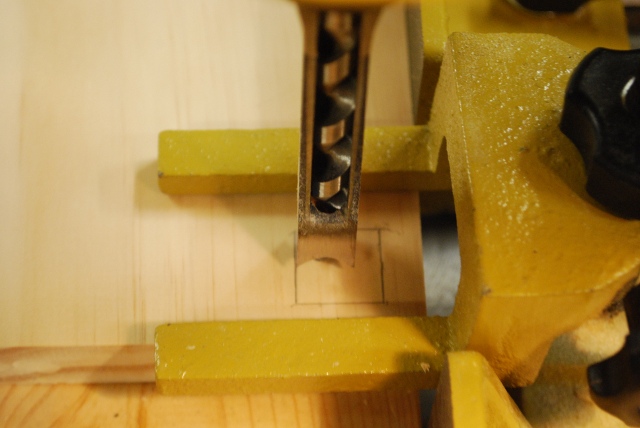
Tenons
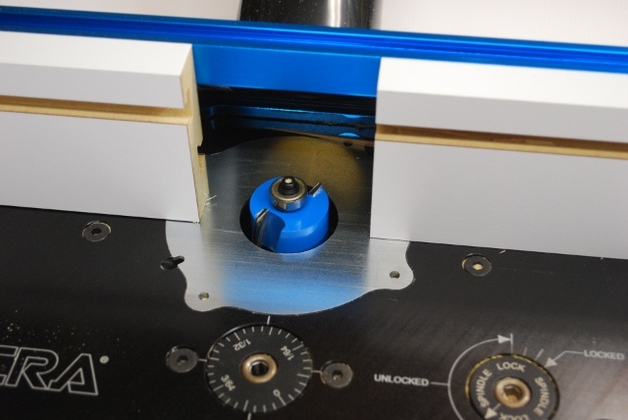
|
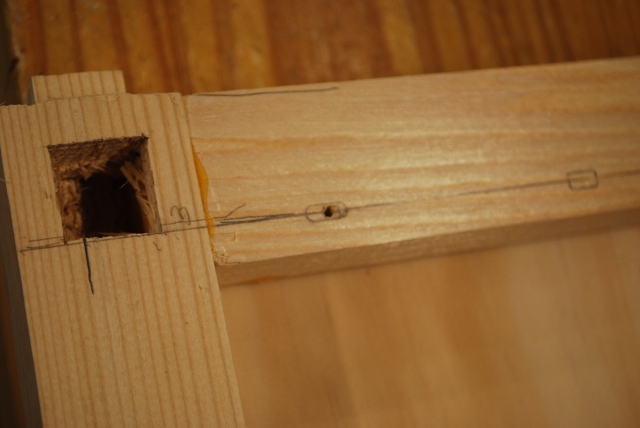
Set up to cut tenons on the ends of the frame pieces.
Brand new rabbeting bit, the bearing is flush with the fence and the height is 3/8", set to cut a 3/8" X 3/8" rabbet leaving a 3/4" square tenon in a 1-1/2" square frame piece.
|
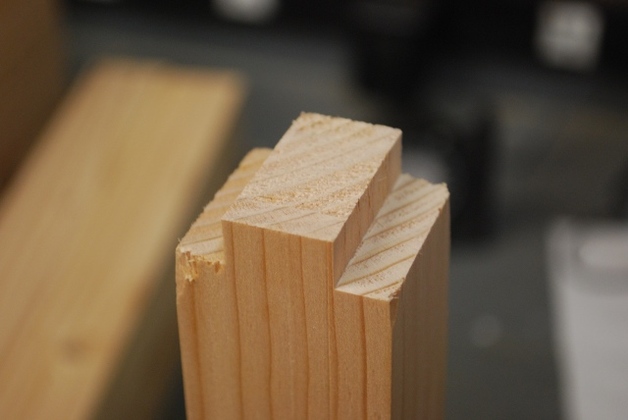
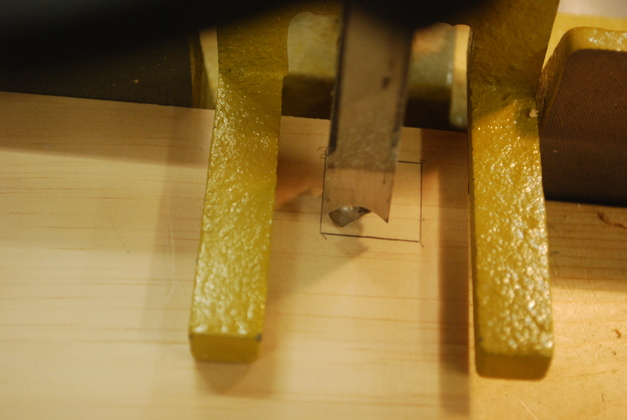
|
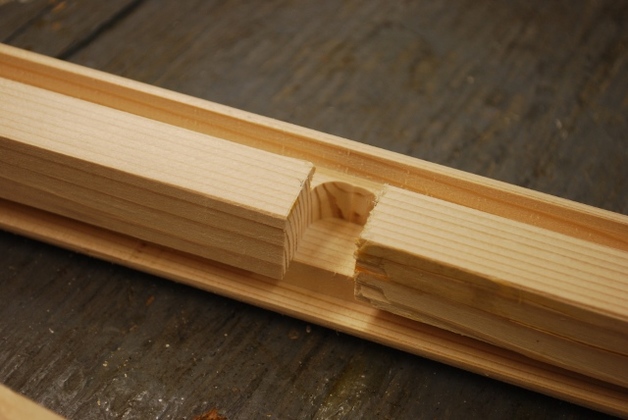
Test cut, two shoulders of a tenon, 3/8" wide and 3/8" deep rabet leaving a 3/4" wide section for the tenon.
|
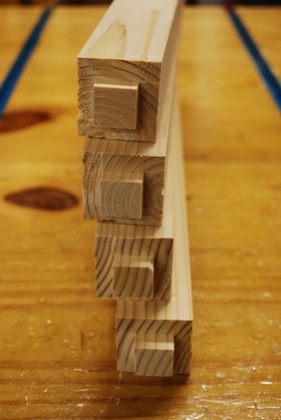
|
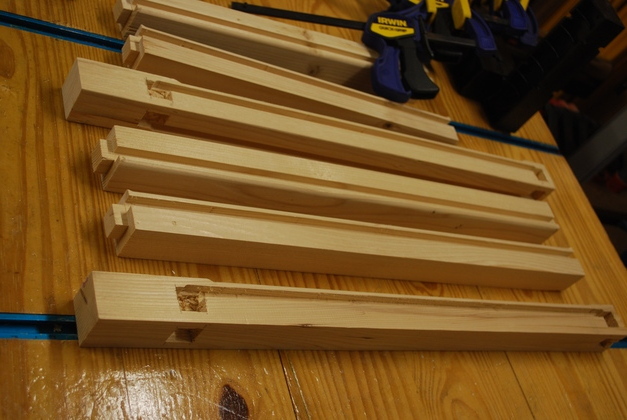
3/4" square tenons, with all four shoulders cut, on end of frame members.
|
Mortises
|
After cutting mortises side frame members laid out for rounding inside edges.
Nothing glued yet, I'll clamp them and round the inside edges where the panels will go.
Your looking at the inside so the rounding will be on the opposite side, the panel will be inset about 3/8" from the outside edge.
Also notice the mortises for the back horizontal frame members.
|

|
I have rounded the inside corner (where the panel will go).
Next I'll cut a groove for the panel to sit in, about 3/8" from this face.
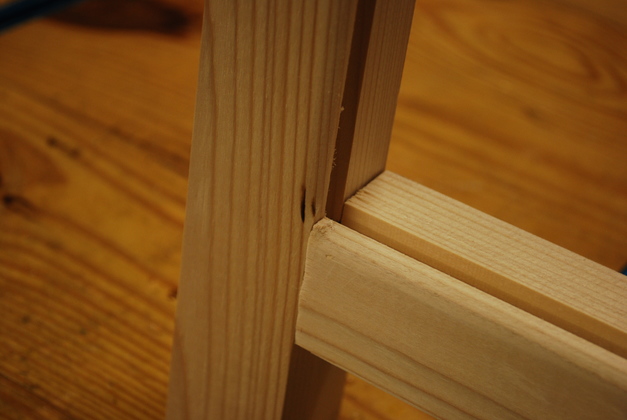
Notice the nice butt joint due to the square corners of the frame members and the shoulder of the tenon.
|

|
Back frame laid out on top of side frames, it'll get the outer edge rounded too then a groove for the panels just like the sides.
The back corners have rounded outer edges and a panel groove on two sides.
|
|
Two complete frames, laid out, with edges rounded ready to have the panel grooves machined.
|
Panel Grooves
|
Panel grooves machined.
|
|
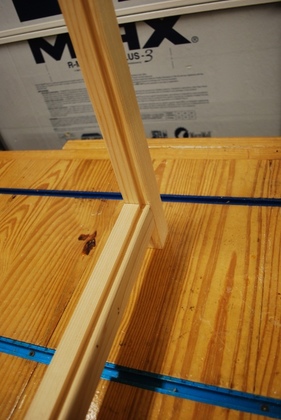
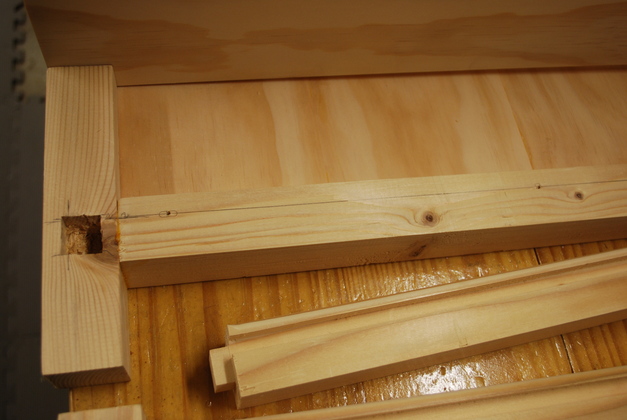
Corner of the frame with panel grooves machined, with just the mortise and tenon corner pushed together.
|
|
Closer look at the panel groove at the corner.
|
|
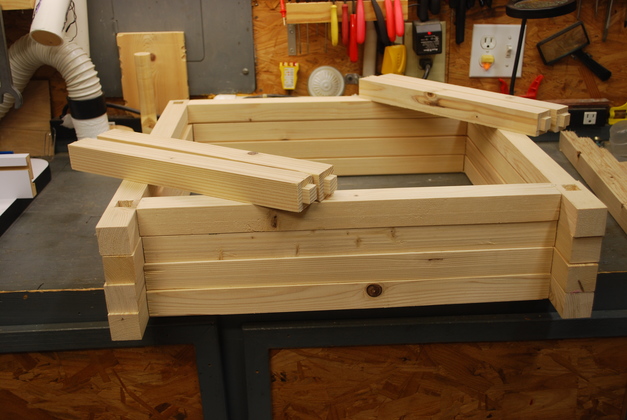
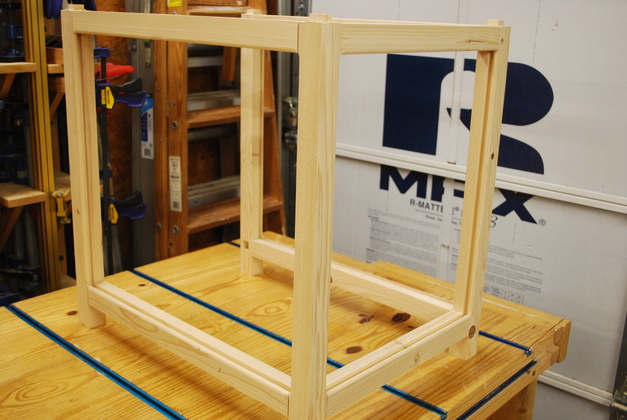
Test fit of entire frame with panel grooves machined held together with only the mortise and tenons.
|

|
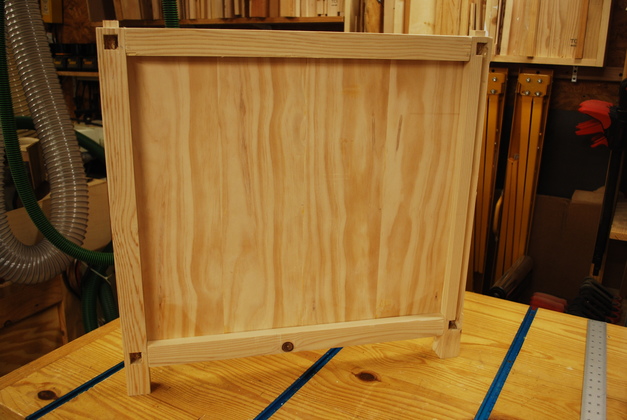
Side panel test fit, from the outside, inserted into the frame.
You can see the rest of the frame members to the right.
|
|
Inside view of the side panel and frame.
You can see the mortises and the groove for the rear panel.
I did cut unessary mortises in the front vertical frame pieces (on the left in pic), they will be hidden by the drawers.
|

|
Closer look at rear panel groove and mortise for lower rear horizontal frame piece.
This is before the shelf slot was cut.
|
Shelf
|
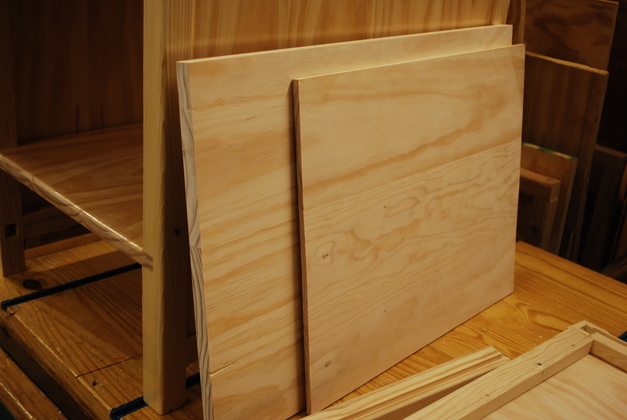
Shelf and back panel ready to test fit.
Please see Top section for info on how the shelf is made and the Panel section on how they're made.
|
|
Shelf slot machined in rear corner vertical.
|
|
Shelf slots in all four legs (corner verticals).
|
|
Sides laid out for shelf fit.
|
|
Shelf test fit into slots.
|
|
Shelf fit against back panel.
|
|
A shelf after glue in, sanding, and paint.
|
Panels
|
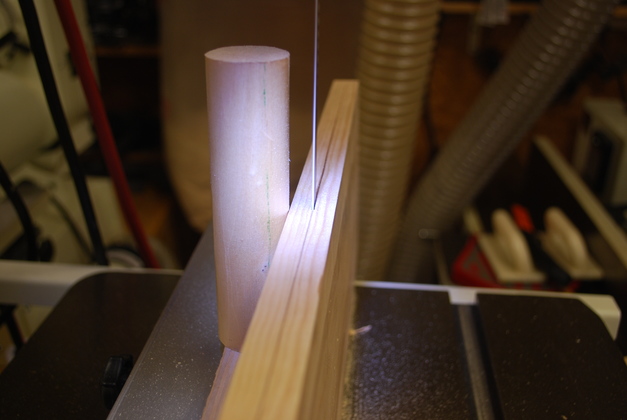
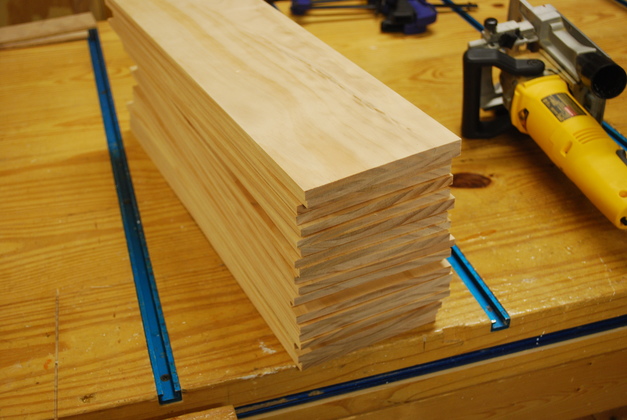
1x6s cut to length for panels.
The panels will all run vertically, so they are cut to 19".
Note the board in the woodworking bench's front vise, it is about to be marked for resawing.
Please see the Edge Joining Page for more details on how I make panels.
BTW, you can use sanded pine plywood for these panels, it would be a lot simpler.
|
|
Here I'm marking the exact center of the 1x6 for resawing.
I run the marking wheel over it then a .5mm pencil to make the mark stand out.
Please see the Edge Joining Page for more details on how I make panels.
|
|
Stack of 1x6s marked for resawing.
You can see the pencil line down the center of the edges.
Please see the Edge Joining Page for more details on how I make panels.
|
|
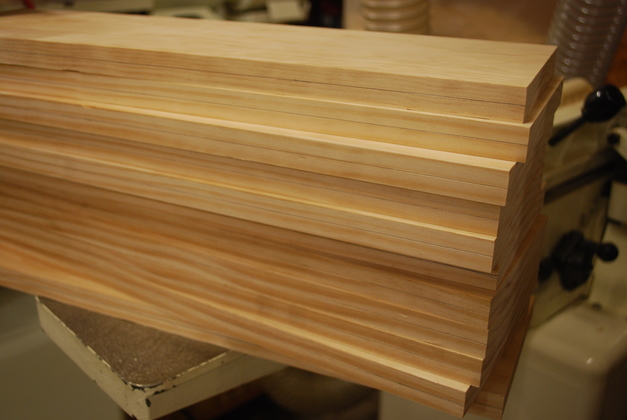
Stack of resawed panel pieces after running across the jointer to clean up the bandsaw marks, the panel pieces are now 5/16" thick.
Note the DeWalt slot cutter on the right.
Please see the Edge Joining Page for more details on how I make panels.
|
|
Panel laid out, putting "good" side up.
I will put a little "tick" mark every 4" along joints for biscuits.
Please see the Edge Joining Page for more details on how I make panels.
|
|
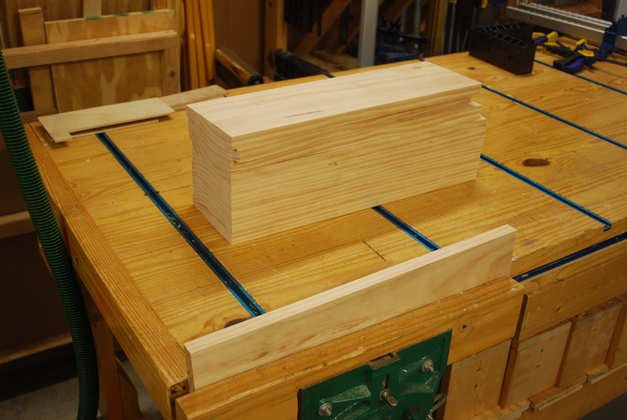
Stack of panel piece sets, slotted ready to join.
These are 4 piece panel sets will be the side panels for two end tables, once they are joined and sanded.
Please see the Edge Joining Page for more details on how I make panels.
|
|
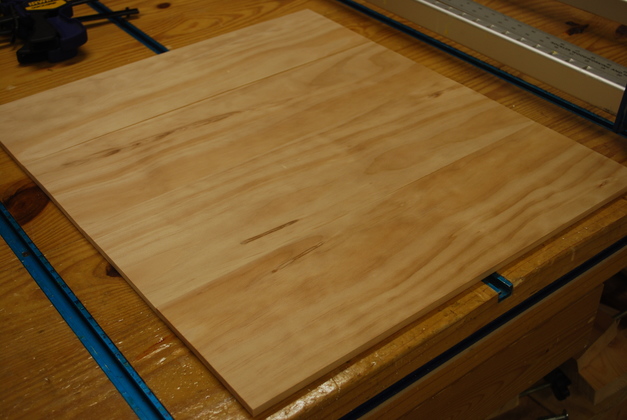
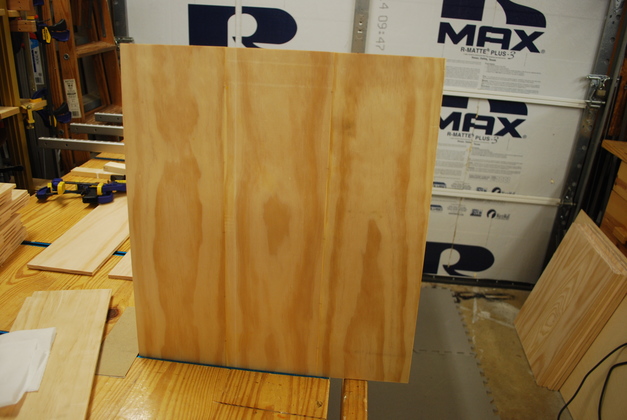
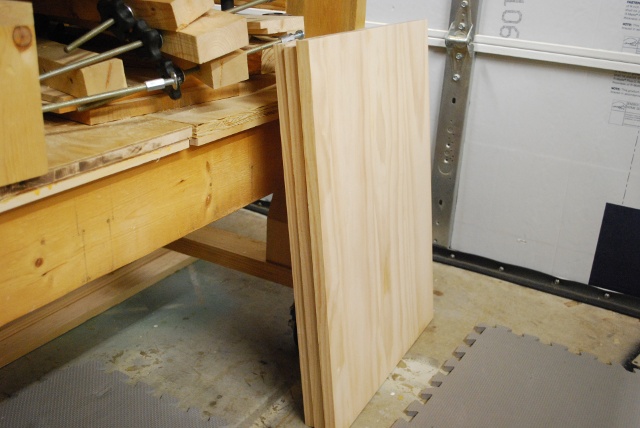
A 5/16" back panel, edge joined, ready to sand, standing up in a tee track.
Please see the Edge Joining Page for more details on how I make panels.
|
Top

|
The top in the glue clamps.
For more info and pics on top and panel making page on edge joining.
For another important aspect please look at the Square Board Page.
The edges of the panel / top pieces must be very square and straight so you can't feel the cracks.
|
|
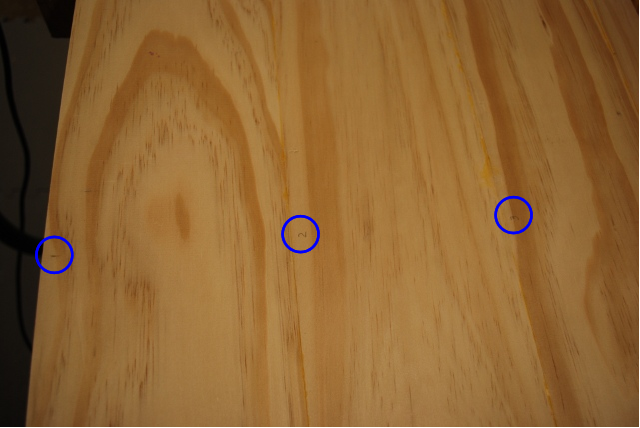
Under side (bottom) of table top, you can see the little numbers (blue circles) at the top (left side) of each individual board, that help to keep them oriented as I originally laid them out.
|
|
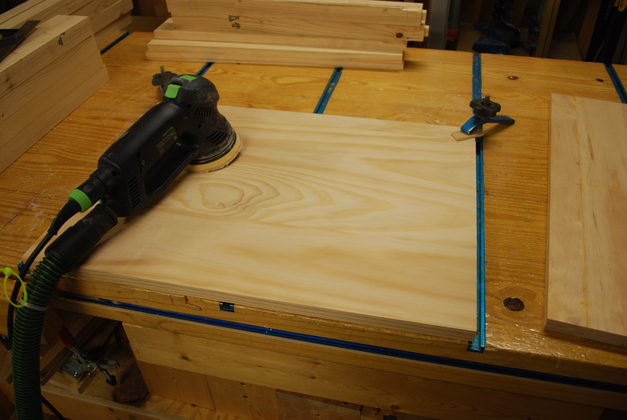
Top being sanded.
|

|
Sand until you can't feel any joint.
|
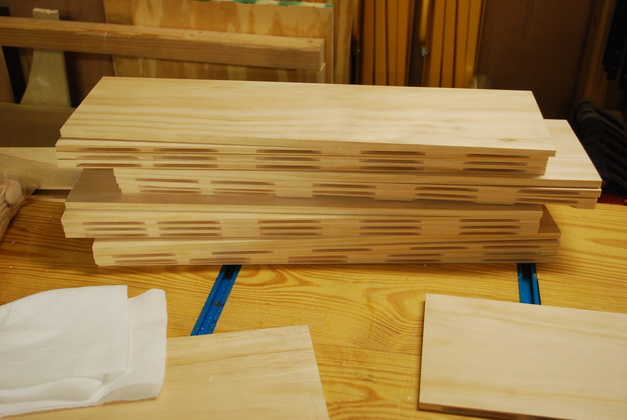
|
Top and shelves ready to edge sand.
|
Assembly
|
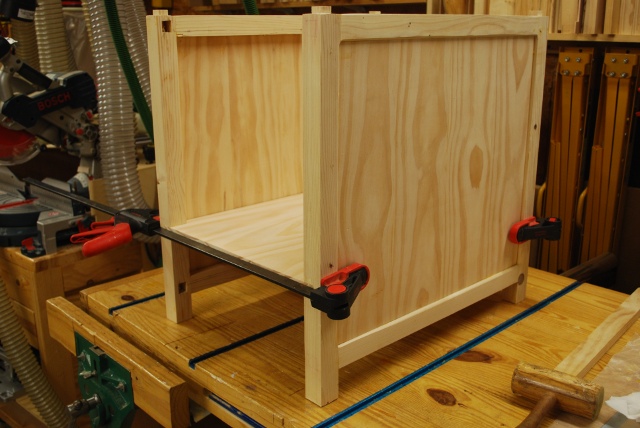
From the inside, the panel is glued into the left side frame as the frame is glued.
You can see the left rear vertical's shelf slot only going as far as the panel slot.
Please look here for more about installing the panels.
|
|
Right side with panel in glue clamps.
|
|
Right side frame, lower back showing back end of shelf slot and mortise for lower back horizontal.
|
|
Left side frame standing, with right side frame in clamps.
|
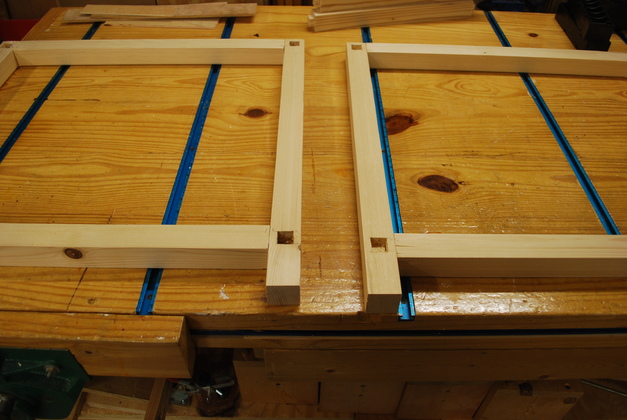
|
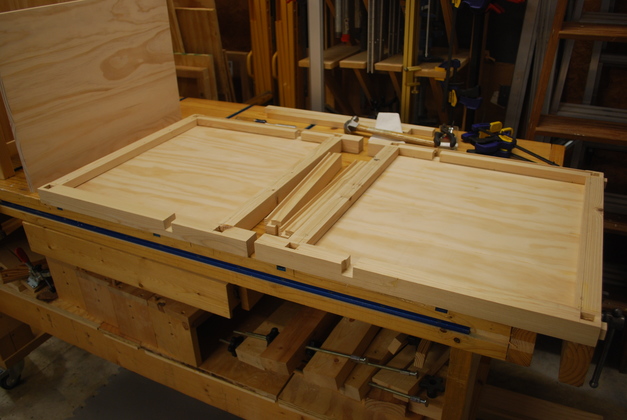
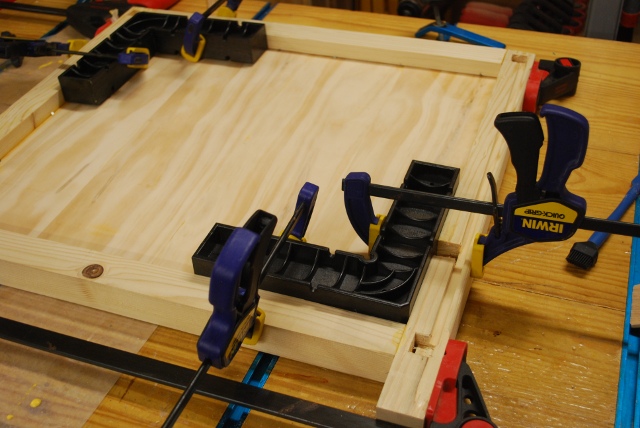
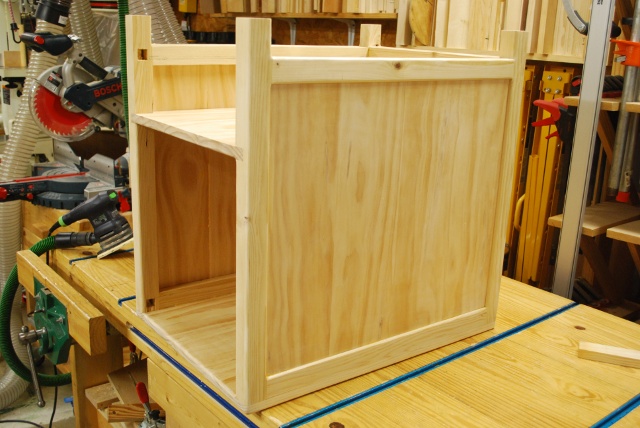
Rear horizontal pieces test fit before gluing.
|
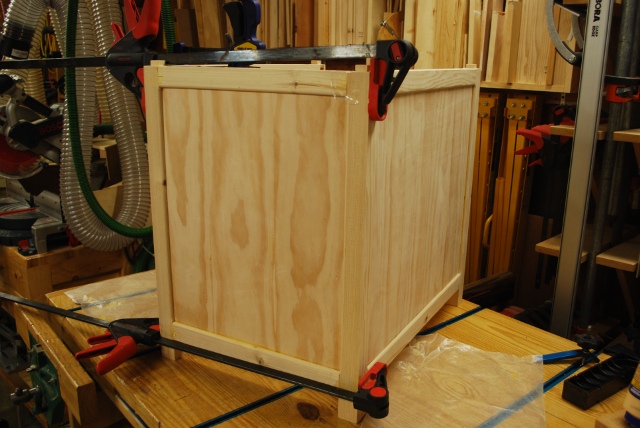
|
Rear panel and frame pieces in the glue clamps.
|
Shelf
|
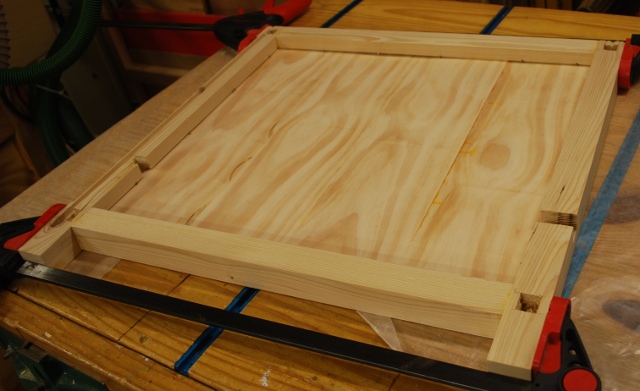
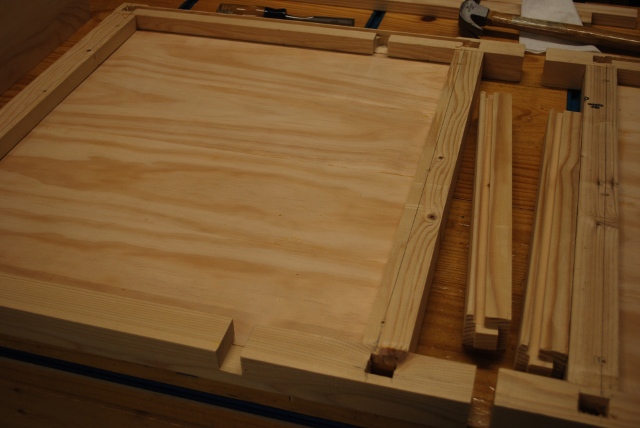
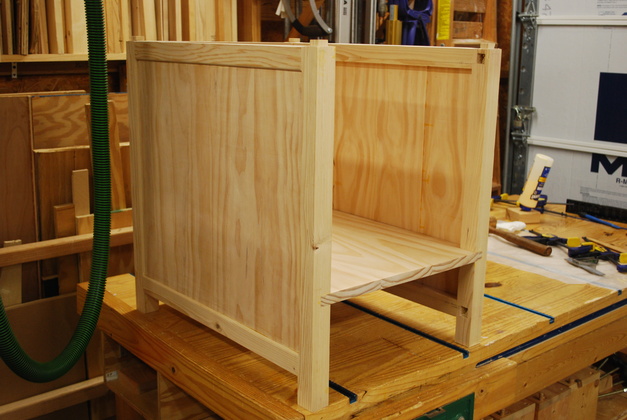
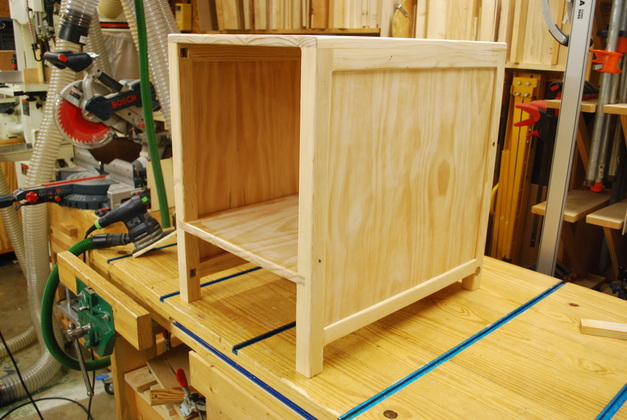
Left side assembled showing slots for the shelf.
|
|
|
Left and right side laid out for shelf fitting.
|
|
|
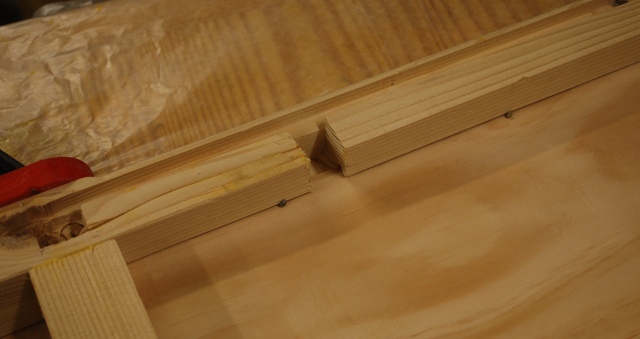
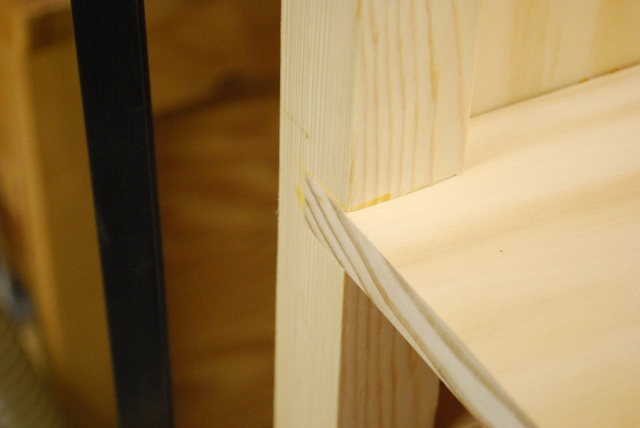
Shelf standing in it's slots.
The slots are milled exactly 4/5" wide and the shelf is also 3/4" thick so I have to lightly sand the slots so the shelf will slide in easily while it's being glued in.
|
|
Other side of shelf tes fit.
|
|
|
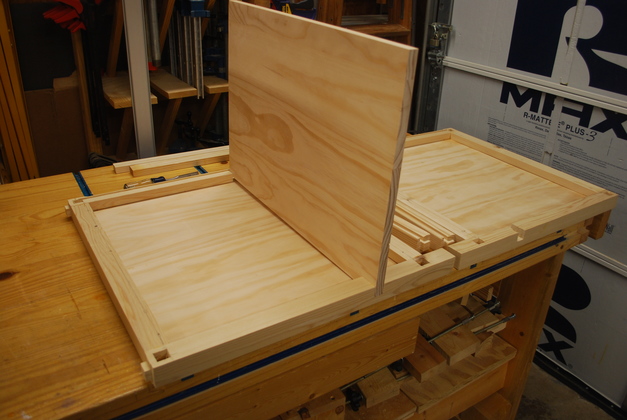
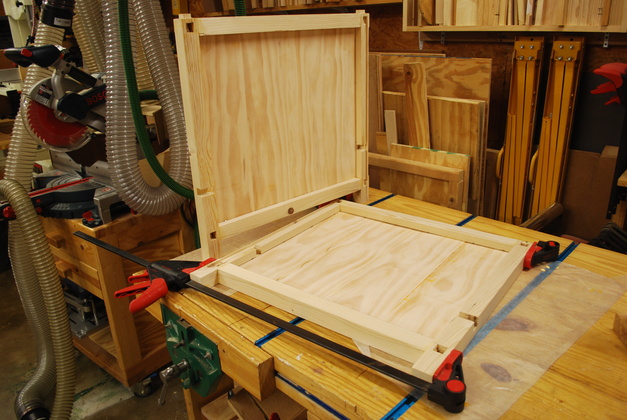
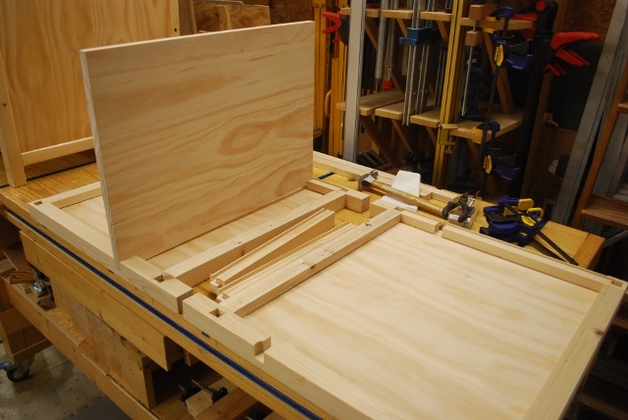
Shelf and back panel test fit.
|
|
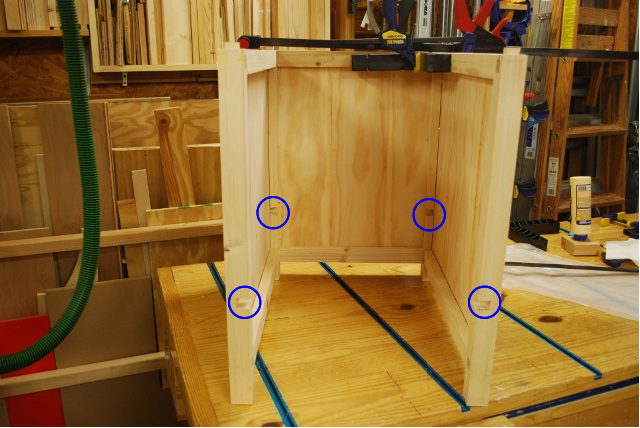
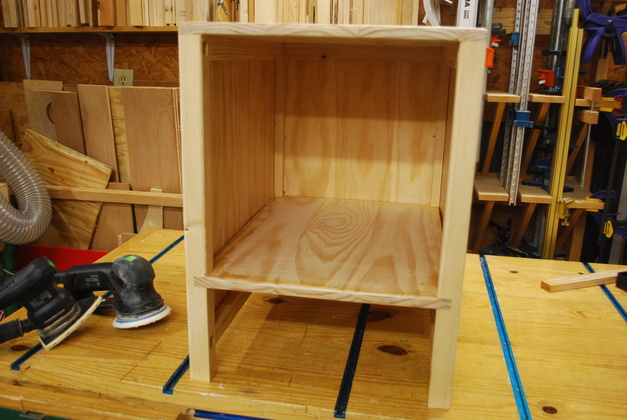
Front view of cabinet.
The blue circles indicate the shelf slots.
|
|
Looking down one side of the shelf slots where the shelf will be glued in.
|
|
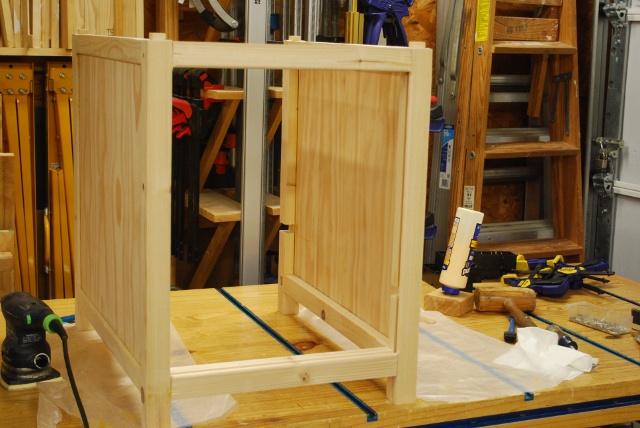
Shelf glued and in the clamps.
|
|
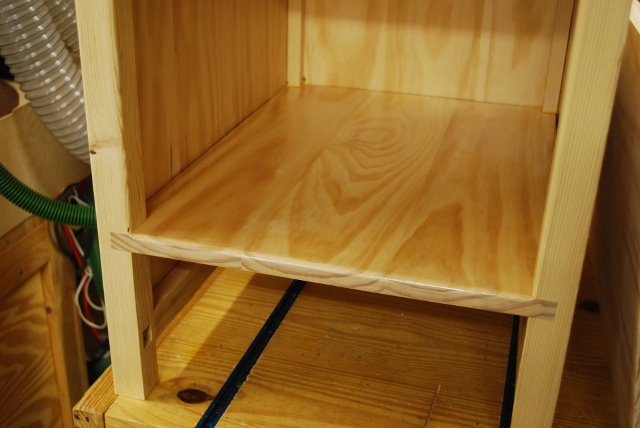
Front edge of shelf should be flush with the frame.
|
|
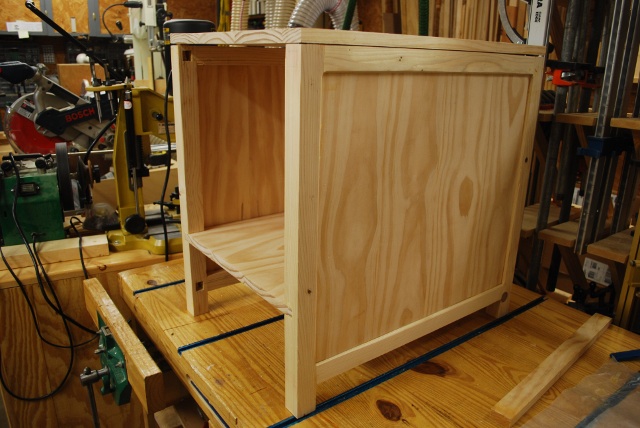
Shelf installed.
|
Top Install
|
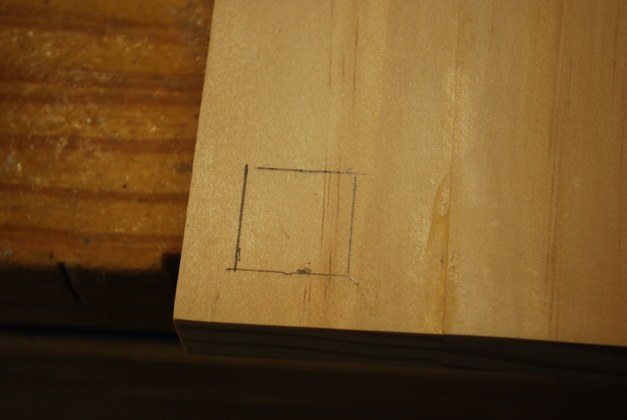
Mortise hole marked in underside of top.
|
|
Preparing to drill mortises in underside corners of table top.
|
|
Closer pic of mortiser lined up and ready to drill.
|
|
Lined up both ways.
|
|
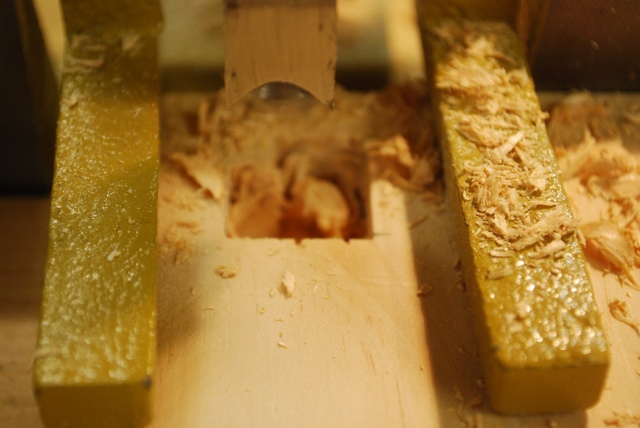
Mortise drilled.
Depth of mortise is critical, the top is 3/4" thick and the tenons are 3/8" high.
The mortise must not penetrate the top so they are slightly over 3/8" deep.
After drilling the mortise must be cleaned out, I use a chisel and cut down each side then scrape out the bottom.
|
|
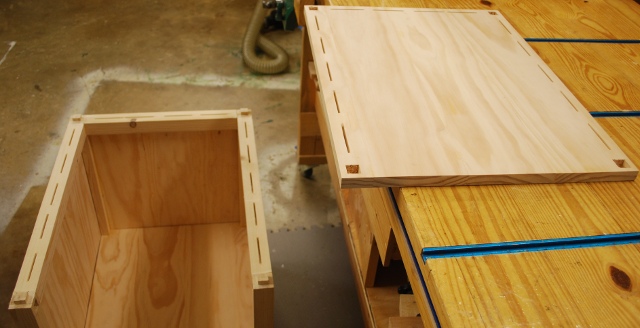
Top test fit, checking alignment of tenons to mortises.
Now I'll mark and cut biscuit slots in underside of table top and top of table frame.
|
|
Frame and underside of top both with matching biscuit slots, tenons, and mortises.
|
|
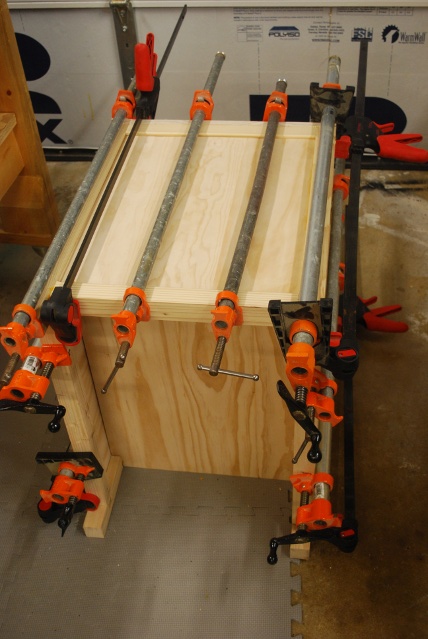
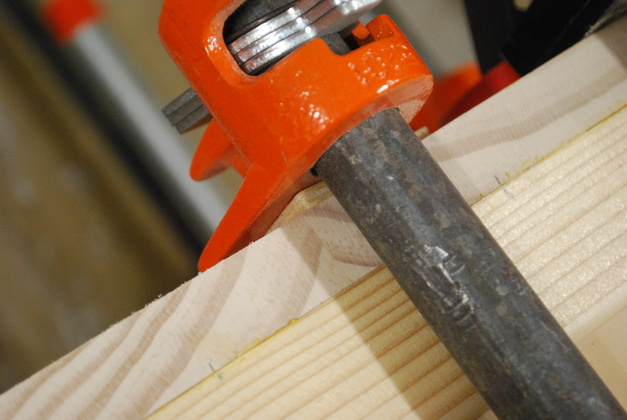
This is what it looks like when I glue it on, a forrest of long glue clamps.
|
|
When I clamp something like a top that needs to be smooth I use small wooden pads under the clamps, you can see one here.
This pad is 3/16" hardwood plywood.
You can also see the little "tick" marks, on either side of the clamp, I use for cutting biscuit slots.
|
|
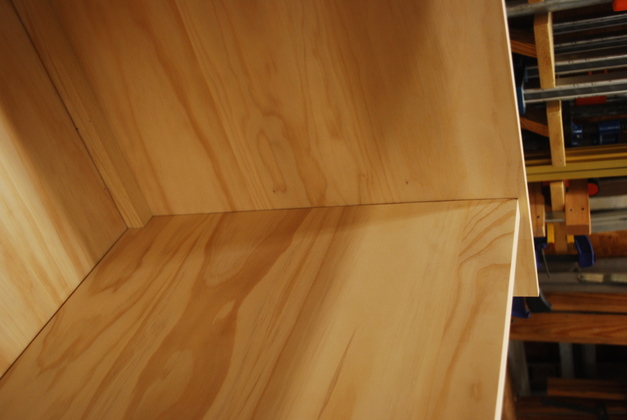
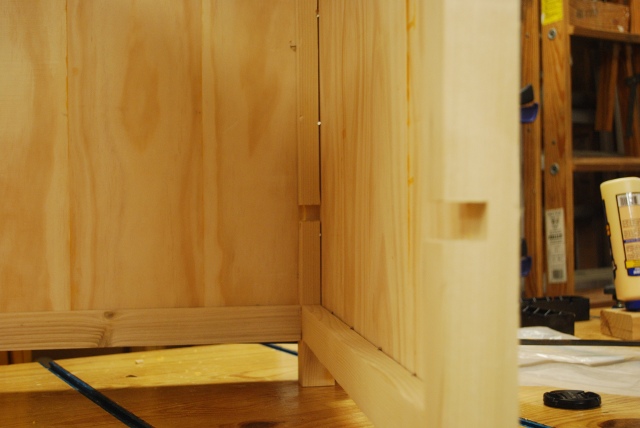
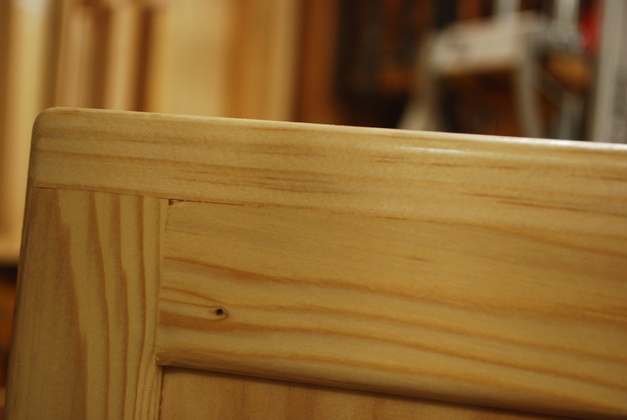
Top to frame join after table top glued (and corners rounded).
|
|
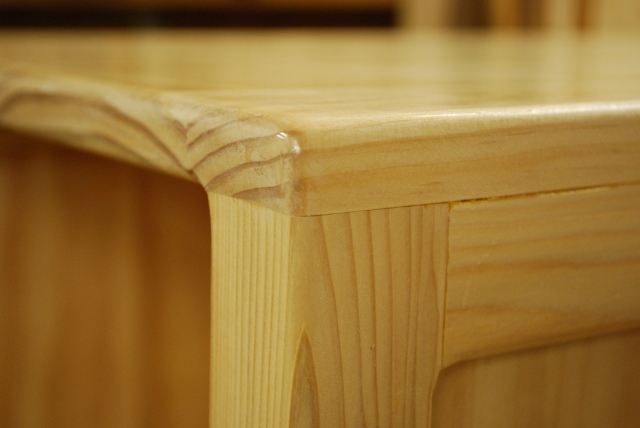
Front corner table top to frame join.
|
Finishing
|
The top, glued on and sanded.
|
|
Painting the underside of top and shelf.
|
|
Painting sides.
|
|
Painting top of table top and shelf.
|
Drawers
|
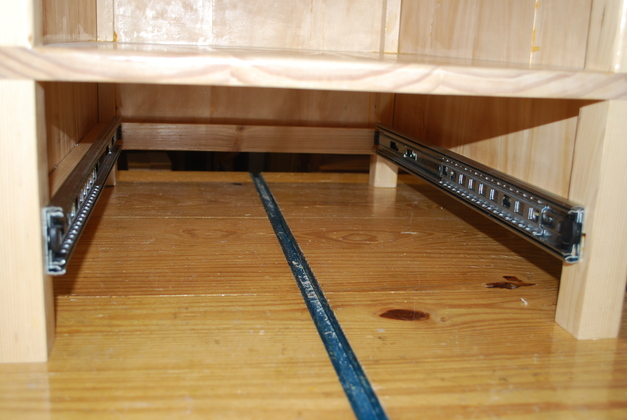
Marks and holes for top drawer slide as you can see I'm doing this before the cabinet is completely assembled.
This cabinet slide center line is 1-1/8" from the top, the drawer will have it's slide center line 1" from the top so I'll have 1/8" clearance at the top of the drawer, I know its a lot but the frame and drawer is pine so I leave a little extra clearance.
Note vertical line 1/2" from front edge, it marks position of front end of cabinet slide.
For more on how I make drawers please see Drawer Page or Drawer Construction Page.
|
|
Marks and holes for bottom drawer slide.
This cabinet slide center line is 1" from the bottom of the horizontal frame piece, the drawer's slide center line will be 1" from the drawer bottom, making the drawer bottom flush with the bottom of the horizontal frame piece.
There is a 1/8" space at the top below the shelf.
|
|
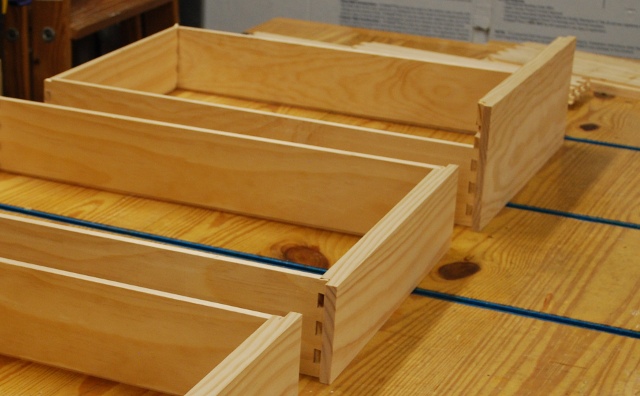
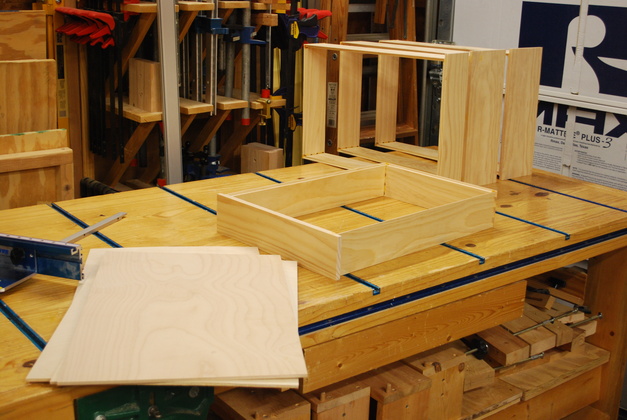
Drawer frames being test fit.
Note, in the back, the lower (5") drawer's sides are lower than the front.
Also, these are recessed drawes, the front is wider than the sides in order to conceal the slides which isn't shown well here.
|
|
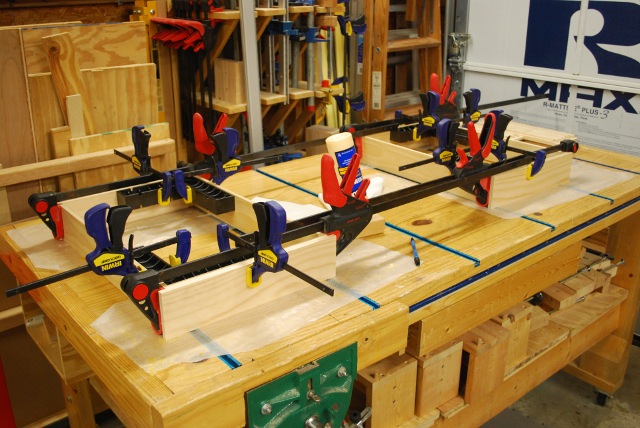
First two drawer frames in glue clamps.
|
|
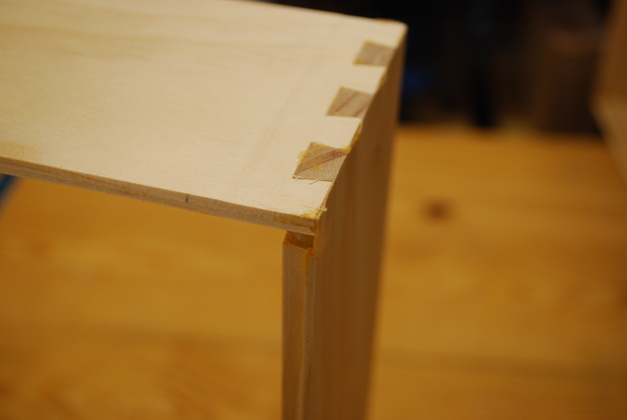
Dove tailed back corner.
|
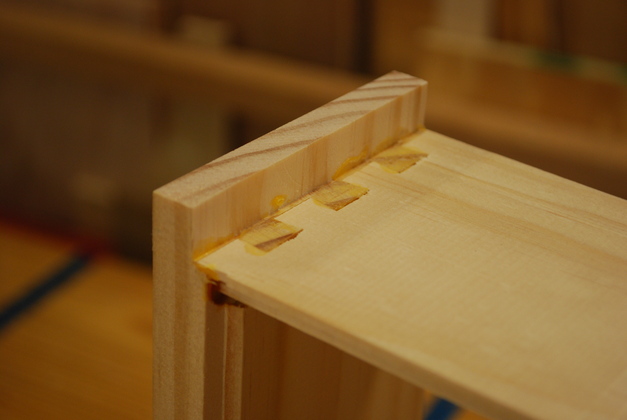
|
Dove tailed drawer front, note the overhang (a rabbet) to conceal slides.
You can also see the rabbet for the bottom in the drawer front.
|

|
Upper and lower drawer frames glued.
|
|
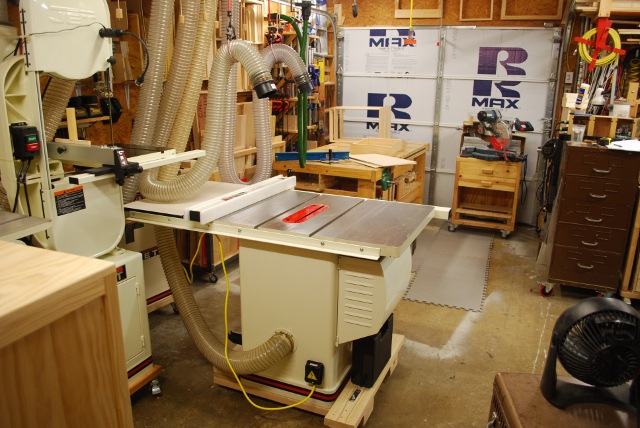
Table saw set up to rip drawer bottoms.
|
|
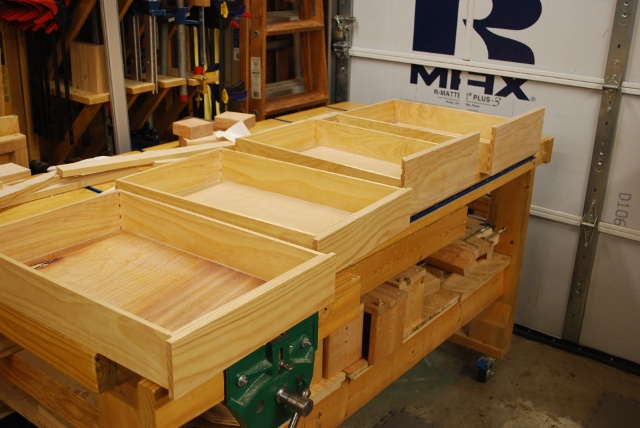
Drawer bottoms cut out in foreground.
|
|
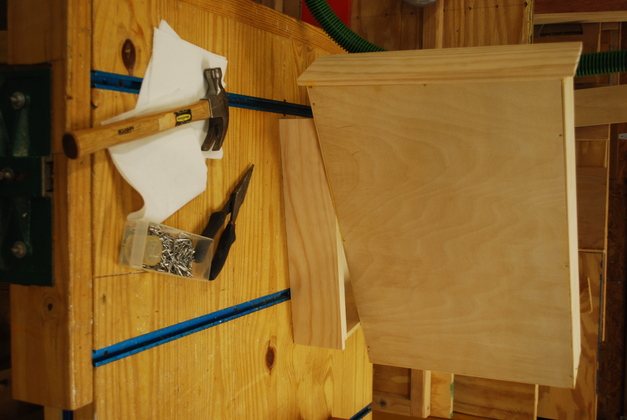
Drawer with bottom glued in.
I use wire nails to hold the bottom in until the glue dries, notice the hammer and nails in plastic drawer.
|
|
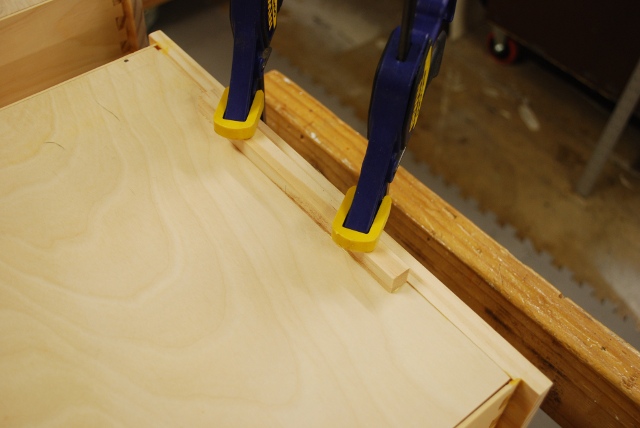
Finger grip bars being glued on.
|
|
Bottoms being painted.
|
|
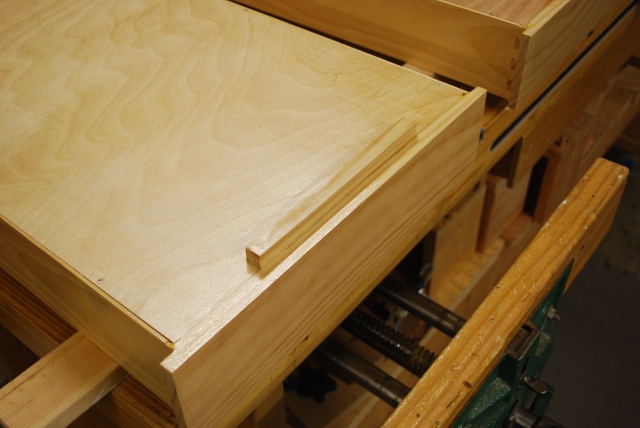
1/2" by 1/2" finger grip bar after bottom is painted.
|
|
Drawer inside being painted.
|
|
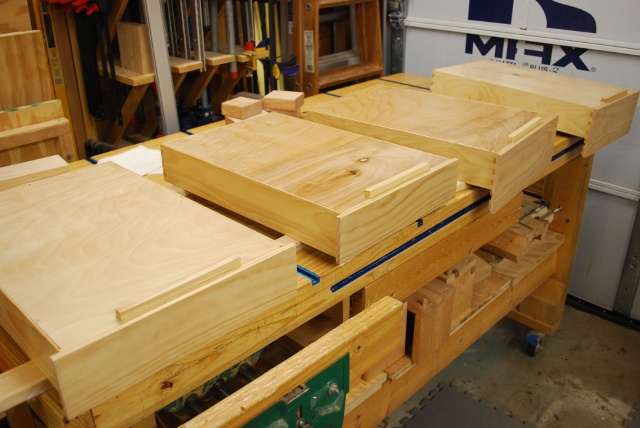
Drawer fronts beginning to take on a shine.
|
|
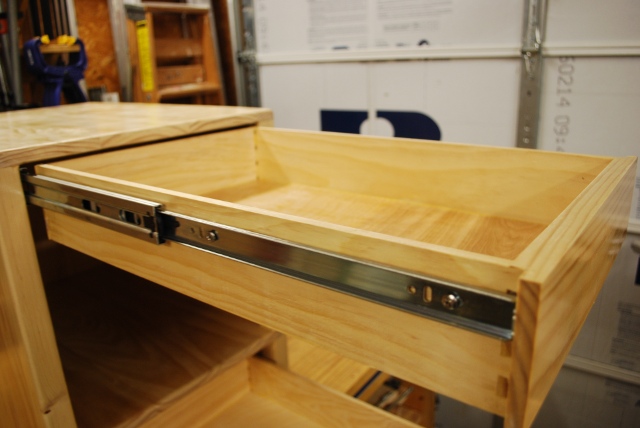
Slides mounted in frame.
|
|
Drawers in cabinet.
|
|
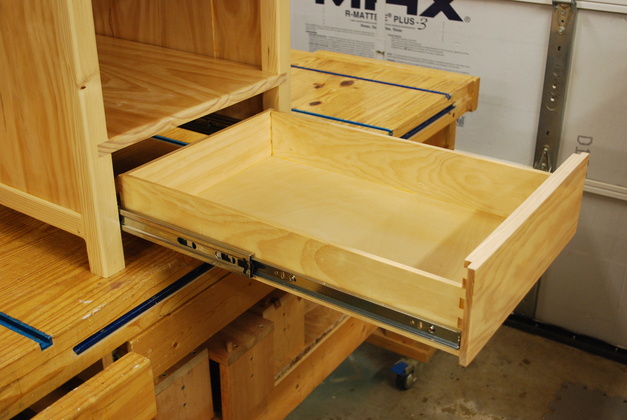
Bottom drawer extended.
|
|
Top drawer extended.
|
|
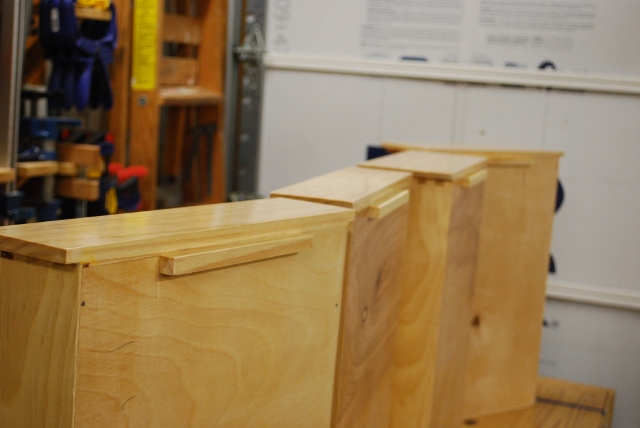
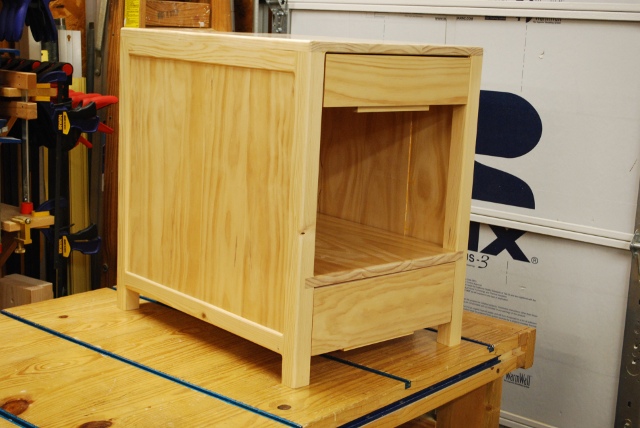
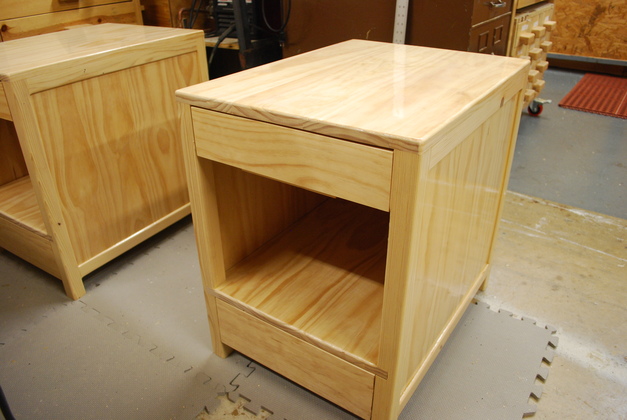
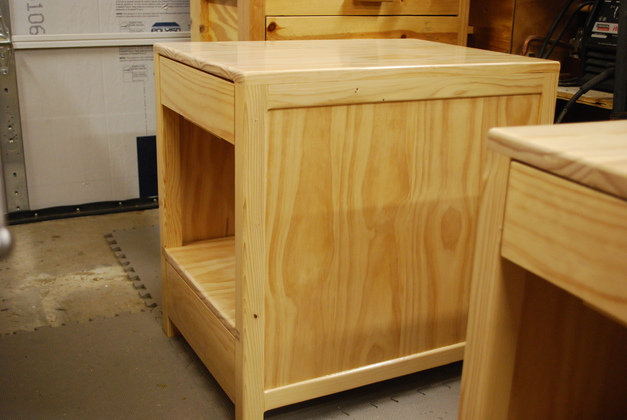
Finished with drawers installed and top painted.
|
|
Side of other end table.
|
Finished
|
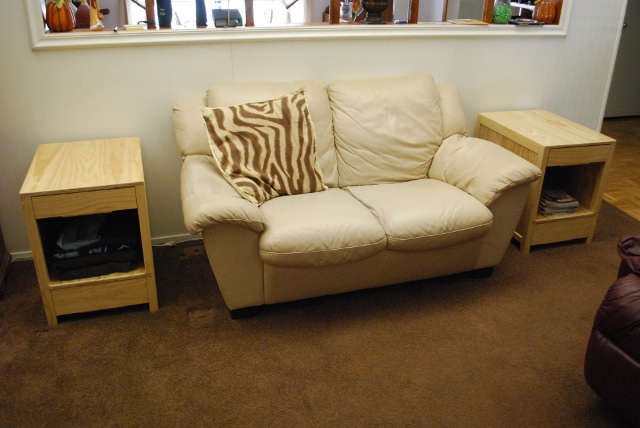
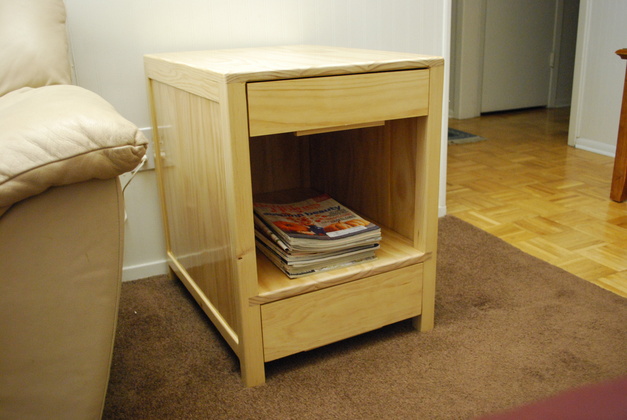
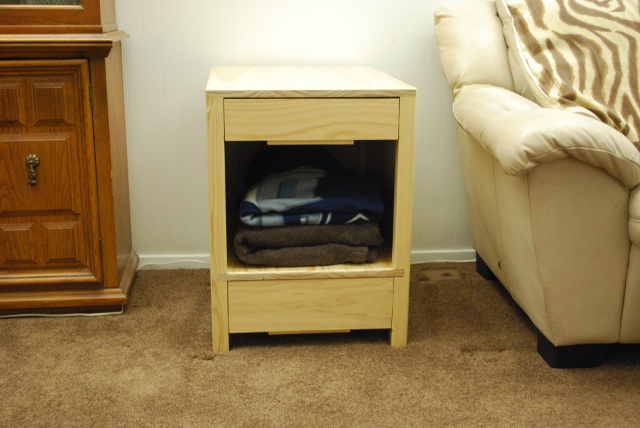
In the Den.
|
|
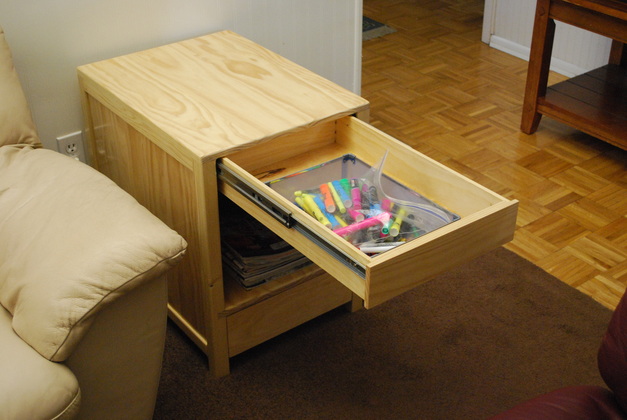
Already getting stuff in drawer.
|
|
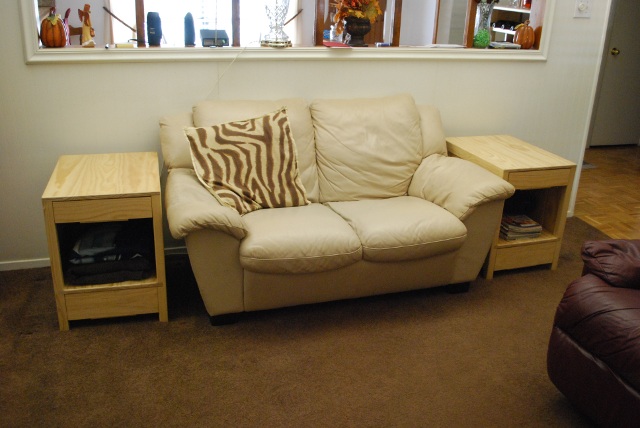
Left side of love seat.
|
|
Love seat with both end tables.
|
|
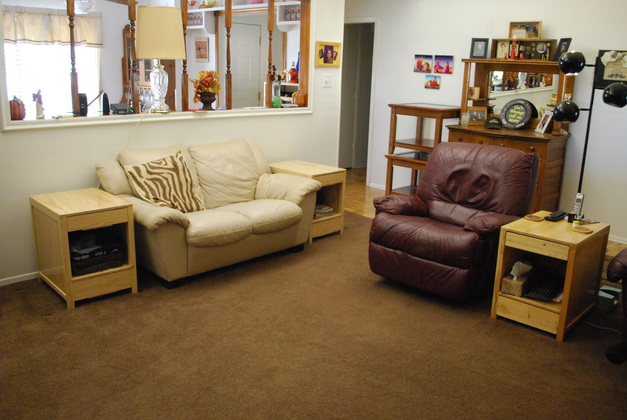
All three end tables in our den.
|