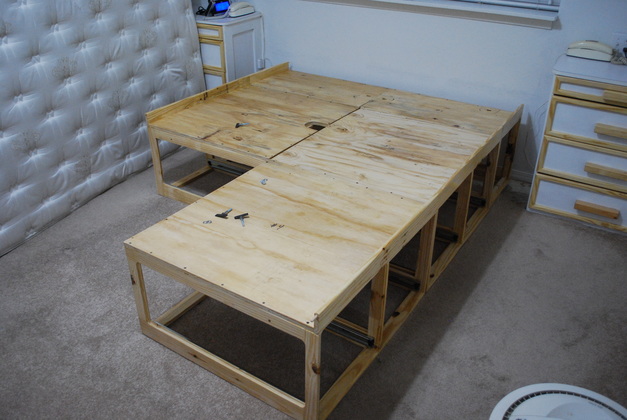
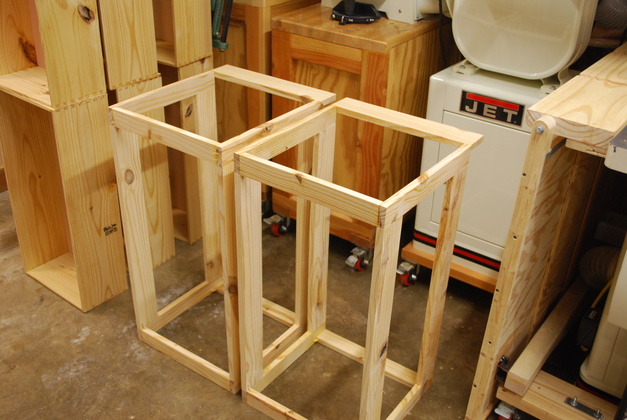
Boxes being assembled |
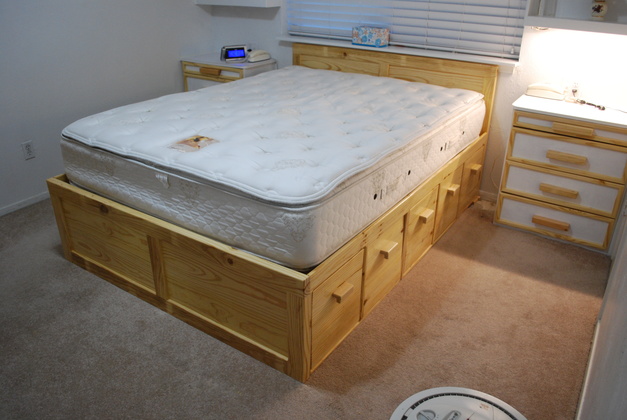
Bed assembled with mattress |

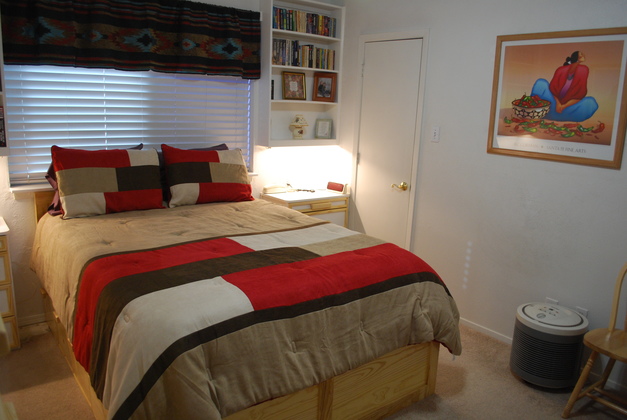
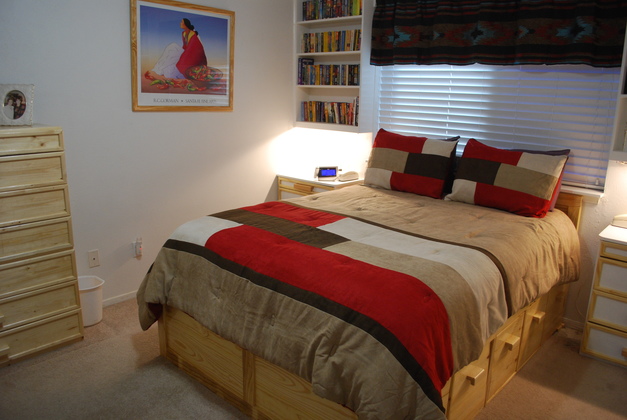
Final, with new floor |
|
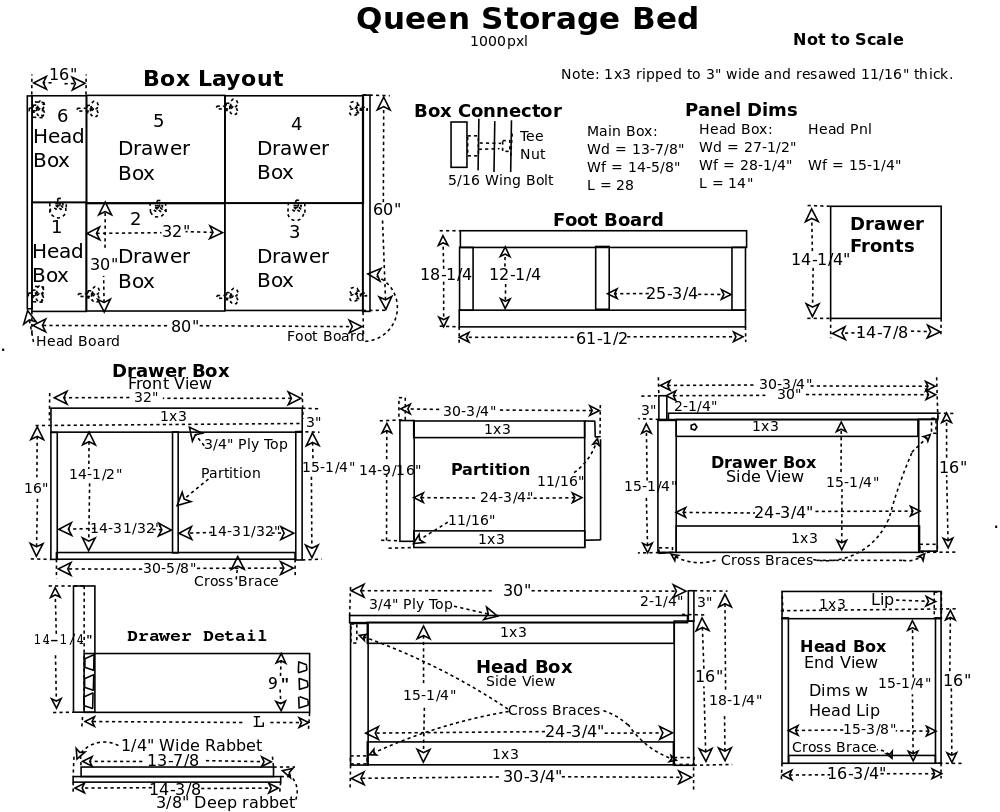
Queen Storage Bed
| ||
|
Boxes being assembled |
Bed assembled with mattress |
Final, with new floor |
|
Queen Storage Bed
| ||
| Construction Info | Lumber Prep | Main Box | Drawers |
| Head Box | Wing Bolts | Head & Foot Boards | Mattress size chart |
| Cindy's King Bed | Box Number Legend | Susan's Queen Bed |
We had talked for a while about building a new platform bed frame to increase storage in the master bed room. I recently saw some storage bed ideas on WoodWorking for Mere Mortals, April Wilkerson, and Darbin Orvar and this is the result.
This will be a platform bed, similar to Linn's (Darbin Orvar) idea consisting of boxes containing drawers. There will be four main, double drawer boxes and two 16" wide head boxes without drawers, at the head (night stands prohibit drawers). This platform bed will have a lip around the edge, 2-1/4" above the plywood platform, so the mattress doesn't move around. Since the bed has night stands at the head on either side, a drawer would not work so the head will have boxes with doors made to match the drawer fronts. However, if you didn't have night stands in the way, you could make 2 extra drawers and place them in the head boxes. These head box doors will have magnetic latches so some access to their interior storage will be possible. The overall bed frame will be 61-1/2" wide, including a/div/4" frame on each side. The head and foot board will probably be like those of the twin bed I made for the corner bed room. The frame will be made from yellow pine 2x8s, ripped and resawed into 1x2 and 1x3s, with a/div/4" plywood platform. I call these 1x2s and 1x3s, they are a full 2" wide (or/div") and 11/16" thick. The frame will be glued pine with biscuits or dowels at the joints. I've used mostly 1x2, 11/16 thick (resawed 2x8) ripped to exactly 2", with 1x3 as the bottom frame members (a little more room for mounting slides). Since the frame is yellow pine it will be very strong. I know yellow pine likes to warp etc. but when I've glued it into frames with bracing it tends to stay straight.
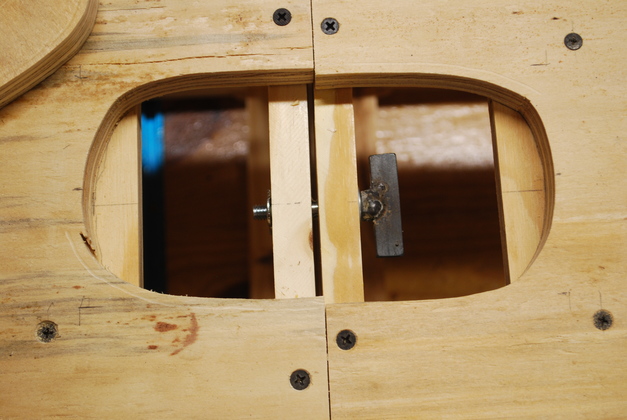
Each box will be bolted to it's neighbors using 5/16" wing bolts so they may be separated for moving. The wing bolts will be made from hex bolts with cross bar "wings" welded to the head. Tee nuts on the ajoining box will receive the wing bolts. In the case of the head and foot boards, the tee nut will be glued into a counterbore on the back side of the head or foot board so it doesn't show from the outside. Or I could use threadded inserts. In cases where access to a wing bolt is difficult, I will cut a small lift-out trap door above each of the wing bolts. After cutting them out I decided these little doors look like dog house doors.
The second queen storage bed is for Susan who wants to use her existing head and foot board. These are decorative wrought iron that allows the bed, covers, etc to be seen through the bars, so I will have to have a foot board to hide the drawer box sides. The wroght iron head board stands out from the bed several inches so an additional "lip" will be needed at the head to prevent the mattress from moving off the platform toward the head.
After building and installing 3 of these (2 queen size and 1 king size), I have come to really appreciate the modular idea of construction. With Cindy's king size and Susan's queen size beds, I had to carry the pieces quite a distance (Susan's was upstairs), to install them. I could use a 2 wheeler to move each box to it's destination and that was great!

|
All frame lumber (2x8s) on the work bench (except the 3/4" plywood). . |

|
Cutting 2x8s down to length. |

|
Most main box frame pieces cut to length. The 2x8s in the foreground are for the head boxes. |

|
My sizing operation. The workbench is the same height as the saw's table. |

|
Ripping 2x8s into 2x3s and 2x2s. Note the outfeed table. |

|
Complete set of all the main box rips, stacked on the table saw's outfeed table, ready to mark and resaw. |

|
All the head box lumber rips done. |

|
Marking 2x to be resawn into 1xs. |

|
Closer look at resaw mark. |

|
Resawing a 2x into a 1x. Thats a Jet JWBS-14DXPRO saw and a TimberWolf 3/4" 3TPI blade. The resaw guide is one I built. |

|
Closer look at the resawing. Note sawing right down the center the two halves should be equal thickness. |

|
All the main box lumber resawn into 1x2s and 1x3s. After resawing I ran each piece across the planer to clean up the bandsaw marks leaving 11/16" thick lumber instead of/div/4" (1X pieces). |

|
Main box sets for box sides the other two are in the glue clamps. Note the biscuit slots. |

|
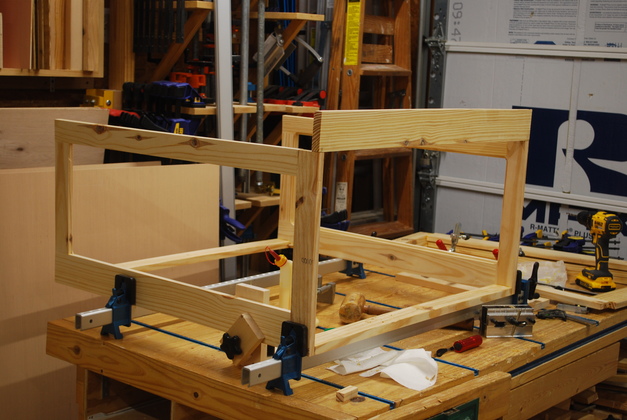
First main box side glue set is gluing and clamping the top and bottom bars to the vertical at the back end of the box (right side in pic). Both joints have biscuits inisde. The clamp on the left isn't holding any pressure, the left board is just a spacer so the top and bottom are parallel. Note the ClampIt on the right holding the frame square. The back vertical butts against the top and bottom bars, while in the second set the horizontal bars butt against the front vertical. |

|
Second main box glue set. This early design, required two "glue sets" per box side. The new design only requires 1 glue set per side . Box bottom 1x3 is at the near side of the pic. The bottoms are 1x3 to give a little more space to attach the drawer slides. |

|
Second glue set clamps the front vertical to the top and bottom bars (left side in pic). Again, both joints have biscuits inside. |

|
Some of the main box sides after gluing. The lumber on the table saw is for the two head boxes. |

|
A partition's front joint being glued. It also has a biscuit inside the joint. |
|
Main box bottom cross braces and sides being glued. The top front bar isn't being glued it is doweled into the front of the top verticals, so it holding the frame sides spaced correctly. |
|
|
5/16" dowel holes in top cross brace and front vert. I used dowels instead of biscuits in these joints, a biscuit wouldn't fit. The front cross brace will also be glued to the 3/4" plywood top. |

|
Dowel holes in front bottom cross brace and partition vertical. |

|
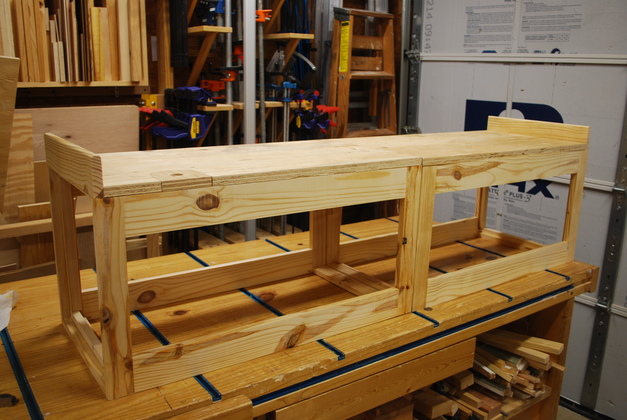
Partition and top cross brace being glued. On this frist box I haven't added the back cross brace and the back vertical on the partition yet. Note all the bottom bars are 1x3s to give more room for the drawer slides. The top front cross brace (lip) appears precarious but will be stabilized when the/div/4" plywood top is glued on. This upper front cross brace forms a lip which holds the mattress on the bed. |

|
Two glued frames in front of stacked drawers. I haven't put on the top 3/4" ply yet, I'll put in the drawer slides and drill the connector holes first. |

|
Back stiffener panel being glued into main box. |

|
Back stiffeners glued into all 4 main boxes. |

|
All 4 main boxes being painted, inside and out. |

|
3/4" plywood main box tops cut out. |
By this time I had realized what a difficult design I had so I changed it to make the box frames easier to build (fewer dowels, glue sets, and easier clamping etc.). I have retrofitted the main and head box drawings and construction info to the new design. The head boxes will be built to the new design.

|
Head box lumber cut to length from a 2x8 and machined. |

|
Head Box tops cut from3/4" plywood leaning on the main box tops. |

|
Slotting the ends of a head box horizontal for biscuits. |

|
Slotting the sides of a head box vertical. |

|
Head box set slotted and ready to glue. |

|
Head box side in the glue clamps.
Note the Rockler ClampIt clamped to the vertical and horizontal holding the whole thing square till the glue sets.
|

|
All 4 head box sides glued, ready to sand. |

|
Gluing a head box together. Note a lot of Rockler ClampIts keeping everything square. |
|
Both head boxes glued. |
|
The two head boxes together with tops. |

|
Gluing in the strips (like door stops) for supporting the head box access panels. |

|
Little closer look at the 3/4" X 3/4" strips being glued at the end of the head boxes. |

|
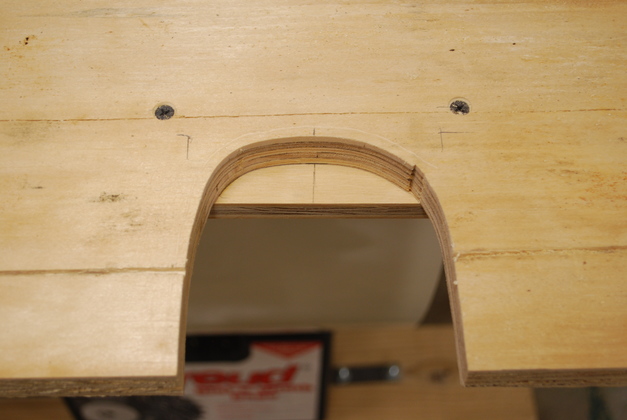
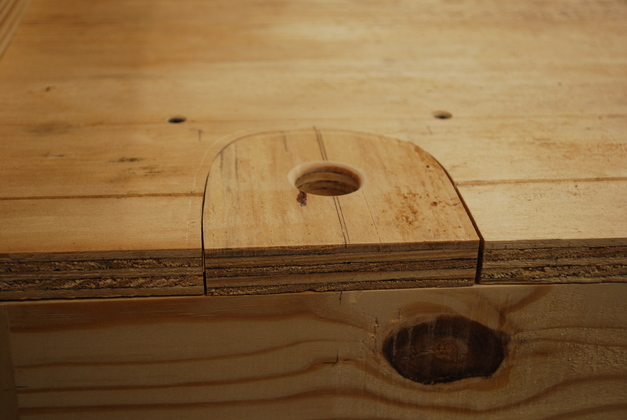
A head box top with the access doors cut. I think they look like dog house doors. |
|
Closer look, you can see the 1/2" plywood across the top edge of the dog house door. Please excuse the lousy jig sawing. |
|
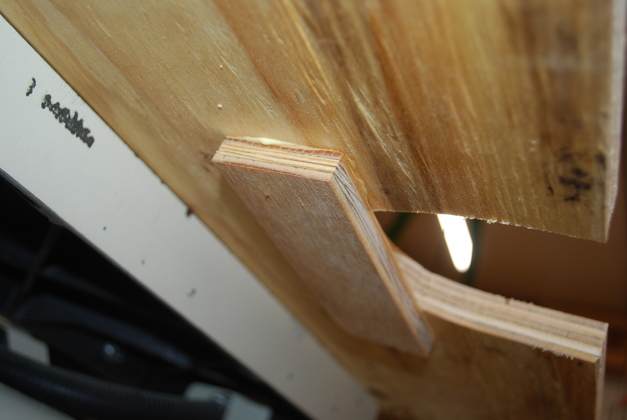
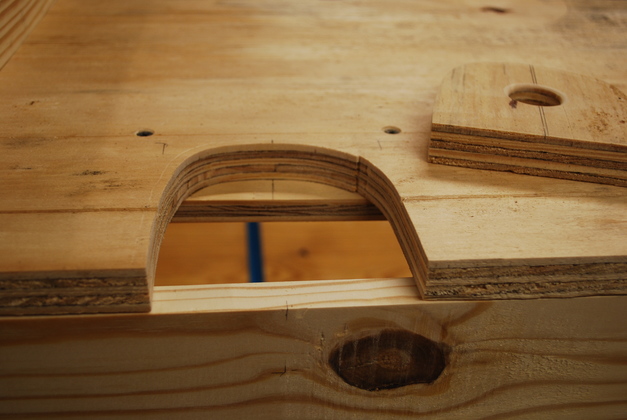
A look from under neath, you can see the1/2" ply glued/screwed. This supports the top of the dog house door. |

|
Access door with a 1" finger hole to lift it by. |
|
One of the dog house doors in position. |
|
Here you can see the glued in 1/2" plywood and frame piece which the door top rests on. The lower end of the door rests on the box frame as you can see. You are looking at the side the headboard will be attached to. |

|
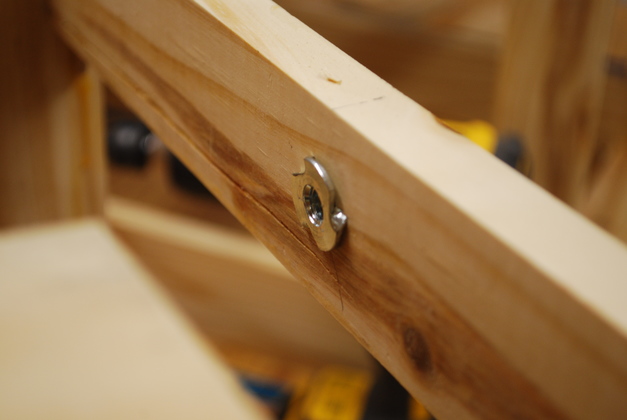
Headboard wing bolt in place. |

|
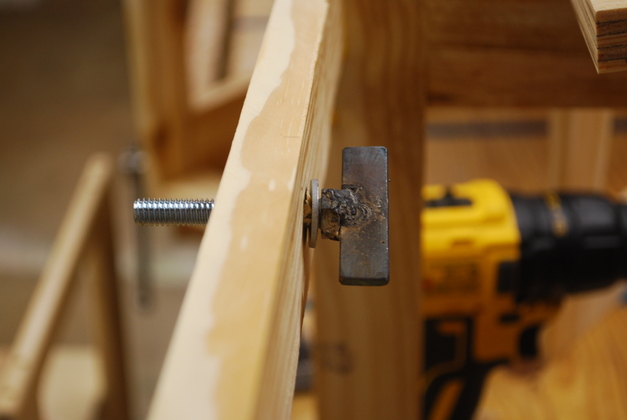
Headboard Wing bolt protruding, this is where the threadded insert will be imbedded into the headboard. |
|
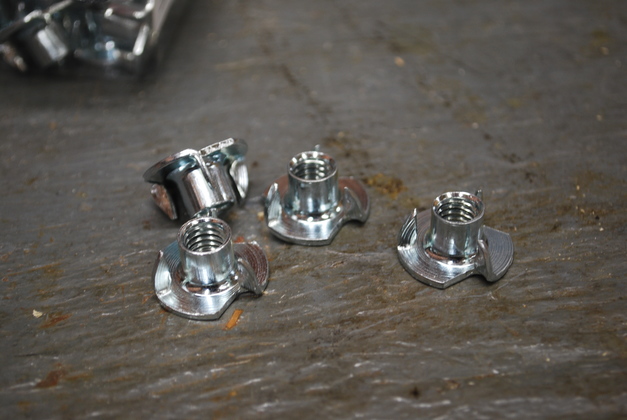
Tee nut for joining adjacent head boxes. |
|
Wing bolt for joining adjacent boxes. |
|
The joint between the two head boxes. |

|
Same joint with dog house (access) doors installed. |

|
5/16 hex bolts, 2" and 1" long. The short bolts will hold the head and foot board to the boxes, the longer bolts hold the boxes to each other. |
|
5/16" tee nuts. Most of these will be mounted in/div/8" holes int the boxes to receive the wing bolts. Four will be glued into 7/8" X/div/8" deep counter bores in the back side of the head and foot boards. |

|
1/2" bar stock, clamped in the vise, marked in 2" long segments with 1" center ticks. You can see my cutoff tool laying on the metal working bench under the bar stock. |

|
One of the "wings" cut to length. I ended up sawing these off with a sawzall then filing the ends. |
|
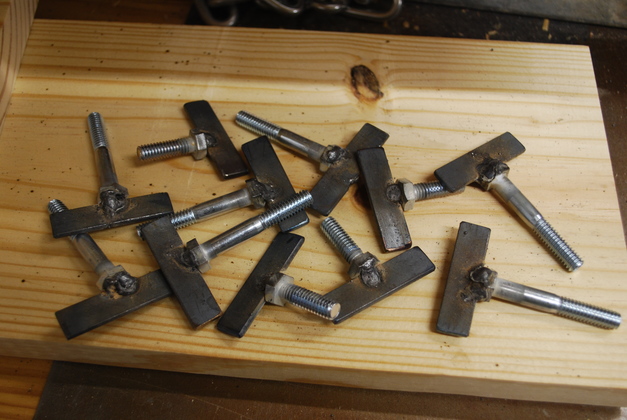
Home made wing bolts. These allow the bed's 6 boxes to be separated for moving. The shorter bolts (1") will hold the head/foot boards on, the longer (2") hold adjacent boxes together. |
|
|
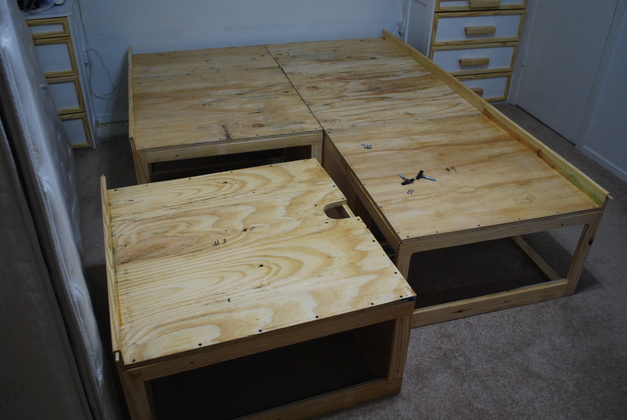
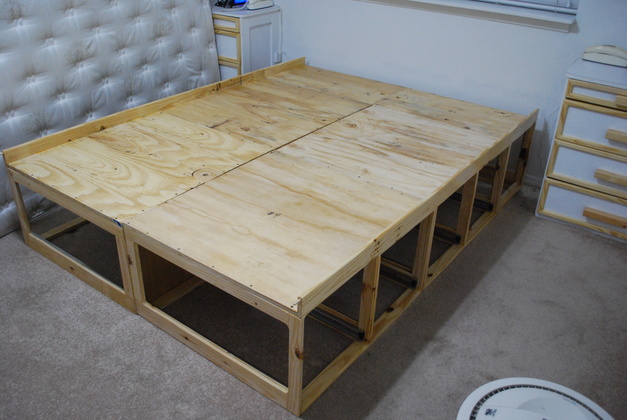
Great big Leggos being put together. |
|
The box/div about to be joined to the other 5 boxes. You can see the open dog door and a couple of wing bolts on box 4. |
|
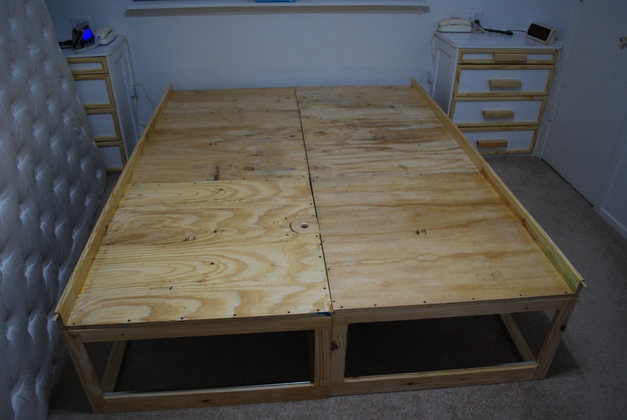
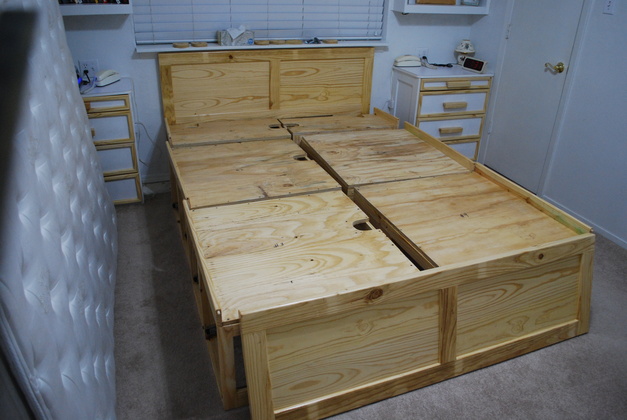
All the pieces together, of course the head and foot boards aren't ready yet. Note the side lips are nice and straight (because of the oak dowels). |
|
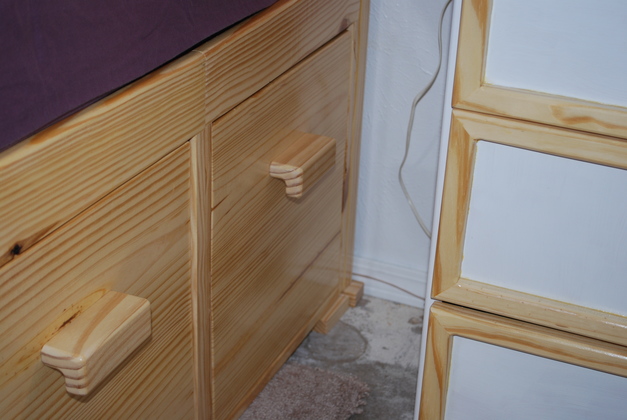
You can see where the drawers will go in this side. The head box won't have a drawer just a matching removable door because of the night stands. |
|
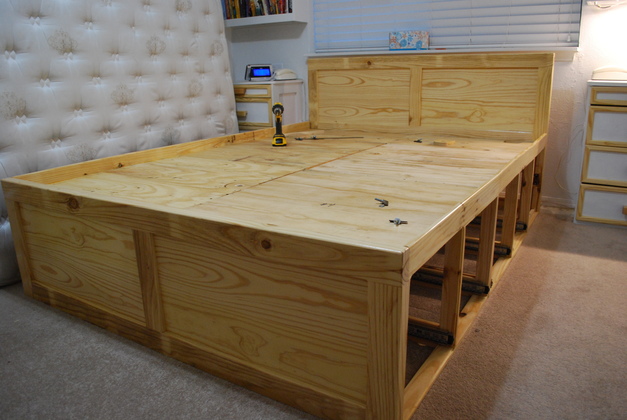
Head and footboards attached. These are attached with the same wing bolts as the boxes, I just didn't take a pic. |
|
This shows how the boxes are asssembled along with the head and foot boards. |
|
|
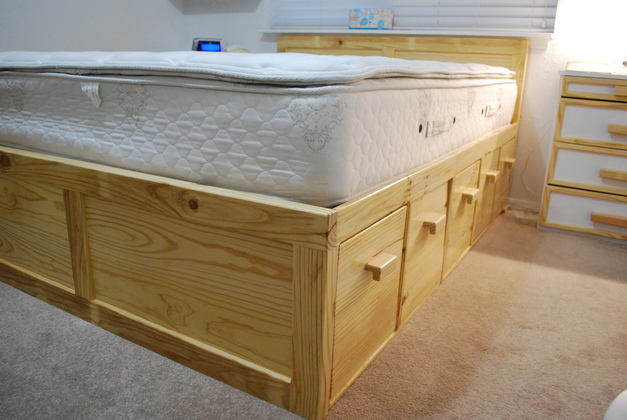
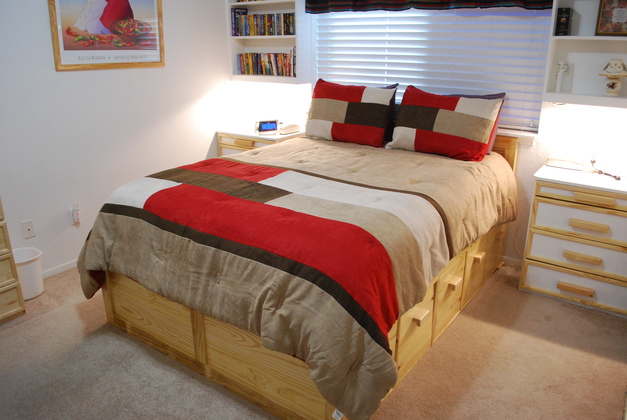
Headboard, footboard, and drawers installed. Note the night stands from the master bed room remod. |
|
Closer pic of footboard and drawers. |
|
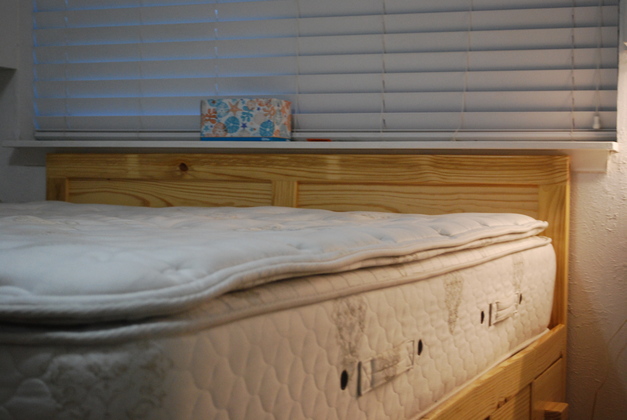
Note the headboard fits neatly under the window sill. Normally I would build a little taller headboard, like Susan's. |
|
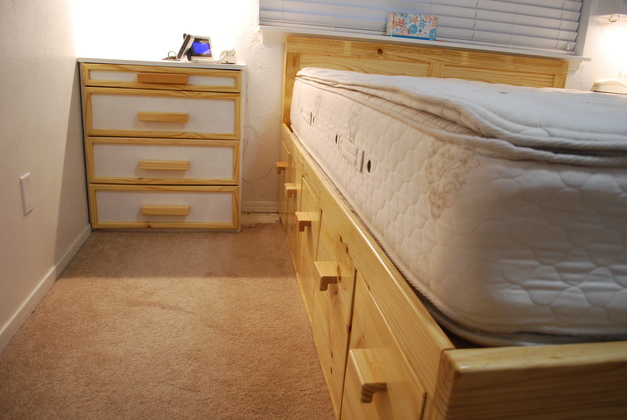
Left side. Also another shot of the night stand. |
|
Left corner. |

|
Couple of the drawers open. |
|
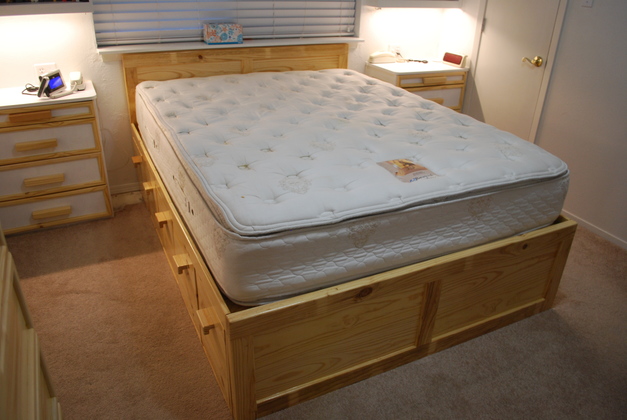
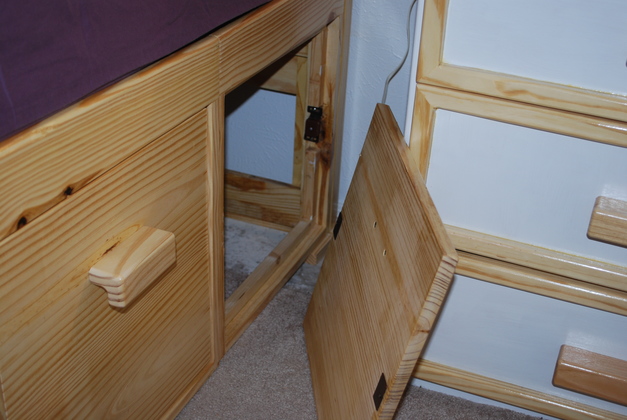
The head door in place. Note the floor, this is where the old lean-against built in storage at the head of the bed was removed. Then, we still had carpet in the master BR, we have since had the carpet replaced with laminate. Pics of old Lean Against built in storage. |
|
Head door removed, you can stuff pillows or blankets in here. |
|
Made up. |
|
A little wider angle. |
|
From the other quarter. |

|
|