| | |
|
With Folding Door Removed
|  After With Sliders Closed
|
|
|
Linen Closet Remodel
|
02/10/15: Finished.
05/26/14: Page Origin.
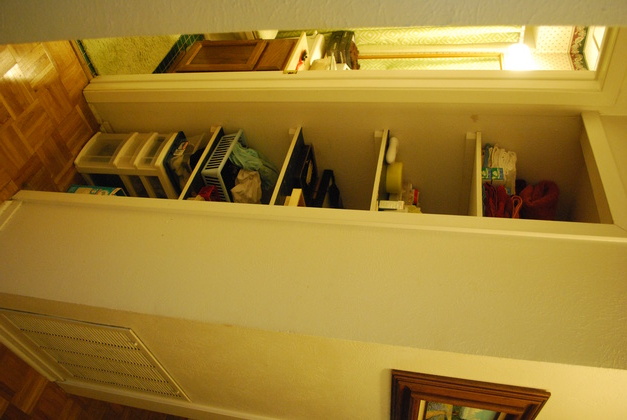
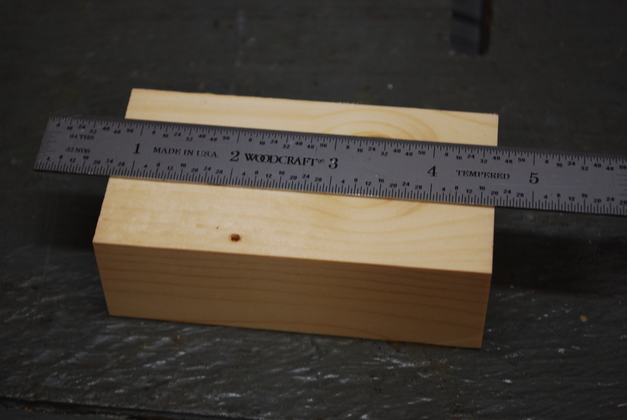
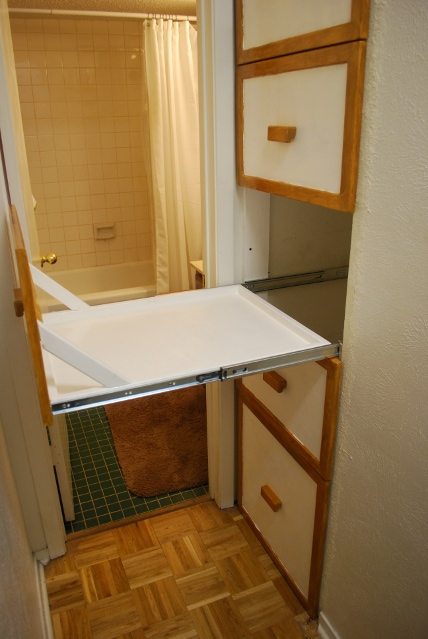
We have a very small linen closet in the short hall to the front bath.
The linen closet had 2 small folding doors which, when open, were always in the way and blocked the hall and the hall light from illuminating in the closet.
The short hall to the bath (where the linen closet is) is very narrow which made accessing the closet difficult.
Between the original pic (above) and the finished pics, I replaced the hall light fixture with a dual T5-13 fluorescent fixture, we use 4000K bulbs, so everything is whiter.
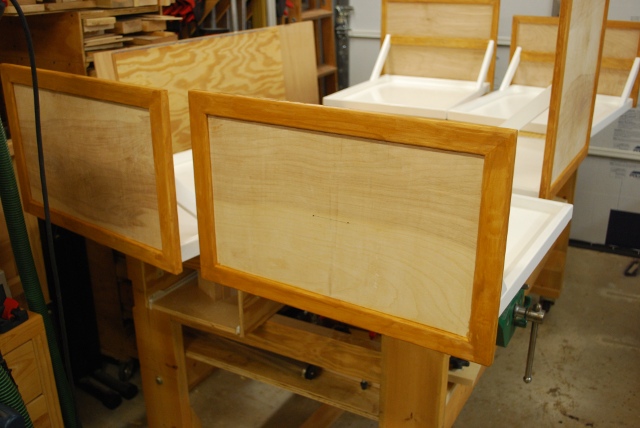
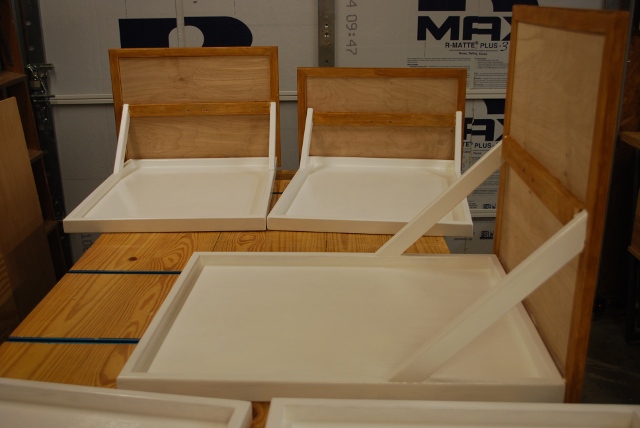
This is a Sliding Shelf Project
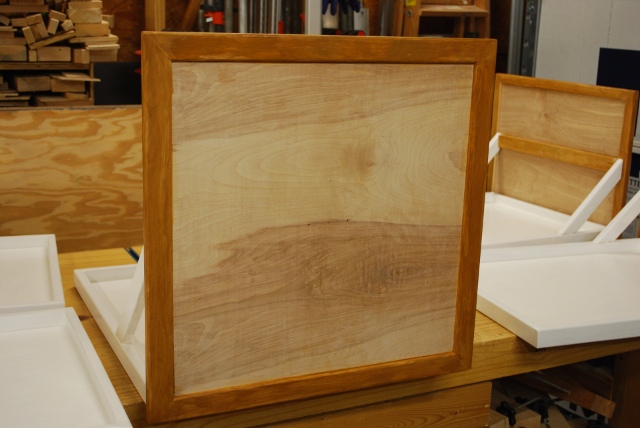
I replaced the shelves and door with sliding shelves with front panels.
Each shelf will have a drawer front that fills the area above it up to the next shelf front and is wider than the shelf to hide the slides and part of the closet frame.
Drawer fronts will be offset to the right so the left side clears the bathroom door facing, but still hides the slides and overlaps the closet edge on the right.
The drawer fronts will have a mitered frame like a picture frame, with a flat inset panel, you could call this mitered frame flat panel insert.
Drawer fronts will have a horizontal, vertically centered stiffener and a 45° diagonal brace from each end of the stiffener down to the frame.
They should look a little like Betty's Closet drawer fronts (face frame flat panel insert).
New Feature, a Rolling Tray
One new feature, a sliding tray above the sliding shelf.
I added a track above one of the sliders with a tray, on rollers.
It allows access to the entire sliding shelf with some smaller items in the tray, like Betty's jewelry.
Link to Sliding Shelves Page with construction info.
Click on Pic for dimensions only.
Houses aren't built by cabinet makers!
Every time I put sliders or drawers in closets I have a lot of things to consider, this one is a little more worrysome.
|
|
|
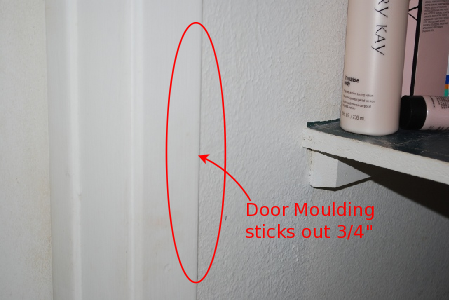
The shelves will have to clear the bathroom door moulding on their left side.
|
|
The right hand closet wall isn't square or plumb and is framed with 2x2s not 2x4s.
|
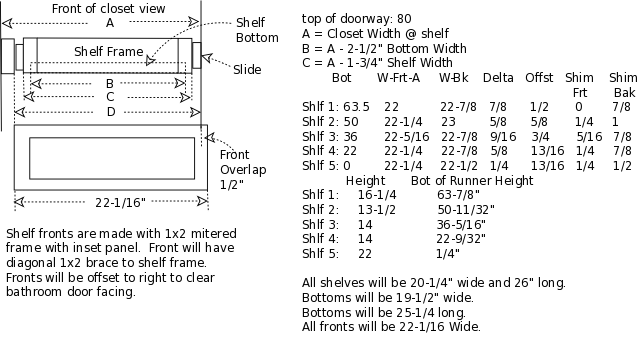
In cases like this I always tablulate the measurement data.
The table above shows the closet width at each shelf position, in front (W-Frt) and back (W-Bk).
I'll make all the shelves to fit in the narrowest shelf position (narrowest is at the front) and shim the other positions to match (shims will be on right hand side only since thats the wall thats badly out of square and plumb).
The front end of the shims is narrower than the back end, so they're all tapered.
The fronts will be wider than the shelves to hide the slides.
|
|
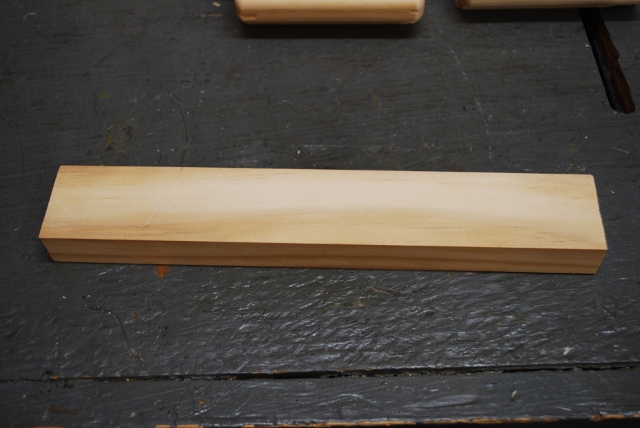
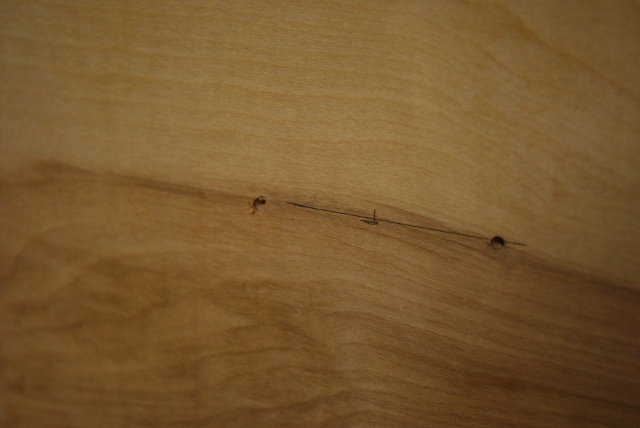
Heres the linen closet with the folding doors off, but before I did anything else.
The area to the right of the closet is the AC return (plenum) back to the attic.
The bathroom door facing sticks out about 3/4" so the sliders will have to clear that on their far side.
Next I will remove the moulding on the right and above the opening, then the shelves and start measuring.
Also note, the light fixture was a "soft white" in this pic, in the other pics I had replaced the hall fixture with a dual T5-13 (and 4100K tubes) fixture so it looks much whiter (and brighter).
After measuring the inside of the closet I found the right hand wall (separating the AC plenum) isn't plumb or square.
The back of the closet is wider than the front and the top shelves are narrower than the bottom (gradually gets wider).
Also the right wall is framed with 2x2 not 2x4 so I have a problem mounting the slides.
Hence, I'll have to drill extra mounting holes very near the back end of the slides.
|
|
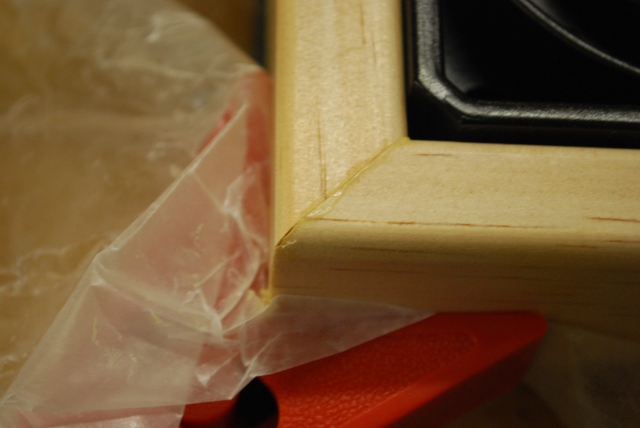
Close up of bathroom door moulding in front of shelf area, slideouts must clear this.
|
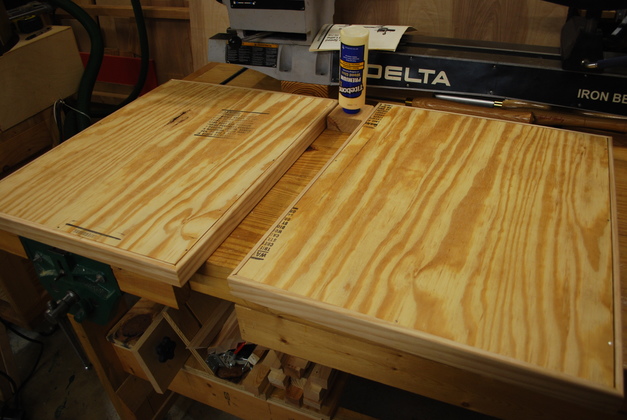
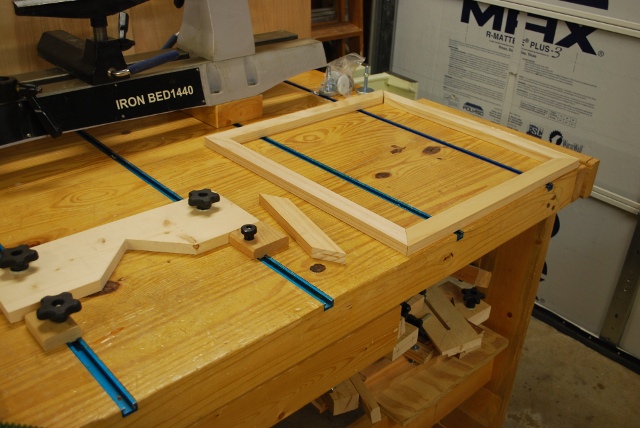
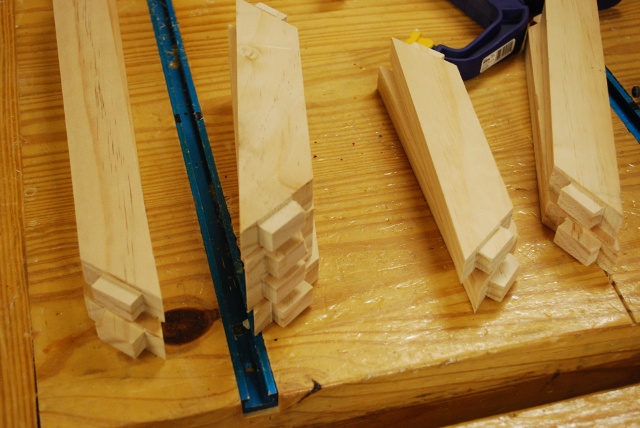
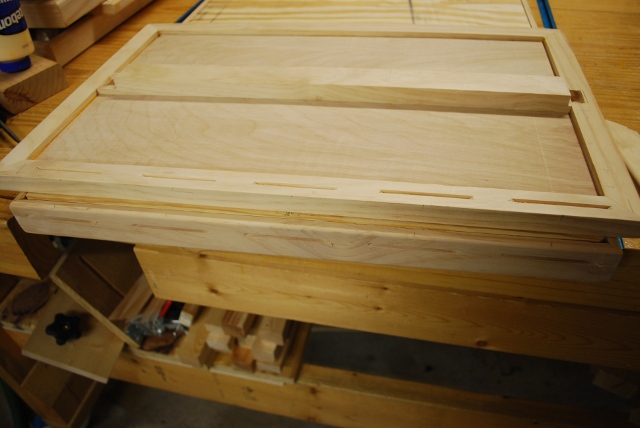
Shelf Frame
|
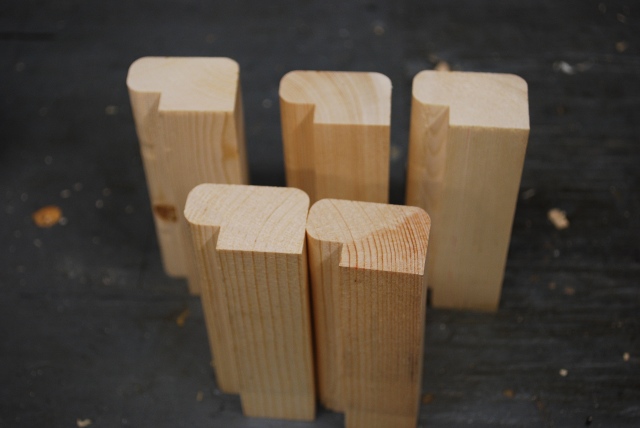
The sliding shelf frames are made just like picture frames with 1/2" plywood instead of a picture and glass.
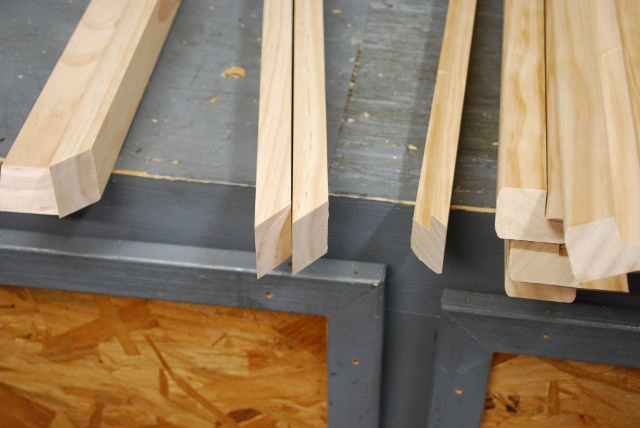
Sliding shelf frame pieces cut out.
4 pieces on the left haven't been rabbeted or had edges rounded yet.
|
|
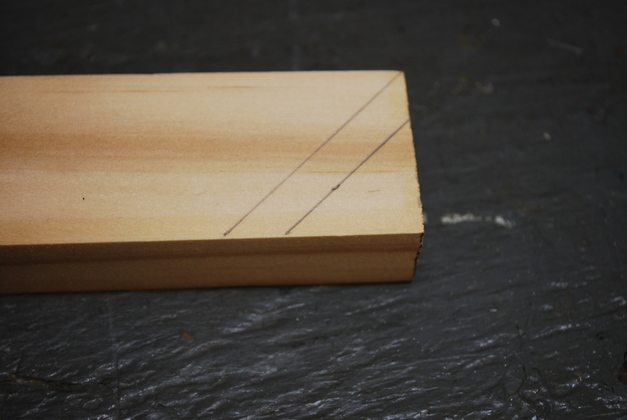
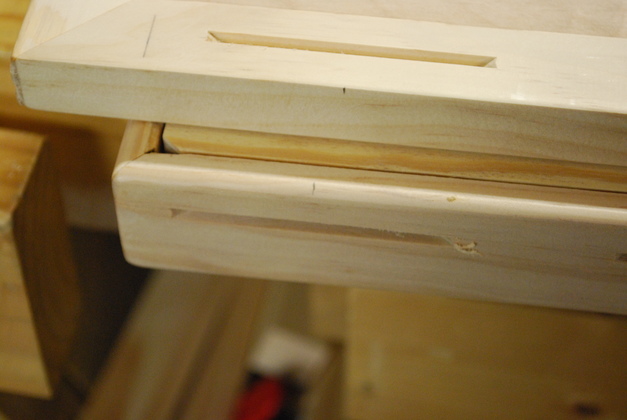
Frame piece marked for slotting at miter edge.
|
|
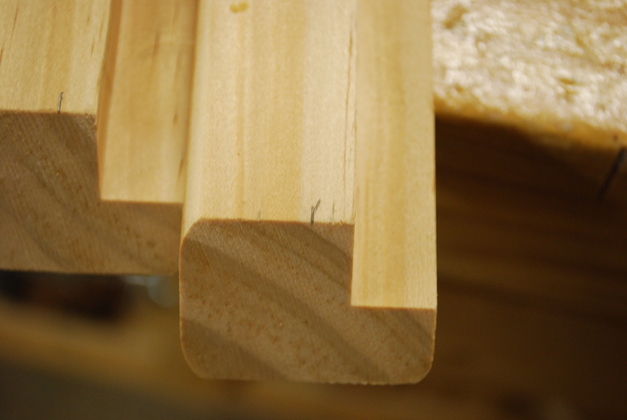
Frame piece with slot cut.
You'll note, that there isn't a lot of slop for the slot placement.
|
|
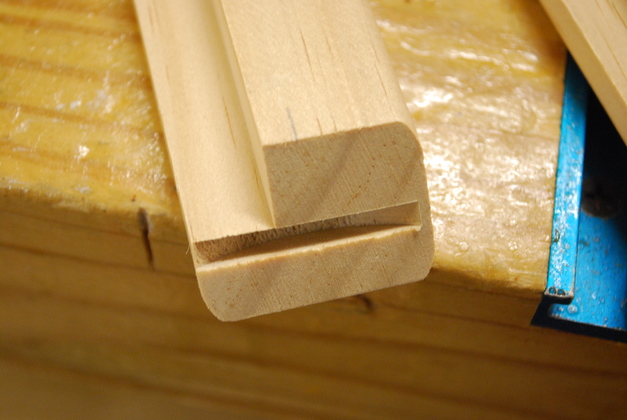
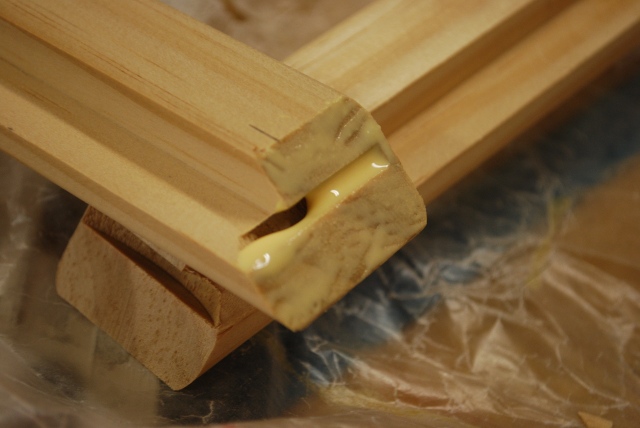
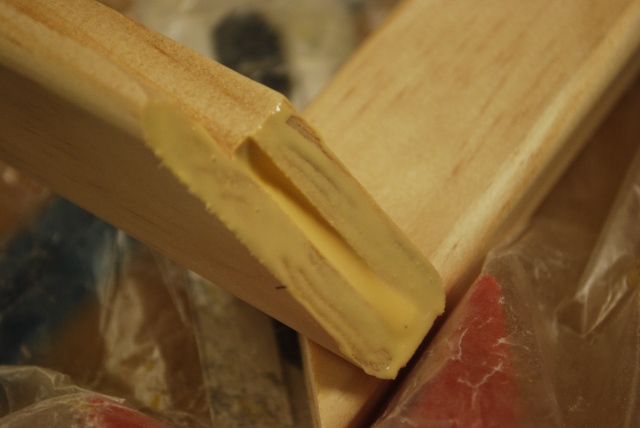
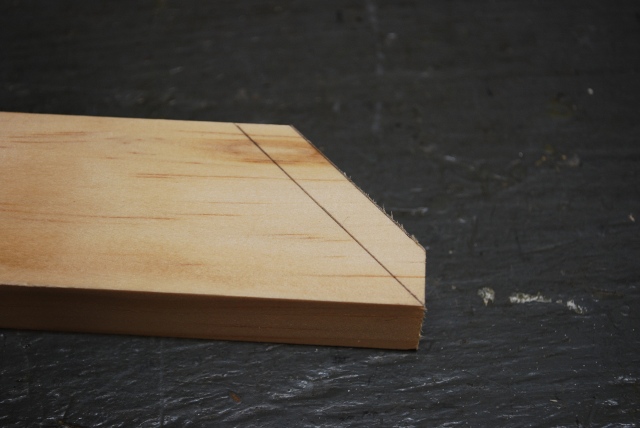
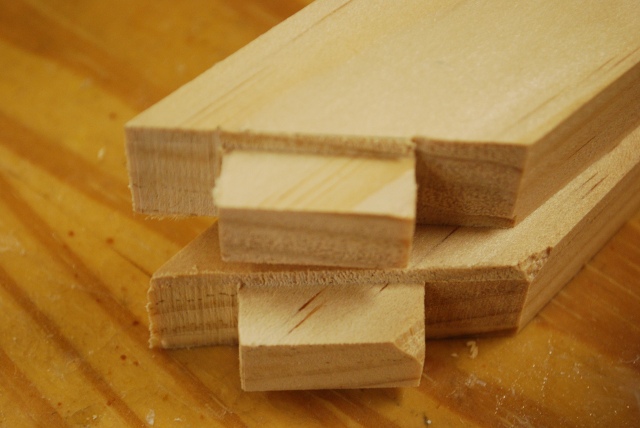
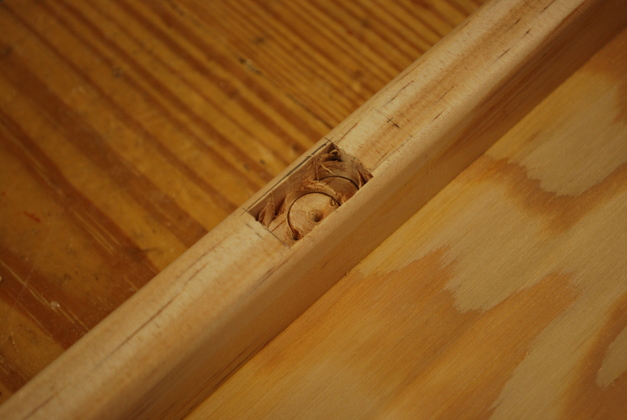
Frame miter slotted ready for type FF biscuit (shown).
Note the frame pieces will be glued together vertically, so the miter is cut long wise.
Also note, the top surface of the biscuit will be flush with the rabbet for the bottom.
Compare to Front miters.
|
|
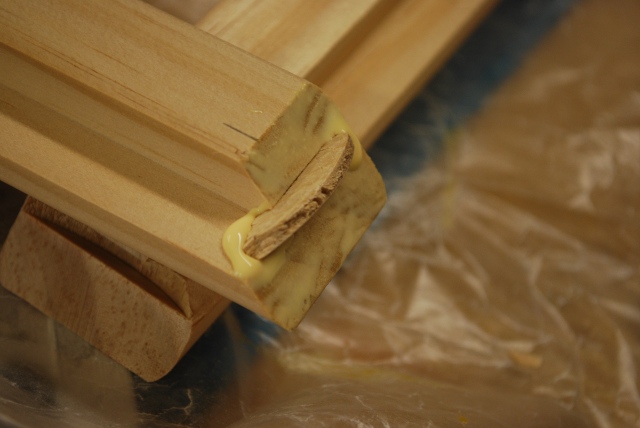
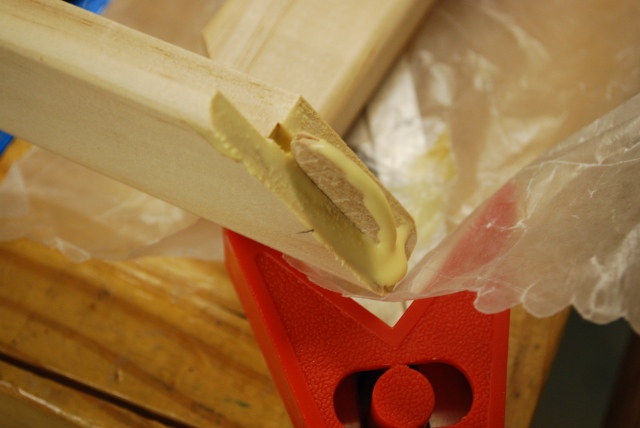
Frame miter, glued ready for biscuit.
|
|
Biscuit inserted.
|
|
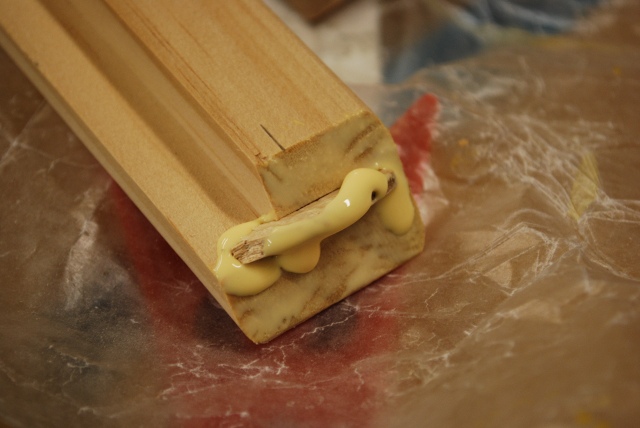
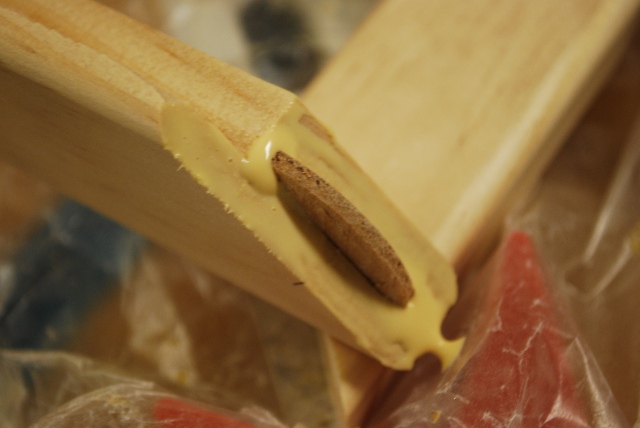
Glue on top of biscuit ready to join into opposite mortise.
|
|
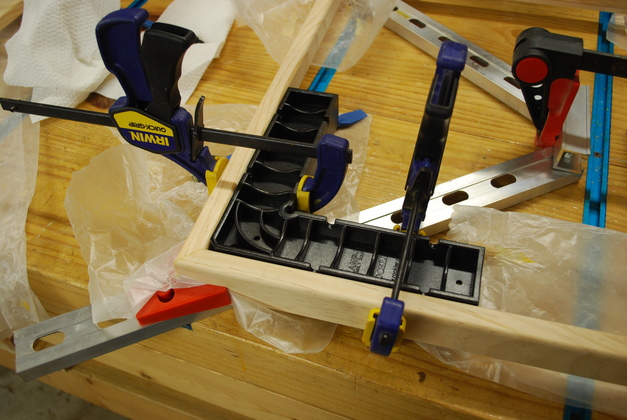
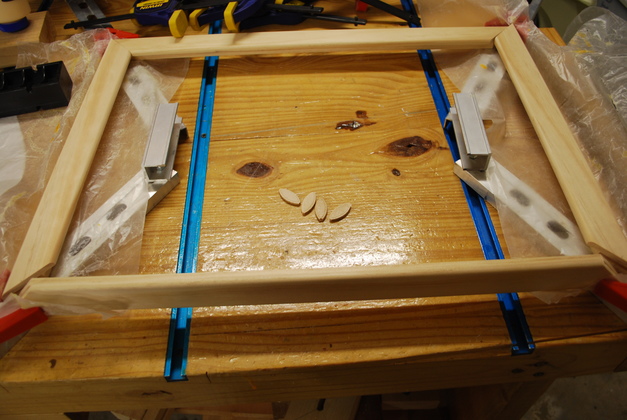
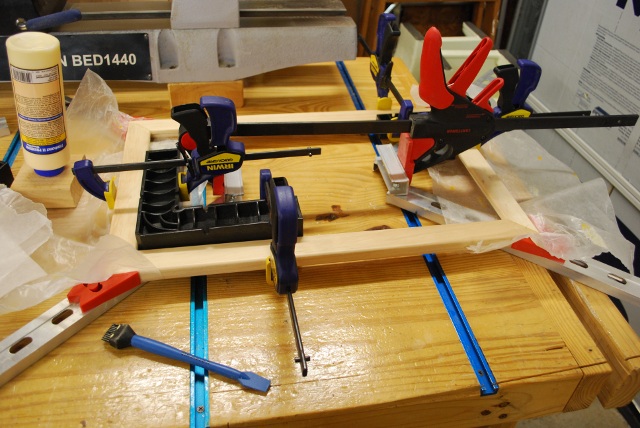
Corner of a slide out shelf frame in glue clamp.
Notice the Clampit keeping the frame perfectly square.
|
|
Close up of frame top corner in glue clamp.
|
|
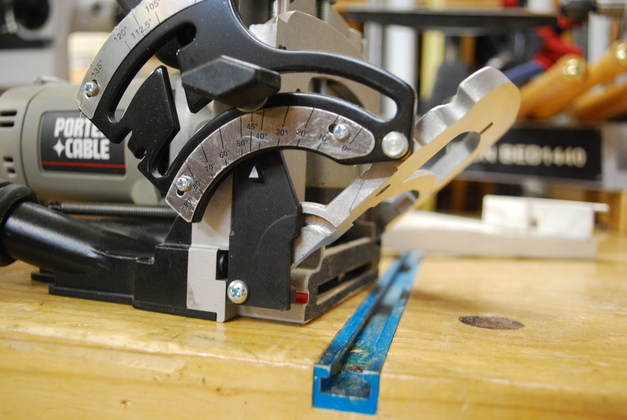
Biscuit mortise cutter set for cutting slots in miters.
The table is set at 45° and then I cranked up the height so the cut would be just below the rabbet in the frame.
My Porter Cable is the only biscuit cutter which has a type FF cutter available.
|
|
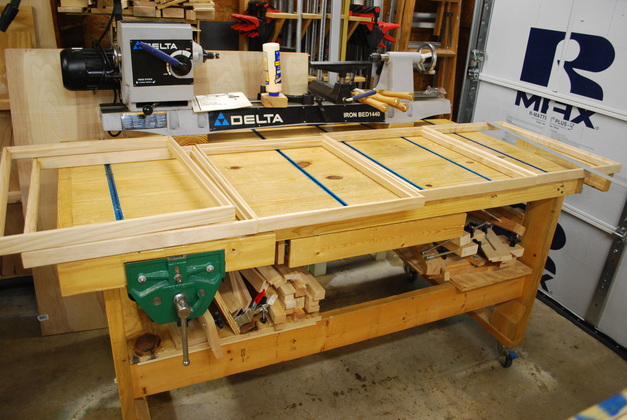
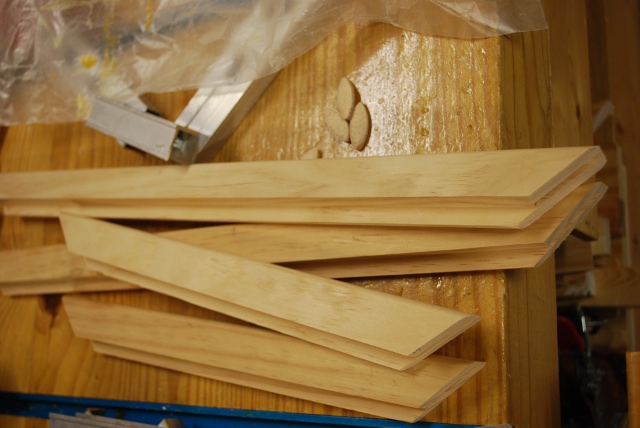
Glued frames laid out on my work bench.
|
|
You can see the edge of the biscuit in the corner, I'll sand a little off each corner of the bottom to clear these.
|
|
Bottoms glued in, from the bottom.
|
|
Right side up view of bottom glued into sliding shelf.
|
|
Closer view of an inside corner with the bottom glued in
These shelves will be painted white so the mix of pine and fir won't be visible.
|
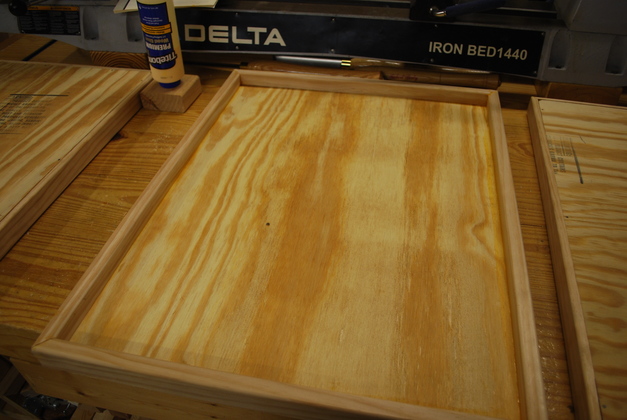
Shelf Fronts
|
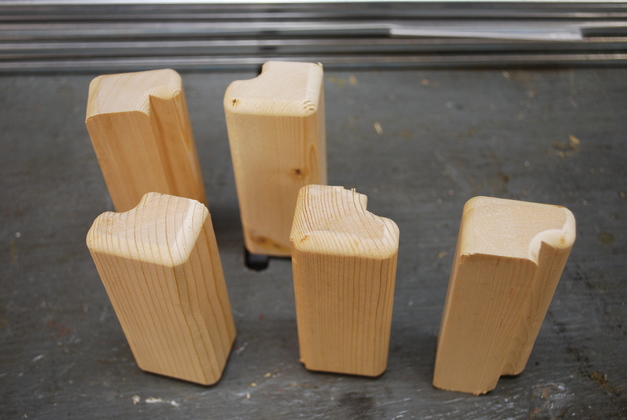
Pieces cut out for slide out shelf front.
These slide out shelves will have a front that conceals whats actually on the shelf when it's closed.
The front is built much like a picture frame with a solid, flat, insert instead of glass and a picture.
|
|
Front frame laid out for a test fit.
The tee track fixture on the left is what I use to hold the frame when I cut the biscuit slots at 45°.
|
|
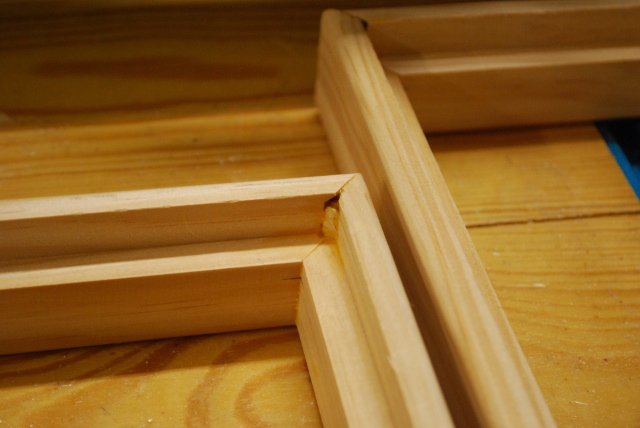
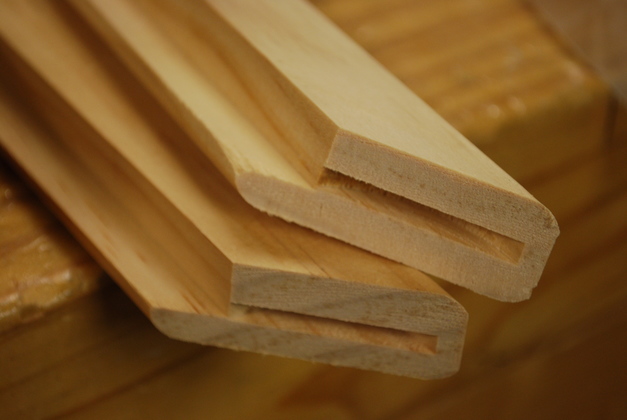
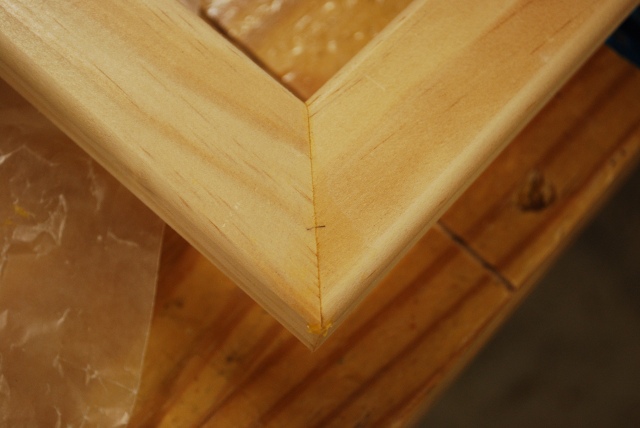
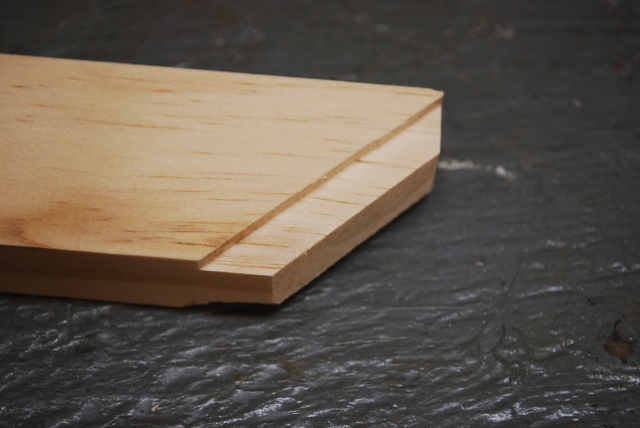
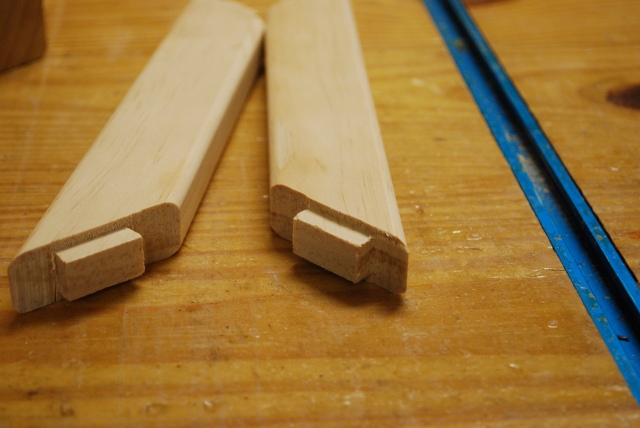
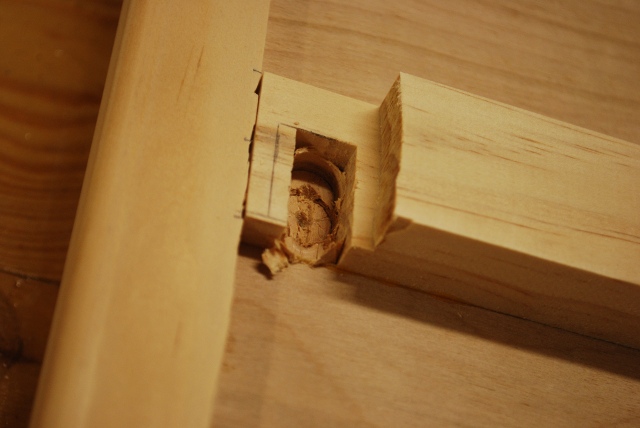
Front frame pieces slotted, note the miter is diagonal to long side, this will be like a normal picture frame.
You can also see the rabbet for the flat panel insert which is cut much deeper than the panel thickness to the lip, as seen from the front, isn't so deep.
Compare to Frame miters.
|
|
A front frame, ready to glue, note type FF biscuits.
|
|
Laid out in the clamps, note front piece is turned up for gluing and type FF biscuits laying in middle.
|
|
Joint on top of clamp, glue spread.
|
|
Joint with glue spread, and biscuit inserted.
|
|
Joint with biscuit inserted and glue on top of it.
|
|
Front in glue clamps, note ClampIts holding corners square.
|
|
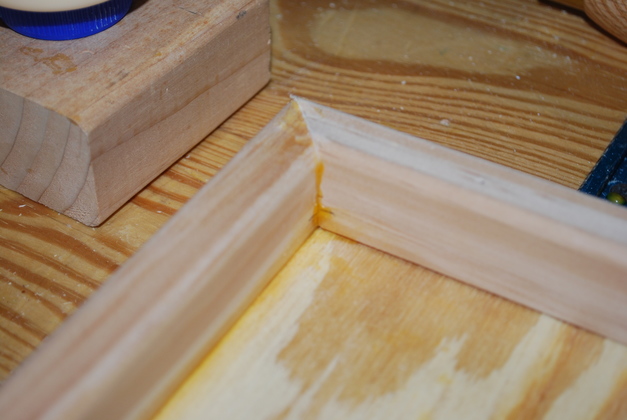
Front joint after gluing and before sanding.
|
|
Underside of glued joint showing the rabbet for the inset plywood panel.
These rabbets are 1/2" deep although the panels are 3/16".
I did this so the front view of the panels would look more like the other panel door fronts in the house.
|
|
Back side of fronts with panels being glued in.
I normally nail backs (or drawer bottoms) in, but the rabbets were deep to give the proper appearance on the front so the nails would be too long.
I had to use blocks to get the pressure on the panel and the bottom of the rabbet.
Note the stack of already glued fronts on the right.
|
|
A little closer look at a corner.
|
|
The flash shows up the grain a little better, wait till its painted.
|

|
Fronts being sanded.
|
|
Gluing front stiffener to the back of the panel.
Since the front panels are only 3/16" plywood, I needed to add strength where the handle (pull) and the diagonal supports attach, so I glued on a stiffener.
|
|
Two front pieces having the stiffener added.
|
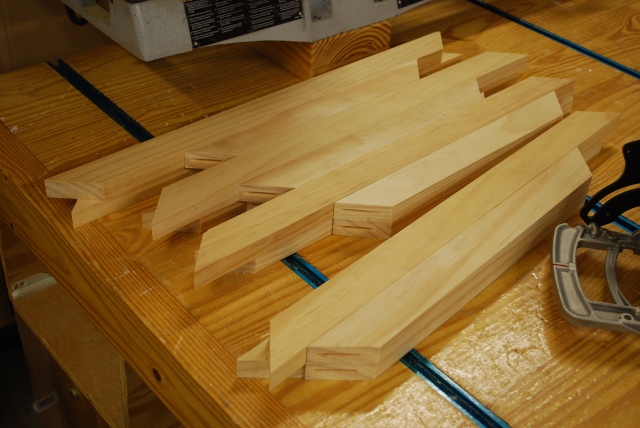
Diagonal Front Supports
|
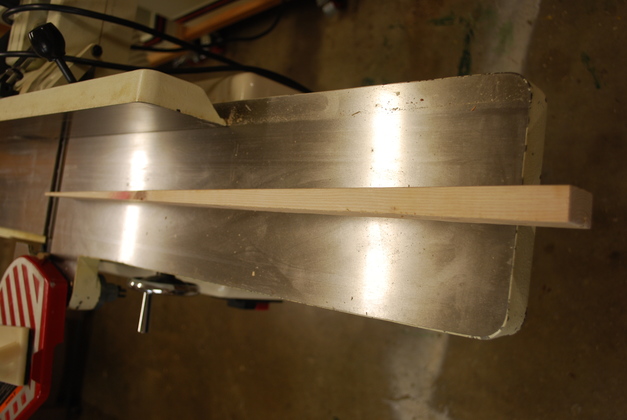
Here is a 1x2 sawed to length.
|
|
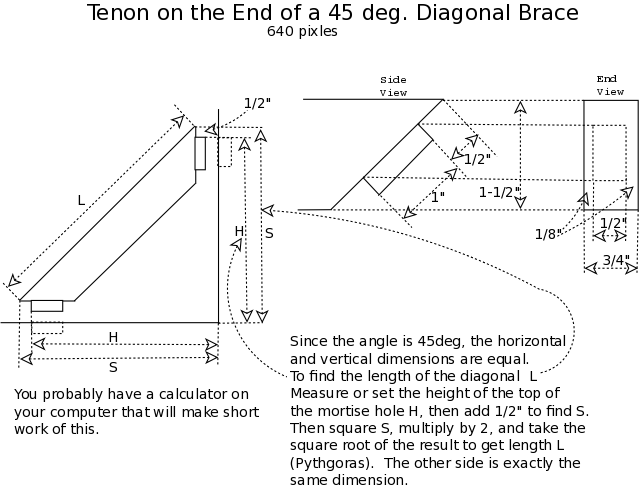
The tenon will be 5/16" high.
I mark a 45° at each corner and another 45° 5/16" from the corner diagonal.
This will be the length of the tenon.
|
|
I saw off the corner at the end of the tenon.
|
|
Then machine off 1/8" deep by 5/16", using the router table, on each side creating the side shoulders of the tenon.
|

|
Both sides after machining.
The shoulder of the tenon is now clearly visible.
|

|
Mark the top and bottom of the tenon.
The length of the 45° cut at the corner is slightly over 2" and I wanted a 1" by 1/2" tenon, so I marked 1/2" from the point, then another inch to define the top and bottom of the tenon.
By not placing it exactly in the center I make the measuring easier.
|

|
Using the bandsaw, I cut by the marks down to the shoulder.
Next I'll cut along the shoulder leaving nothing but the tenon sticking out.
|
|
Here are the diagonal supports after sawing the tenons.
My tenon jig, doesn't do 45° so (I need to work on that), I sawed out the ends and used the router to cut the 1/8" off the top and bottom side (in this pic).
The tenons are 1/2" by 1".
|
|
Closer look at tenons on the end of 1x2 diagonals.
These are not as clean as my tenon jig, but the angle is a problem for the jig, so I use my router table for the sides then sawed the top and bottom with my bandsaw.
|
|
Tenon sawed and corners rounded on the diagonals.
|
|
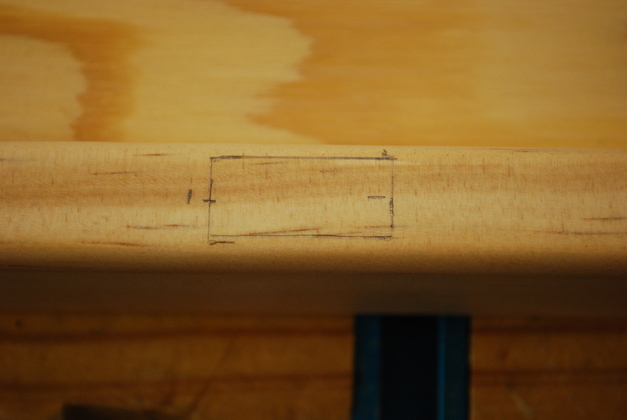
Mortise marked on the top edge of the sliding shelf frame.
|
|
Mortise drilled into the top edge of the shelf frame, but not cleaned out yet.
|

|
Mortise drilled into back of front frame at the end of stiffener.
This is on the left side of the panel as seen from the front, remember, the front panels are offset to the right.
|
|
Mortise drilled into end of rabbeted stiffener, bottom of tenon came out flush with the bottom of the stiffener.
This is on the right side of the panel as seen from the front, this side overlaps the closet edge.
|
|
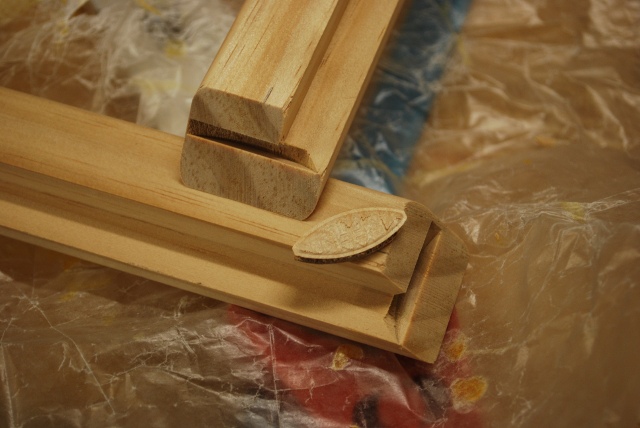
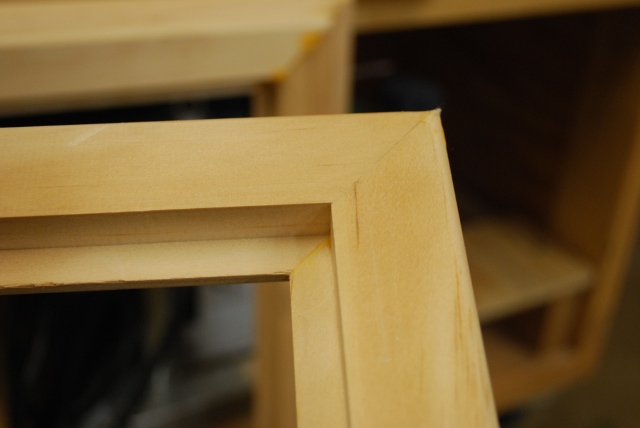
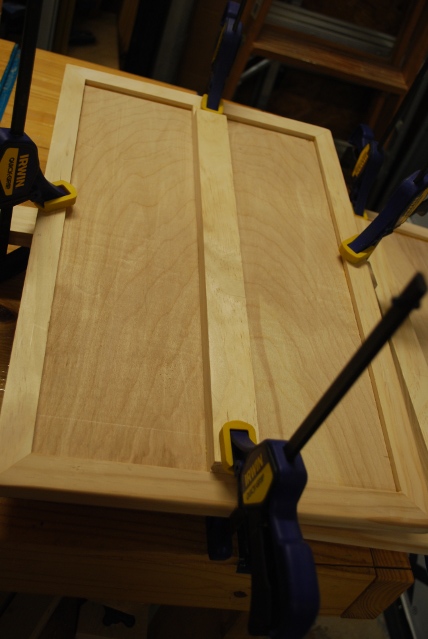
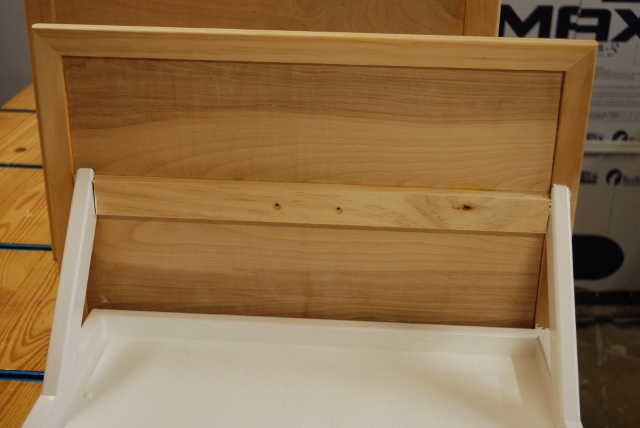
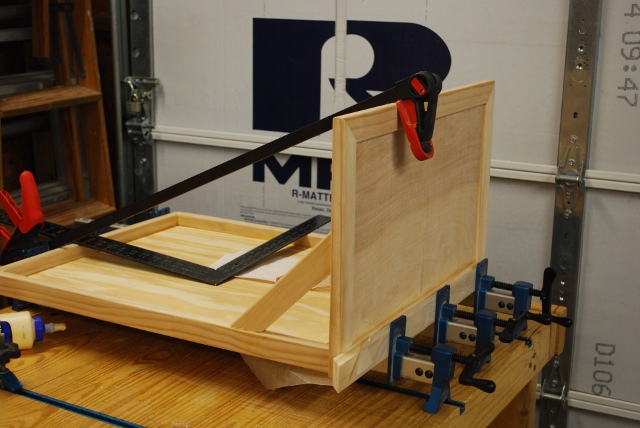
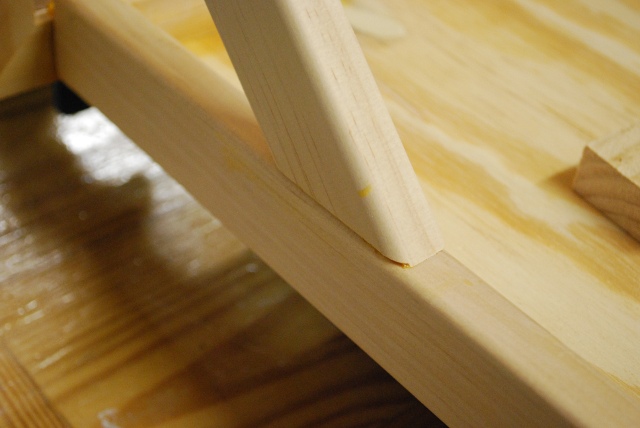
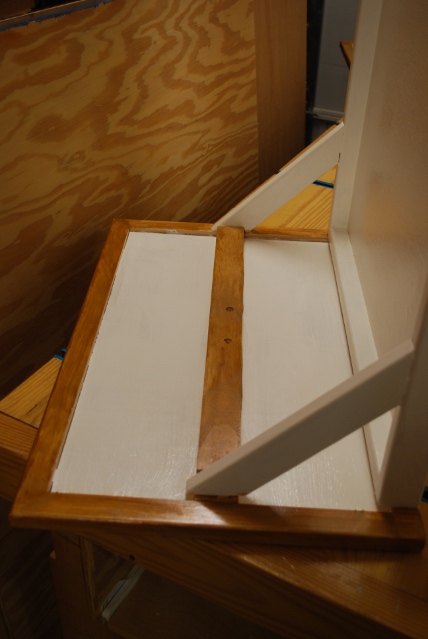
Trial fit of front to shelf frame with diagonal brace.
The diagonals are cut and mortises are positioned so that the front is exactly vertical.
This is important so when its mounted int the linen closet and closed the fronts will flush up to the wall and each other.
|
|
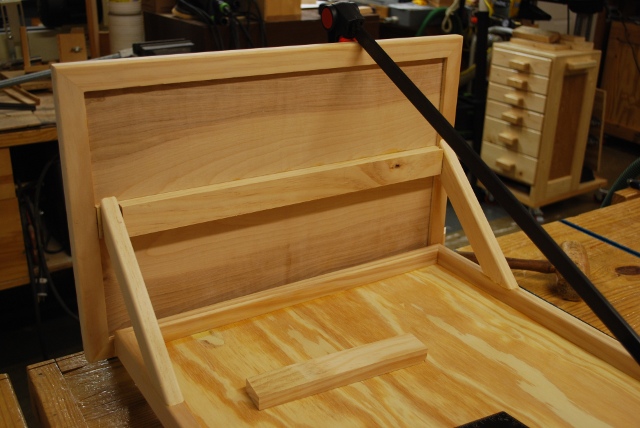
View from the back side showing stiffener and diagonal supports.
Front doesn't look vertical but it is.
|
Handles (pulls)
|
I usually make these handles out of scrap I have around the shop.
A piece of 2x4 about to be ripped to 1" high by 1-1/2" wide, already cut to 4" long.
For more info on how I make handles please see my page on Drawer Pulls and Handles.
|
|
These are short handles (1" high) I normally make them 1-1/2" high.
Here I have cut the finger tip rabbet and rounded the outer edges.
|
|
This is after I round the ends.
|

|
Closer look at rounded handle ends.
|

|
Handles being stained.
|
|
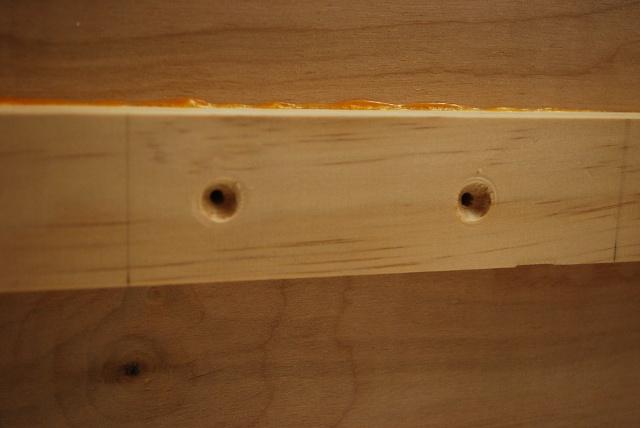
Holes for the pull marked and drilled from the front.
|
|
Close up of the handle mounting holes marked and drilled in the front.
The line between them will be covered by the handle and won't show.
|
|
I countersink the handle mounting holes in the back.
Note they are in the center of the stiffener strip on back of the front panel.
|
|
You can see the handle mounting holes in the center of the stiffener on the back side of the front panel.
|
Final Assembly

|
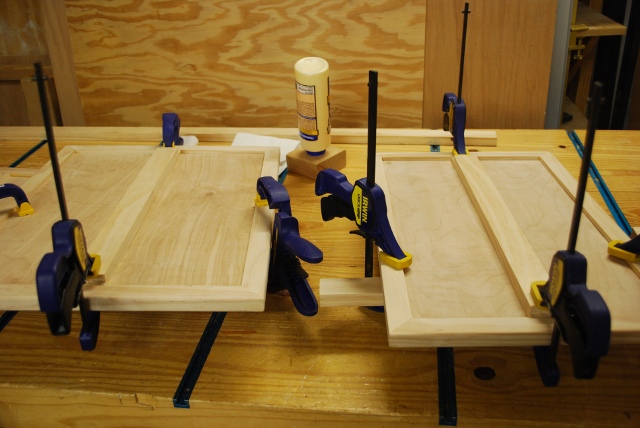
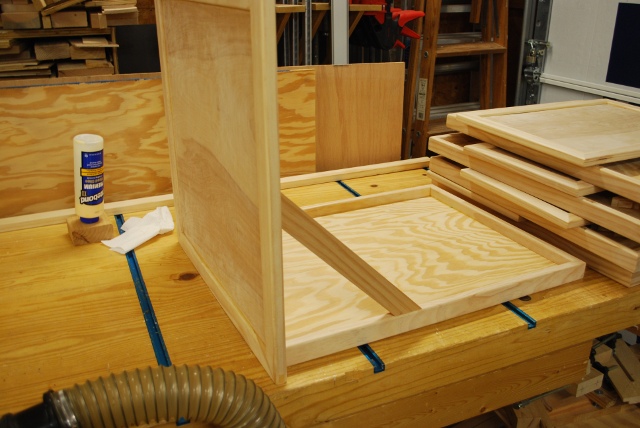
Shelf fronts on the left, waiting for panel glue in, and a couple of shelf frames, on the right, ready for bottom glue in.
|

|
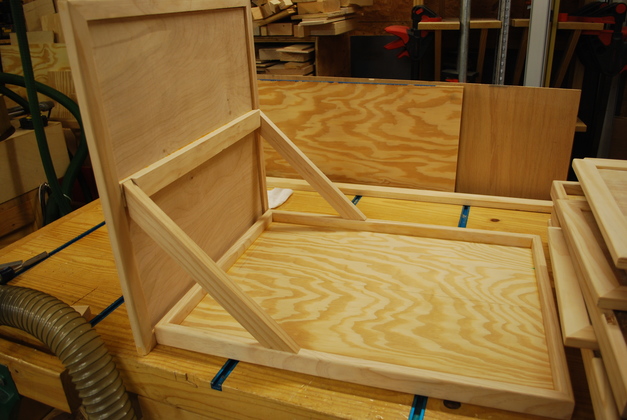
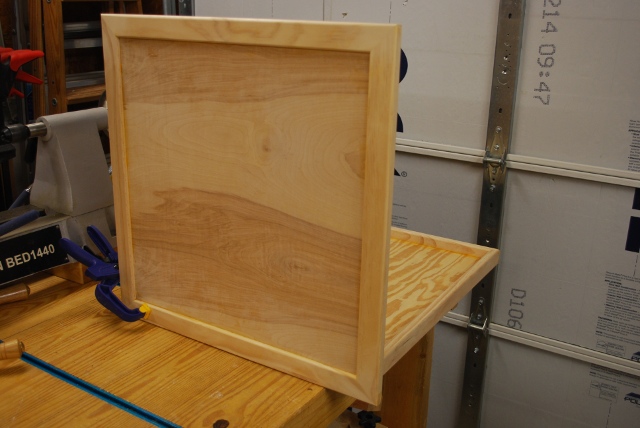
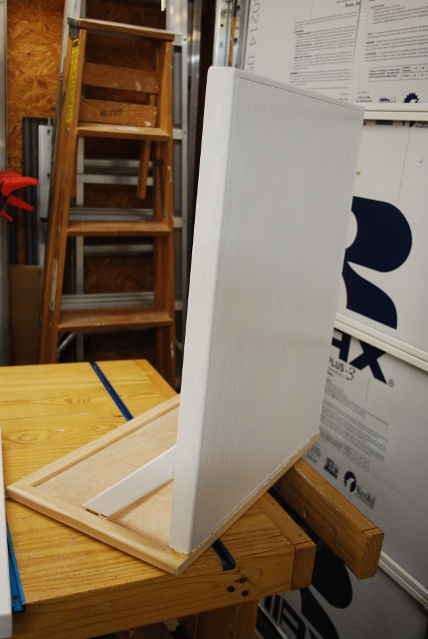
A test assembly to see where the handles looked the best.
This is the tallest (bottom) slider.
|
|
A front look at the test assembly.
|
|
Loose tenon slots cut into end of the shelf and bottom of front.
The shelf is upside down here since the bottom edge is the reference for the slot cutter.
The two slotted surfaces will mate and be glued along with two diagonals.
|
|
Closer look at pair of slots.
|
|
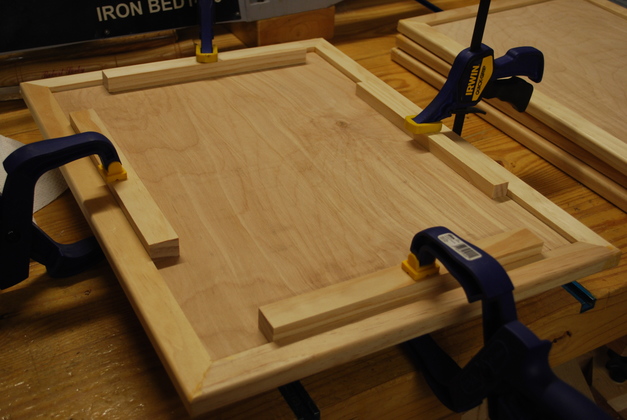
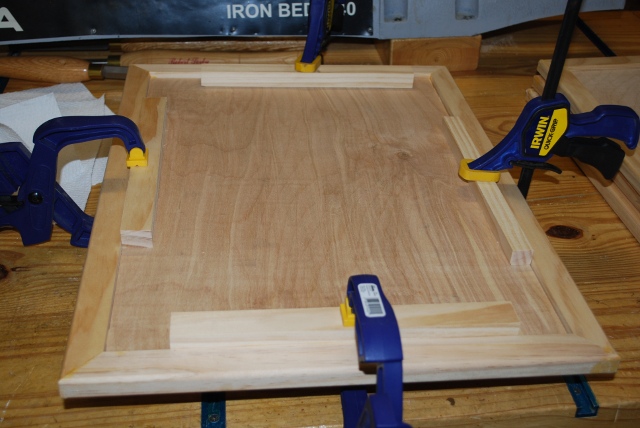
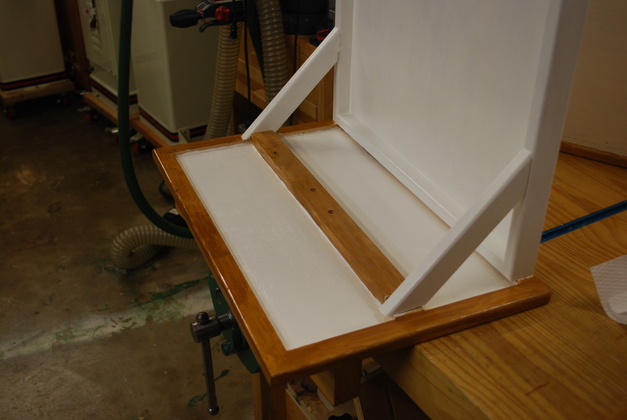
Front glued to shelf in the clamps.
Note the diagonal clamp to hold everything perfectly square while the glue sets.
The framing square is what I used to check square.
|
|
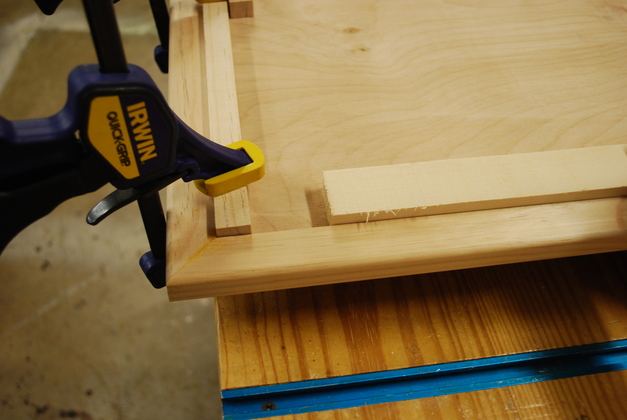
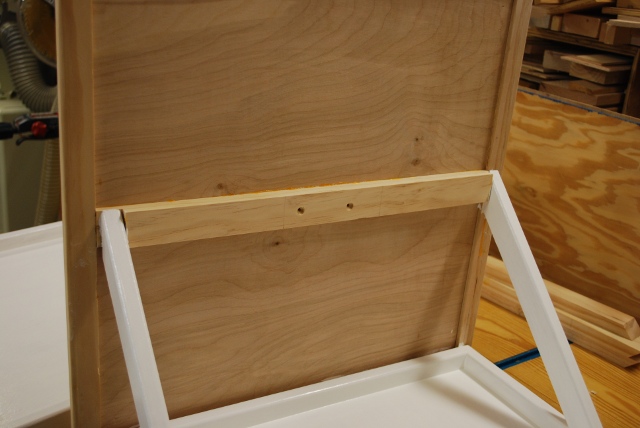
Back side of front and top of shelf while gluing.
Note the top if the diagonal braces supports the stiffener which will have the handle attached on the front side.
You can also see the way the front overlaps the shelf, on the side, to hide the slides and slightly sloping closet edge (the door moulding hid it originally).
|
|
Closer look at diagonal brace with tenon being glued into mortise.
|
Painting
|
Three of the sliders having the shelf painted.
|
|
Bottoms painted.
|
|
The diagonals will be painted the color of the shelf.
|
|
Front frame of bottom (tallest) drawer being stained.
I'm using a water based stain followed by water based polyurethane.
|
|
Shorter drawers front frame stained.
|
|
Back side of drawer fronts with frame stained.
|
It was right here when I realized a major mistake I had made, the front panel inset plywood is not birch, it is something else and clear poly makes it much darker.
Since everything is already glued together, and I don't want dark colors in that dark little hall, I decided to paint the inset panels white.
Looking at the grain and comparing it with other birch, I could easily see it isn't birch now.
But it was marked birch at Lowes!
I have also changed the hall light fixture to a double tube flourescent which should put more light on the slide out shelves.
|
Back side of front panels with insert painted white.
|
|
Another front panel backside with inset painted white.
|
|
This isn't exactly what I had in mind, but it'll do for now in the little dark hall.
|
|
Front inset panel painted.
|
|
I clamped them in the end and front vise of my work bench, makes painting tedious areas easier.
I really need a little better brush (and a steader hand).
|
|
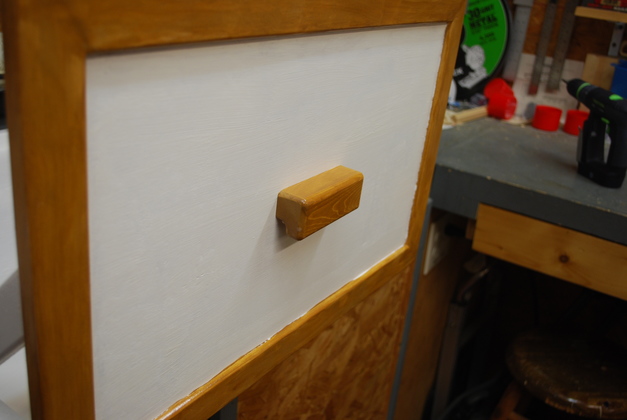
Handle installed.
|
|
side view of handle.
|
|
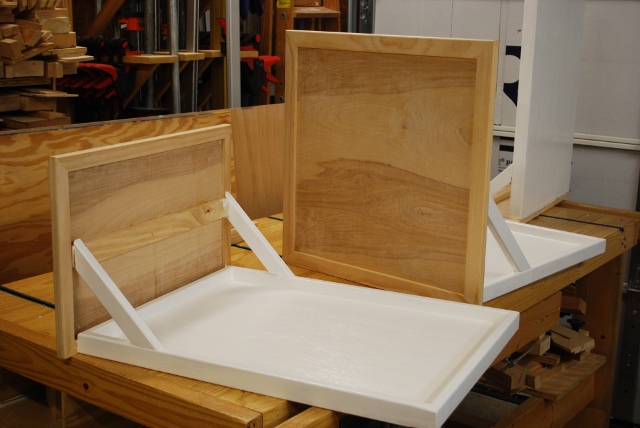
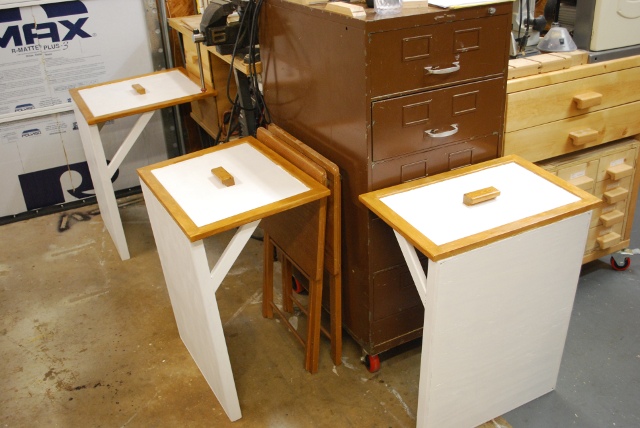
Three largest sliding shelves painted, ready for slides.
|
Install
|
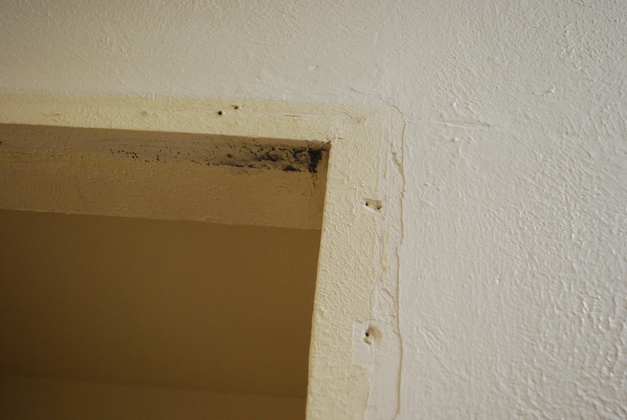
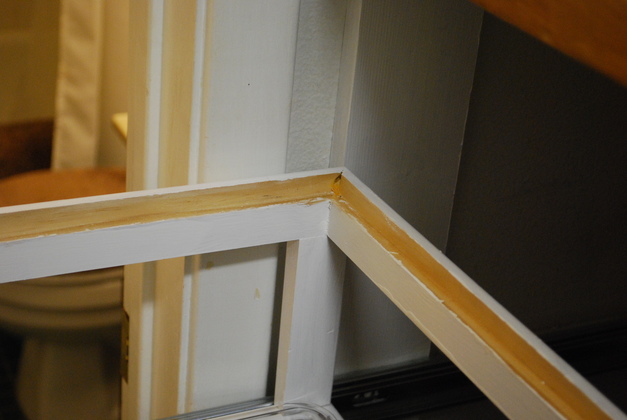
Nail holes where old closet moulding was removed.
I'll spackle them and repaint, also the under side of the doorway, you can see where the track of the old sliding door was.
|
|
Since the closet was so "not square" (wider at the back and bottom) I had to make tapered shims to make the shelf slides parallel, here is one of the tapered shims on my jointer.
I cut these from 2 x 4 with a bandsaw, then ran them across the jointer.
I use the jointer on almost everything I cut with the bandsaw.
|
|
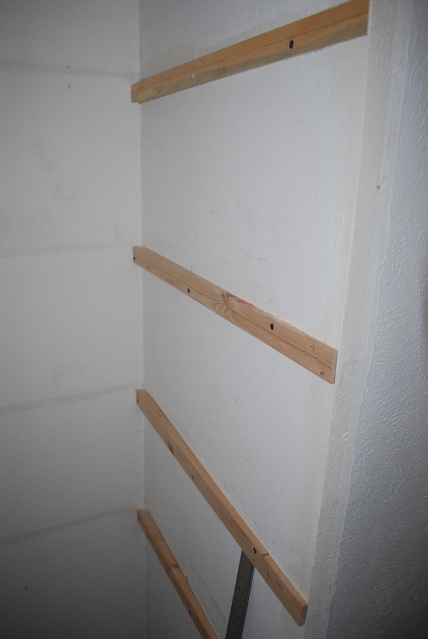
And here the tapered shims are all mounted in the closet.
Each shim is unique since the closet is very irregular and I wanted all the shelves the same width.
After mounting I took my Inside Dimension tool and made sure the slide mounting surfaces were parallel.
Then mounted the slides on these tapered shims.
I've had to do this in almost every place I put drawers or sliders in the house.
Please see my Sliding Shelf Project for more info
|
|
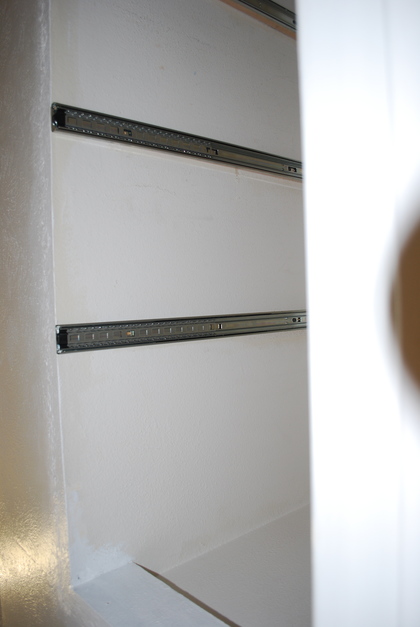
Slides being installed over tapered shims.
|
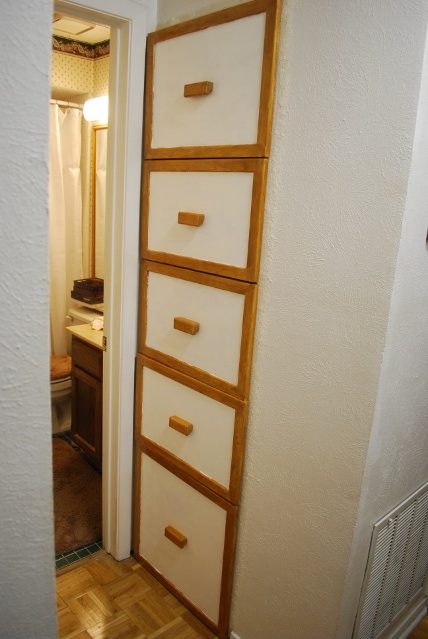
Finished
|
|
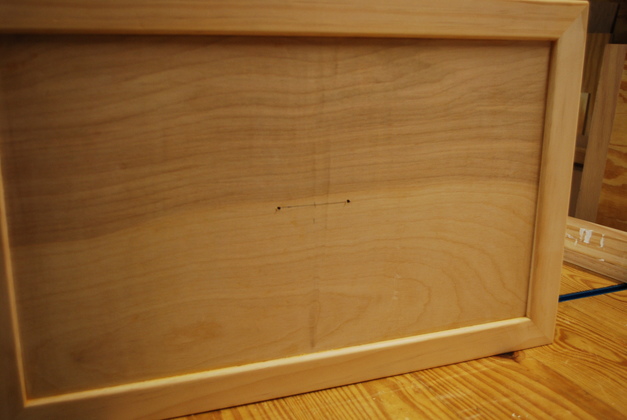
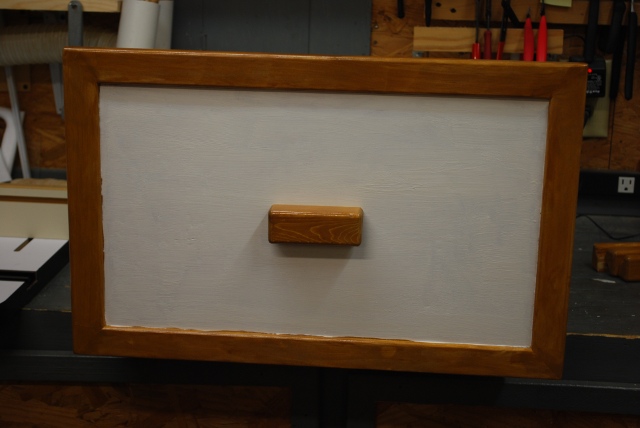
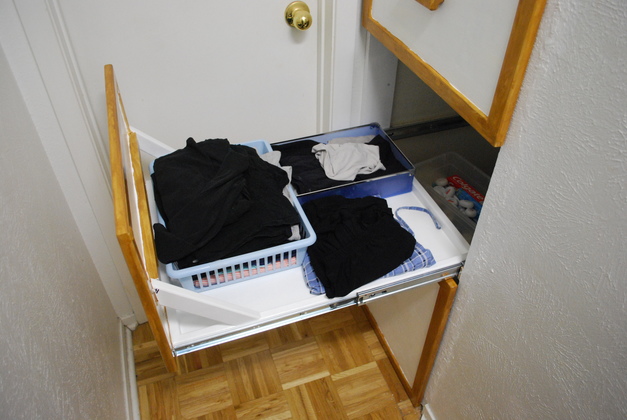
And here is the linen closet with all the sliders closed.
|
|
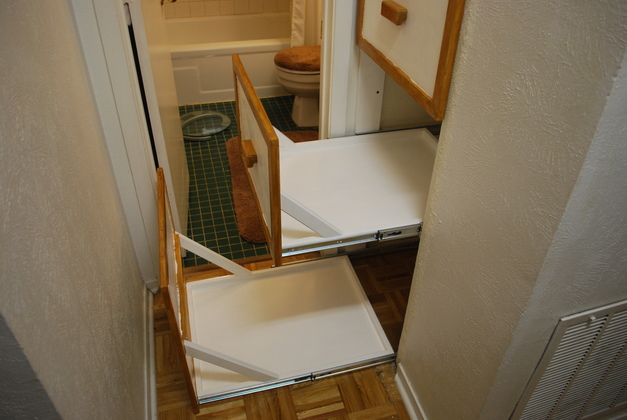
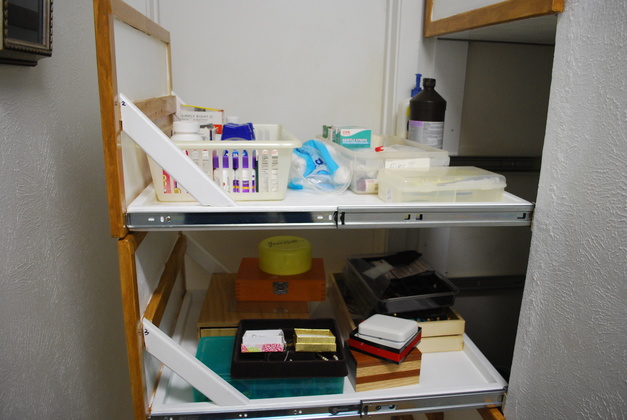
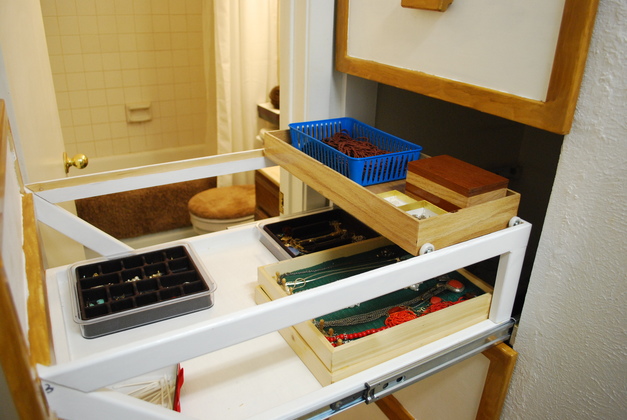
And a couple of the sliding shelves pulled out, Betty hasn't loaded them up yet, I still have a little touch up to do and she'll start.
That awful dark green tile in the bath will be gone soon!
|
|
The center slider pulled out.
|
|
Finished slider, Bettys starting to load it.
|
|
Two sliders, you can see or get anything anywhere on the shelf.
|
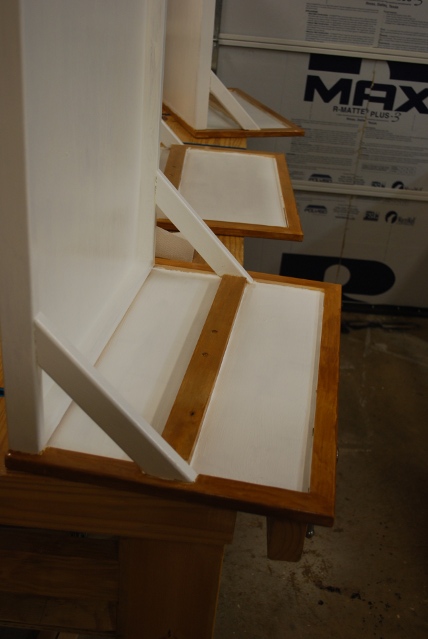
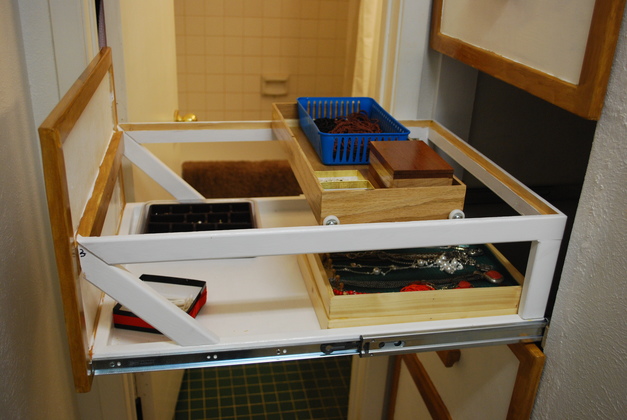
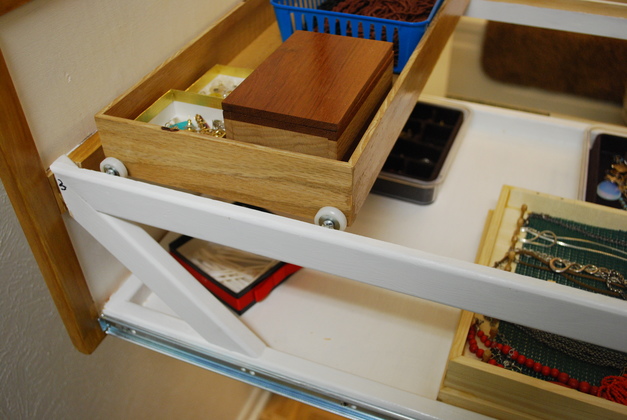
Rolling Tray
|
You can see here I added a track above the sliding shelf with a sliding(rolling) tray.
|
|
The box is a mitered 3/16" oak plywood box with rollers.
Here its at the front of the sliding shelf allowing access to items on the back.
|
|
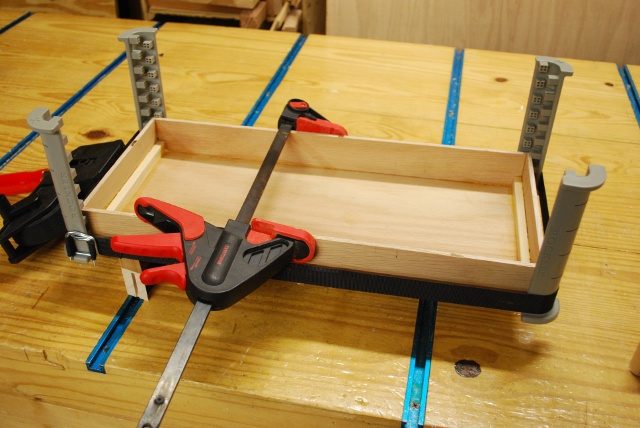
Here is the sliding tray with all the mitered edges being glued.
I have discovered that if you use 3/16" thick hardwood plywood, miter the corners, with no frame, and glue it the result is a very strong box.
This tray is typical, I did put glue blocks in the side corners for the wheel axle screws.
Here is our Range Box built the same way.
|
|
The track frame is 1 x 2 with a 1/2" X 1/2" rabbet painted with polyurethane because its tougher that the white water based enamel.
|
|
Sliding tray at back of sliding shelf allowing access to front.
|