From:
Review of Robert Payne's DC overfill sensor...
From Robert Payne at McRabbet Woodworks, LLC
This is not yet a complete and thorough review of how well it works
during its intended use. I'm putting clear coats on my latest project so
I'm not generating ANY dust or chips right now. Next week I'll update with
actual working conditions and a review.
Today, I will review the service and ease of installation.
The package arrive quickly and well packed. It came with detailed
instructions and several photos as well as a block diagram to aide in
installation. I received the package on Thursday afternoon and was not
able to open it until late that same evening. I began installing the
system the next morning while still waiting for stain to dry.
I came to a point in the installation where I needed to ask Robert a
question. His phone number was printed on the instructions which I
realized after I read the email he sent me which also included his number.
The email was to say that he observed that the package had been delivered
and that he was available for assistance along the way. Perfect timing!!!
I HATE waiting!!!
So took some measurements and quickly cobbled together a wall mount for
the garage door sensors. 10-15 minutes maybe. I chose a location to mount
the sensor unit and mounted it. I realized I needed some 14/2NM( $9, I
think...) wire and made a trip to Lowes. Per Roberts recommendation I
wired the AC adapter to an outlet controlled by my shop lights so the
circuit is not powered 24/7. I bought a 15' extension cord for this ($8).
So now the sensors are mounted and wired to each other and the main
unit, and the main unit is mounted and powered, but turned off for the
moment. Next was to wire the main unit to interrupt my Lone Ranger's
power.
NOTE: I am using the 220V LR remote. The relay in the main unit is
rated for 110V. This is fine as long as you follow the instructions and
interrupt only ONE leg of the 220V circuit which is 110V unless references
from the hot from the other phase.
This is where I needed to call Robert and clarify. I asked, "Do I
interrupt the black wire before or after the Lone Ranger?" As in, do I
interrupt the hot lead that feeds the LR unit? Or do I interrupt the hot
lead from the LR that feeds the DC unit it's power. My thought was to
interrupt the hot lead the feeds the LR remote unit with its power. Robert
confirmed this to be true.
So I drilled a hole in my LR unit and wired it in series with the LR's
circuit breaker which interrupts the hot lead of there is an overload. I
used the included push on spade lugs to connect to the breaker and
soldered the other two wires. One from the hot lead, the other from the
14/2NM wire I just bought.
When wired like this, the DC sensor unit will interrupt the power
feeding the LR remote unit. This allows you to turn on your DC again once
you've emptied your DC bin. I wired the other way the LR remote unit would
remain powered and when the DC bin is cleared the dc unit would start up
with the DC bin open and could make a big mess.
So I completed the install in about 90 minutes. Which included the trip
to Lowes and removing my battery charging station which was foolishly
located behind my clear flex hose.
Like I said earlier I've yet to actually overfill my DC bin as I'm
applying finish to 9 table tops for a restarting now. However, I started
my DC and blocked the garage sensors with a piece of wood and the DC
sensor unit did exactly what it was supposed to.
Every time.
It took about 15 seconds compared to the listed 10-12 seconds. Perhaps
I was counting too fast.
What would I do to improve the unit? Honestly, at this time I cannot
even think of a single improvement suggestion to offer for the unit
itself. Nor can I offer a suggestion to improve Roberts customer service.
Both are exemplary.
I will offer a couple possible improvements to the instructions.
1. Color photos would increase clarity of what were looking at. Added
cost, I surely understand. Perhaps not worth it as far as keeping a low
bottom line. I totally understand.
2. Offer a full color digital PDF version of the instructions and have
the user either print it themselves or read it from their computer,
tablet, or smartphone.
$200 shipped for the DC overflow sensor unit
$9 14/2NM wire to connect DC overflow sensor to my LR remote
$8 for a 15' extension cord to have the DC overflow sensor turned
on/off with my shop lights
$217 total on debit MasterCard (paid with Paypal actually)
Not having to waste more than 3 hours a day overfilling your DC bin and
loading your $155 Wynn filter (twice in one day!!!) then hVe to clean it
and thereby reduce its life on every job you have...
Priceless.
Attached Images Attached Images
File Type: jpg image-3235217351.jpg (65.6 KB, 189 views)
 File Type: jpg image-1182071999.jpg (77.4 KB, 176 views)
File Type: jpg image-3036274445.jpg (52.8 KB, 159 views)
File Type: jpg image-4098842854.jpg (65.8 KB, 153 views)
File Type: jpg image-48141569.jpg (69.3 KB, 180 views)
File Type: jpg image-1913473890.jpg (54.1 KB, 151 views)
*******************************************************
Safe-T-Beams
File Type: jpg image-1182071999.jpg (77.4 KB, 176 views)
File Type: jpg image-3036274445.jpg (52.8 KB, 159 views)
File Type: jpg image-4098842854.jpg (65.8 KB, 153 views)
File Type: jpg image-48141569.jpg (69.3 KB, 180 views)
File Type: jpg image-1913473890.jpg (54.1 KB, 151 views)
*******************************************************
Safe-T-Beams
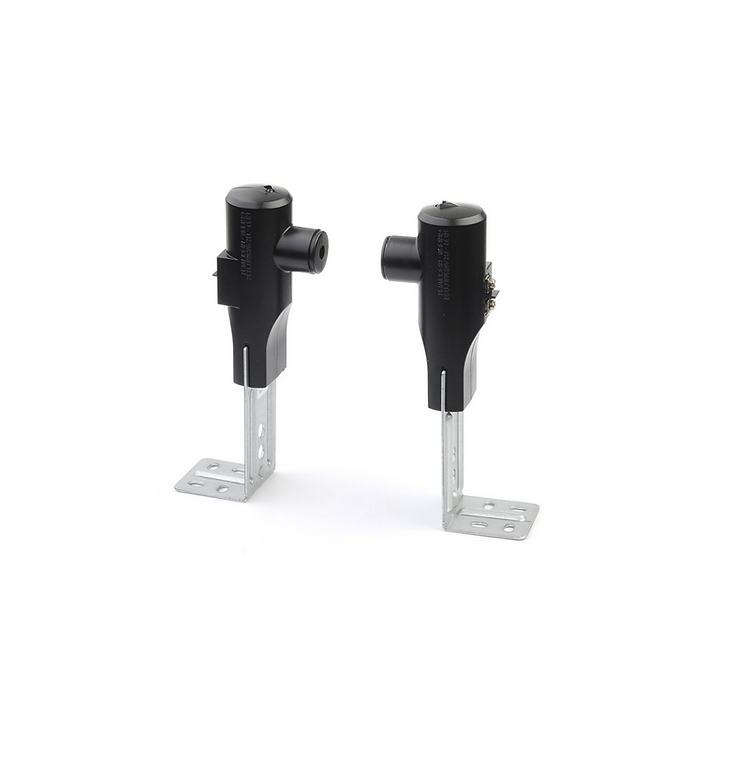 Genie Safe-T-Beam® System
Genies Safe-T-Beam system is designed to ensure maximum safety for your garage door opener operation. Using an invisible infrared beam across the opening of the door, the Genie garage door safety sensor detects any object passing through the LED beam of light and automatically reverses the closing garage door.
Genie Safe-T-Beam® System
Genies Safe-T-Beam system is designed to ensure maximum safety for your garage door opener operation. Using an invisible infrared beam across the opening of the door, the Genie garage door safety sensor detects any object passing through the LED beam of light and automatically reverses the closing garage door.
Compatible with Genie garage door openers manufactured since 1993 that use safety beams.
- Replaces broken or faulty safety beams in your Genie garage door opener’s Safe-T-Beam system
- Keeps Family and Pets Safe. Places an invisible infrared beam across the garage door opening and reverses the garage door automatically if an object passes through the LED beam of light.
- Self-Diagnostic. Alerts you of any malfunction in installation or operation, as an additional safety measure.
- The replacement kit includes mounting brackets and hardware (wire not included)
Garage Door Opener Safety Sensors
Keep your Family Safe
Genie Safe-T-Beam® System
CODE:
TIMEOUT_US = 10000
if (0 == pulseIn(PHOTO_GATE_INPUT_PIN, LOW, TIMEOUT_US)) // Check to see if the Safety sensor has been tripped
{
OPEN_TIME = 0; // Reset the timer and turn on LED when beam is broken
digitalWrite(LED_BUILTIN, HIGH);
delay(250);
digitalWrite(LED_BUILTIN, LOW);
}
*******************************************************
 File Type: jpg image-1182071999.jpg (77.4 KB, 176 views)
File Type: jpg image-3036274445.jpg (52.8 KB, 159 views)
File Type: jpg image-4098842854.jpg (65.8 KB, 153 views)
File Type: jpg image-48141569.jpg (69.3 KB, 180 views)
File Type: jpg image-1913473890.jpg (54.1 KB, 151 views)
*******************************************************
Safe-T-Beams
File Type: jpg image-1182071999.jpg (77.4 KB, 176 views)
File Type: jpg image-3036274445.jpg (52.8 KB, 159 views)
File Type: jpg image-4098842854.jpg (65.8 KB, 153 views)
File Type: jpg image-48141569.jpg (69.3 KB, 180 views)
File Type: jpg image-1913473890.jpg (54.1 KB, 151 views)
*******************************************************
Safe-T-Beams