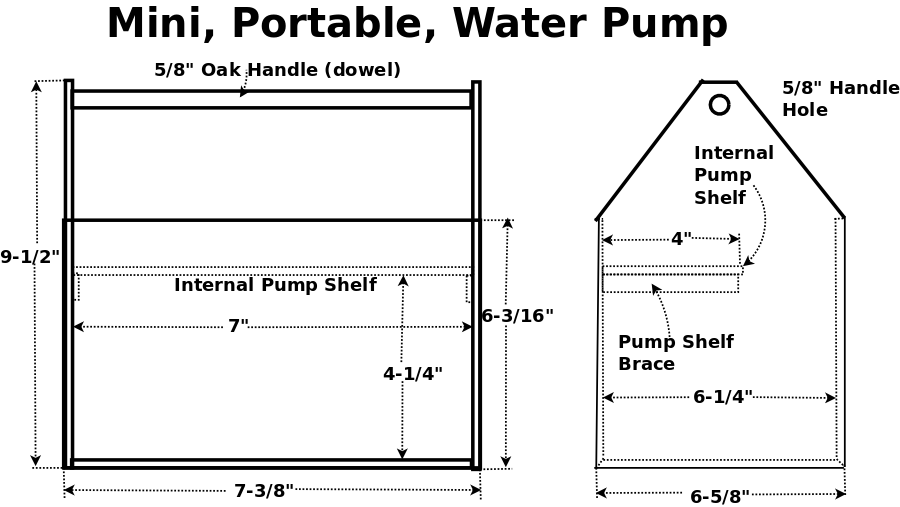
Mini Portable Water Pump
Over the years I have found a need for a small, battery powered water pump.
When I am trying to sweat copper pipe, or, as has happened twice now, the city
emails me about a water leak, I need to get the water out of the meter box or
out of an underground valve box.
Our water meter is an electronic digital meter that senses light when you open
the lid and turns on (it doesn't when the box if full of water).
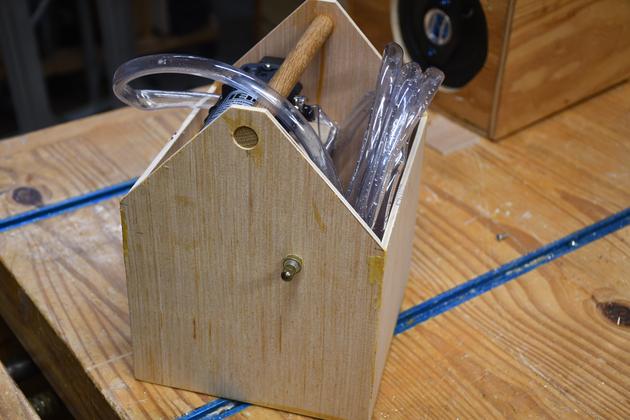
I needed some kind of box to mount the pump and keep it, the battery, charger, and hose together.
So I drew up this diagram for one of my 3/16" plywood boxes.
Mechanical Components
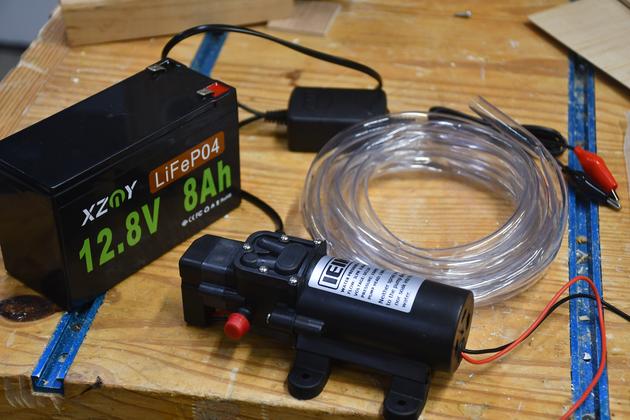
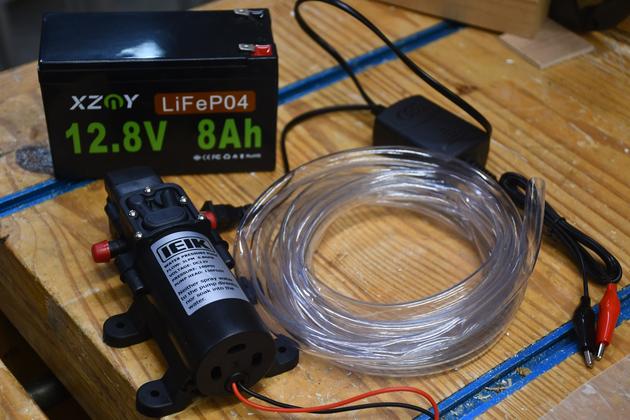
The pump is from Amazon, requires 12VDC, and moves .8GPM.
The battery is a Lithium 12Vdc, 8AH, identical to the one in my computer UPSes.
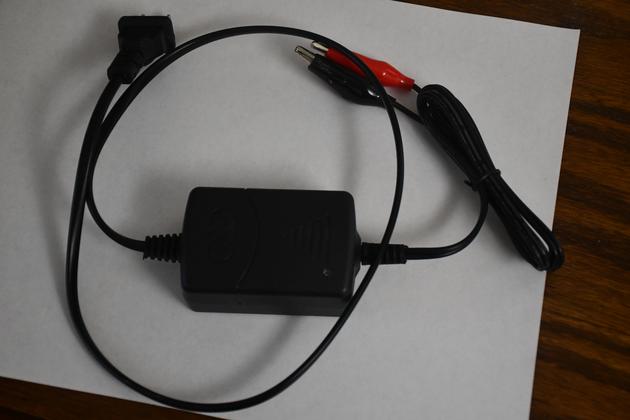
I also bought a 12Vdc battery charger to maintain the Lithium Battery.
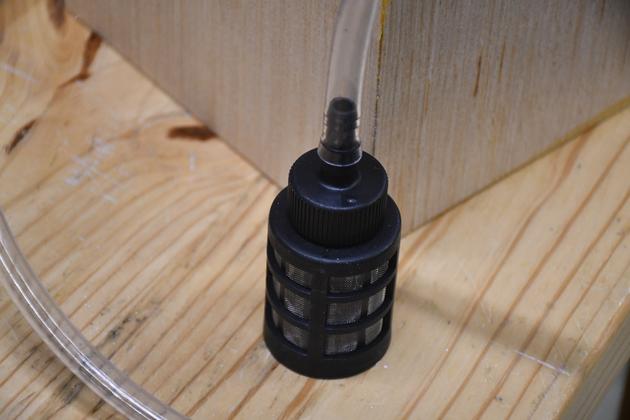
After using the pump once to pump out an underground valve box (main water valve
for the house), I realized it needed an input filter. So I ordered this one from
Amazon.
Mitered Edge Boxes
I make these boxes using 3/16" plywood, with a 45:deg; mitered edges. I glue
the mitered joints together, and it makes strong, light weight container.
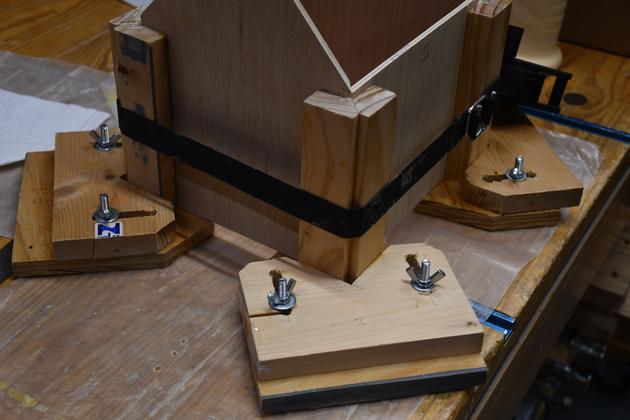
I use the 6" tall clamping cauls to glue the boxes together.
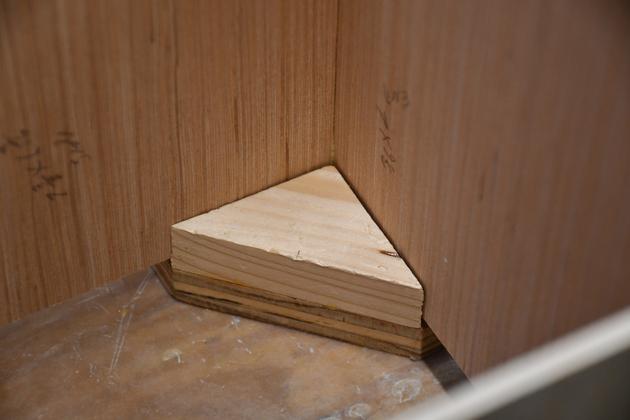
The shelf supports are show on the diagram but not mentioned. They are 3/16"
plywood, same as the box itself, about 1/2" wide and the same length as the
secion of the shelf they support. The shelf is glued to these supports.
The mitered corners have an additional benefit, you cut the outside box parts to
same dimensions as the box itself, you don't have to allow for the thickness of
a side you would butt join.
And you get more surface material in the glue joint, even though some of it is
end grain.
Cut List
All 3/16" plywood:
1 - 7 x 7-3/8     	Bottom
2 - 7 x 9-1/2     	End
2 - 7-3/8 x 6-3/16	Side
1 - 4 x 7       	Shelf
Making the Tote Box
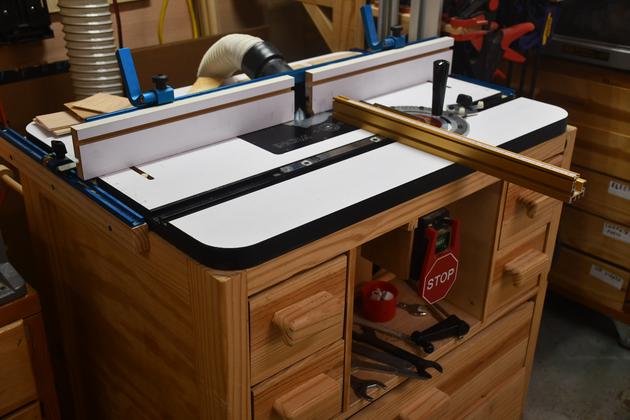
|
The router table set up for mitering the edge of 3/16" plywood.
|

|
Closer look at the router setup to miter the 3/16" plywood edges.
|
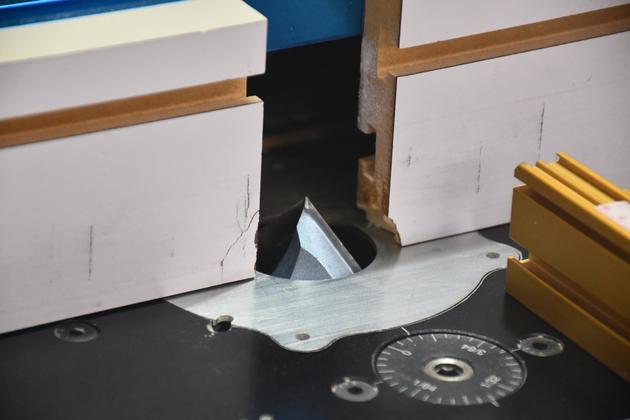
|
Close look at the 45° miter bit, on the router table.
|
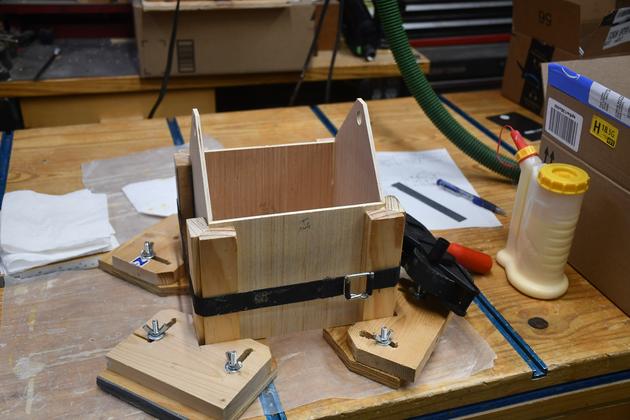
|
Gluing the sides and ends together using my home made cauls.
If your miter joints are square, the box will be square.
|
|
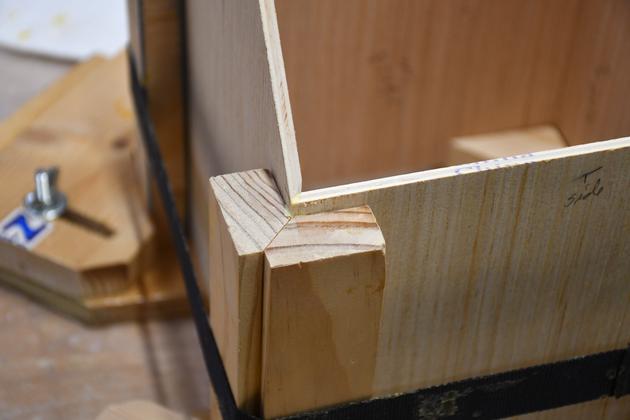
Close up of the mitered glue joint.
|
|
Inside lower corner showing the Caul's clamp holding the box square while the
glue sets.
|
|
End view of the tote-box in the glue clamps.
Note the band clamp.
|
Mechanical Parts
|
The pump's mechanical parts on the work bench.
12V 8Ah battery on the left, .8 GPH pump front center, battery charger rear,
and 3/8" clear tubing center.
|
|
A little different aspect.
|
Finished
|
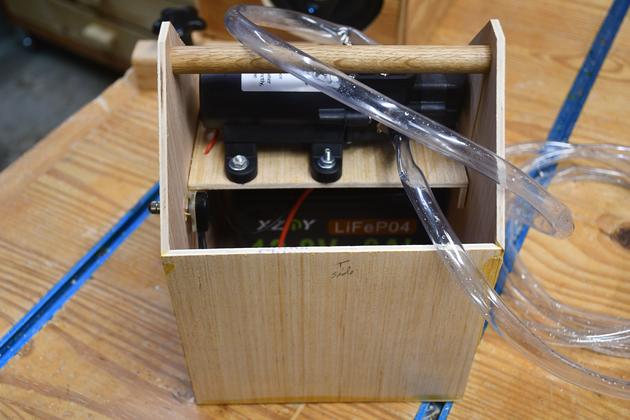
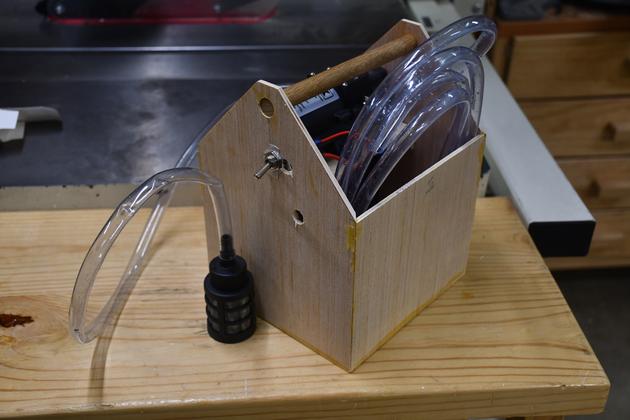
Finished mini pump.
Note the rotary power switch, I didn't have a toggle (one is on the way from Amazon).
I prefer a toggle switch on battery powered devices, so I always know if power is on.
|
|
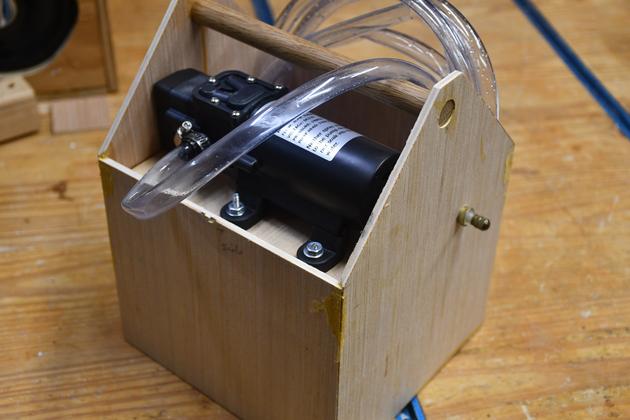
Quarter view. The pump mounted on it's shelf. You can also see the input tube.
|
|
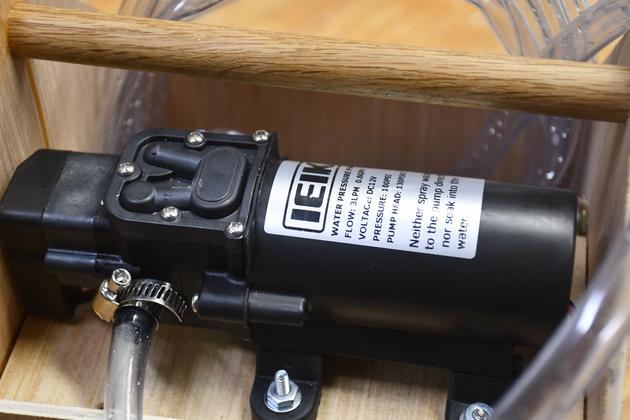
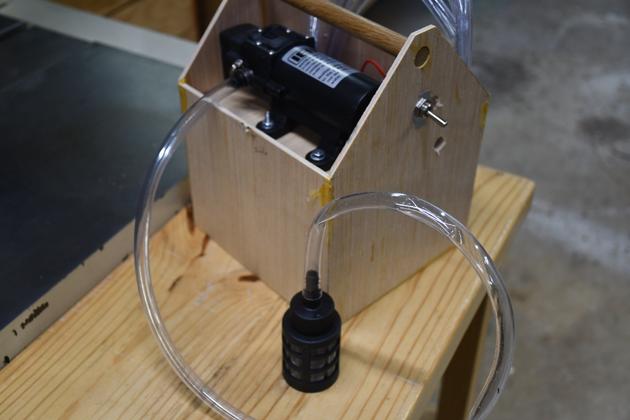
Closer view of the pump mounted on it's shelf.
The pump is 12VDC, moves .8 GPM, is 4" wide and 6.4" long.
|
|
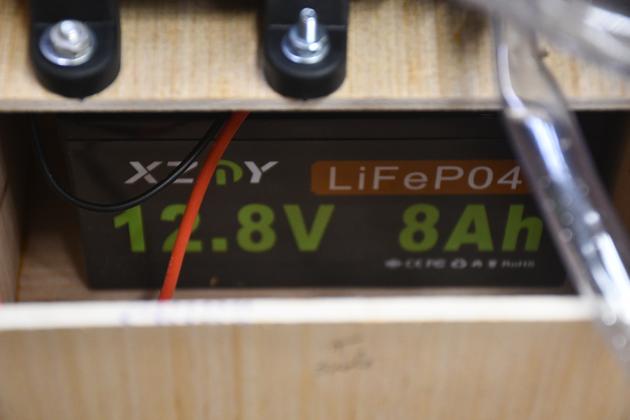
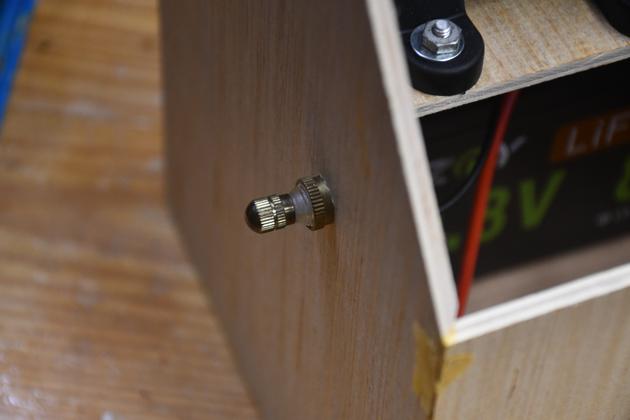
View from the opposite side. You can just see the 12V 8AH Lithium battery under
the pump shelf.
|
|
Closer look at the Lithium 12V 8AH battery.
This is the same battery I use in my computer UPSes.
|
|
The power switch. As I said I don't really like rotary switches, especially on
battery powered devices. You need to know whether its on or off just by looking.
|
|
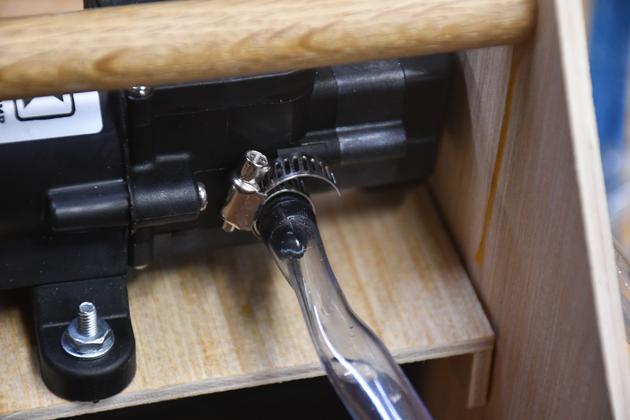
The pump's output.
|
|
After installing the power toggle switch and input filter.
The toggle switch is a DPDT, I had to buy 3, so I picked the most flexible.
Note: I had to move the switch to avoid conflict with battery insertion.
|
|
Different view of completed pump.
|
|
Closer look at the input filter. Its weighted so it'll sink to the bottom.
|
Battery Charger
|
I bought this from Amazon.
It gives me a convenient way to keep the 12V battery charged.
|
