| 
| ||
|
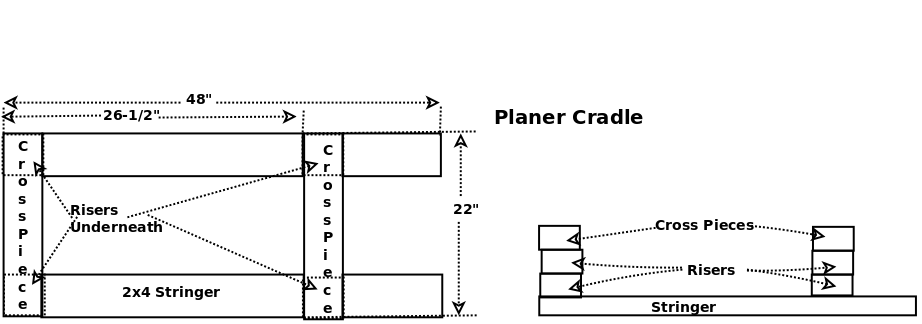
Planer Cradle
| |||
|
|
| ||
|
Planer Cradle
| |||
| Diagram | Without a Cradle |
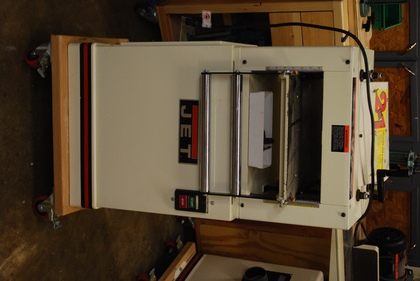
The Planer's caster base is made of 2x4s with at least 1" overlap of the planer's base on each side.
The caster base has mitered corners with biscuits in the joints, and uses 3" ball bearing, double locking casters.
I don't remember why, but for some reason I had the planer, laying on it's back so I had to build a cradle to get the planer (225Lbs) up on the caster base, by myself.
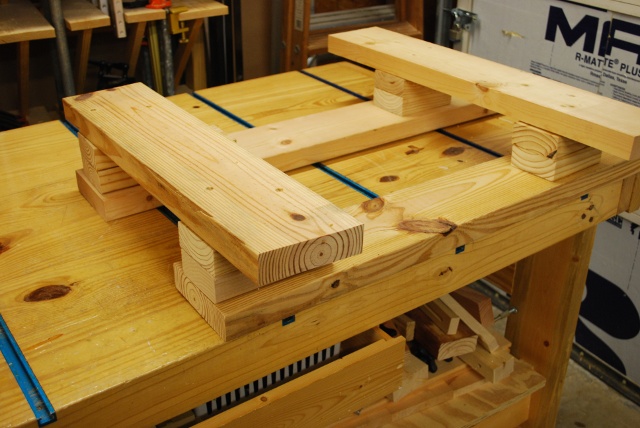
The cradle was built out of 2x scrap and needed to be 6" high above the floor so the bottom of the planer would be above the caster base.
Getting the planer up on the cradle was not difficult, I used 2x blocks and a wooden prybar, lifting one end 1-1/2" at a time then sliding another 2x under it, when one end was high enough scooting it over on the cradle.
Then I did the same thing on the other end.
BTW: most of the planer's weicht is in it's upper 1/3.
|
|
Cradle laying on the work bench. |
|
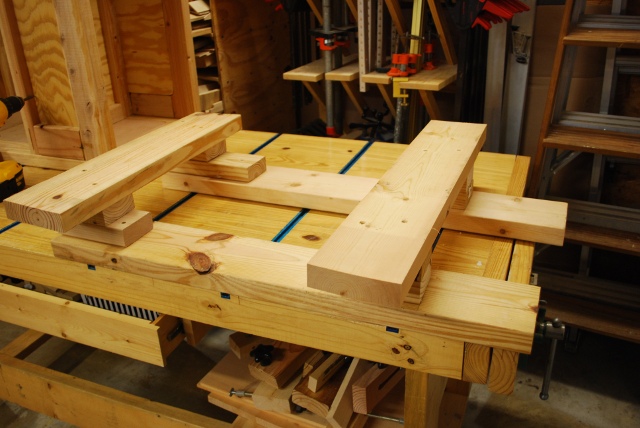
Another view of the cradle on the workbench. |
|
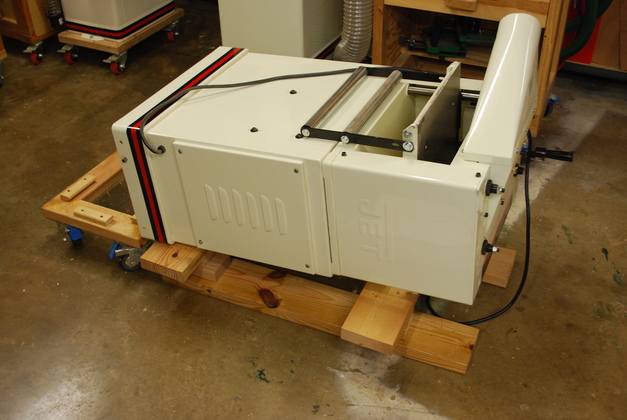
Planer on the cradle. Note the planer has to lay on it's face or front, so the dust port is pointing up. |
|
You can see here the bottom edge of the planer is just above the caster base. |
|
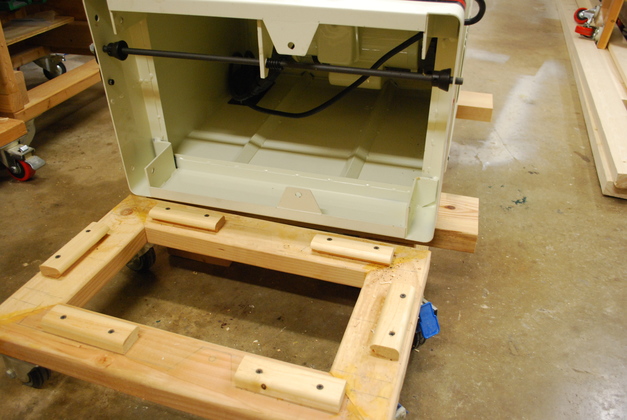
A different view. Note the caster base has it's casters locked. Now comes the grunting and straining. |
|
|
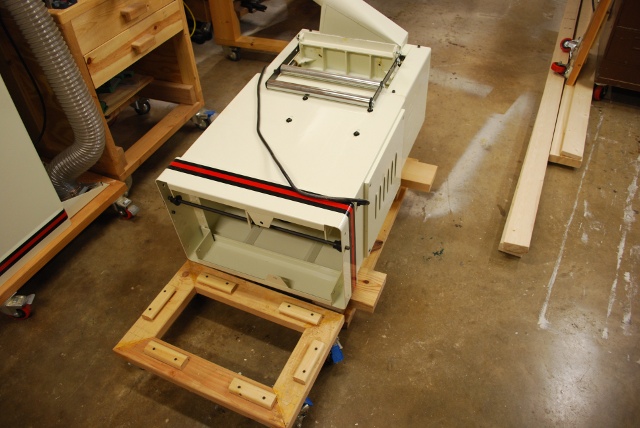
Voilla, the planer has ascended to it's rightful place. |
|
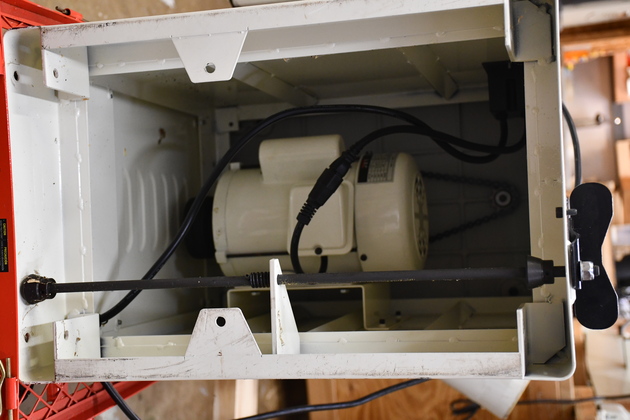
Back from the tool shed (2021). I remembered that I had a bunch of 4x4 cut-offs left over from Kelsey's table, so I thought I would try something a little different. Before trying to tilt it up on a base, you need to remove the in-feed/out-feed rollers and turn it over on it's from (so the dust port is sticking upward). |
|
A good look inside. Note the two tabs, one on each side just below the center with holes, I'll use that to hold the caster base on. |
|
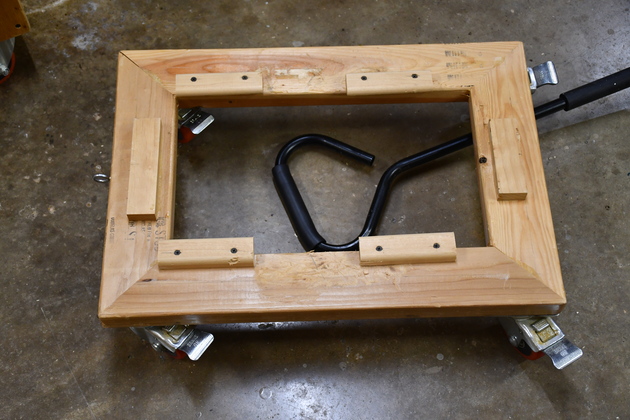
The planer's caster base. The little blocks fit just inside the planers bottom and position the planer on the caster base. |
|
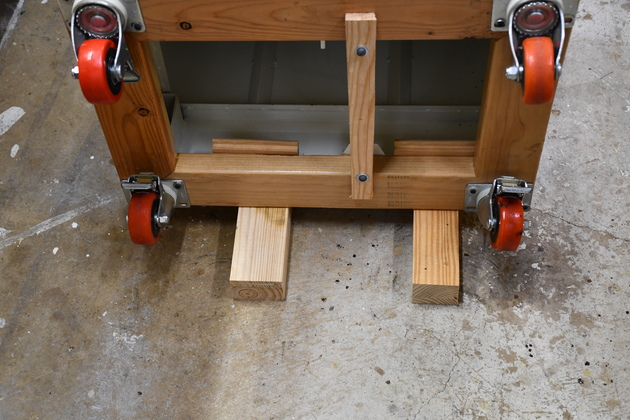
I tried this to set the planer on it's base. The base is held on by the 1x2 across the hole and two 1/4-20 bolts into tabs under the planer. The wood blocks are 3x2 with a 4x4 on top. |
|
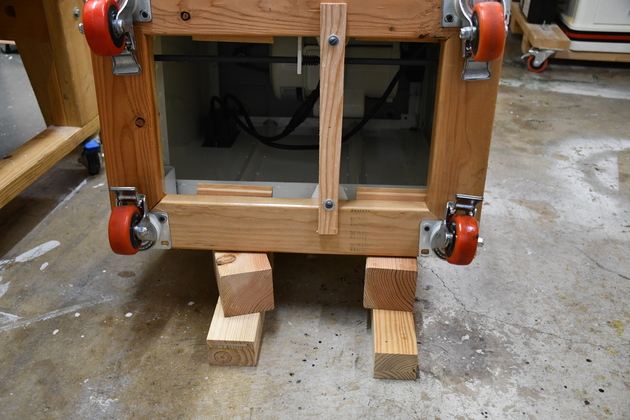
The 3x2 and a 4x4 under the base.
I did a simlar thing on the top end, then ran a floor jack under it and raised it as high as the jack would go then I straddled the floor jack and tilted it the rest of the way up on it's casters.
|

|
|