Document Interface
From: https://wiki.videolan.org/Documentation:Interface/
Documentation:Interface

Contents
General Interface Description
VLC has several interfaces:
- A cross-platform interface for Windows and GNU/Linux, which is called Qt.
- A native Mac OS X interface.
- An interface that supports skins for both Windows and GNU/Linux.
The operation of VLC is essentially the same in all the interfaces.
Windows and GNU/Linux (Qt)
The screenshot below shows the default interface in VLC 2.0. More features can
be displayed by selecting them in the View menu.
| |
|
| The Menu Bar
|  |
| The Playback Controls | Volume Controls
|
See also VLC Interface 2.0 on Windows 7
Mac OS X
This screenshot shows the default interface that VLC had on Mac OS X until
version 1.1:
 Default Interface Mac.PNG
Since version 2.0 the interface has been redesigned. See OSX 2.0 interface.
Default Interface Mac.PNG
Since version 2.0 the interface has been redesigned. See OSX 2.0 interface.
Starting VLC Media Player in Windows
In Windows XP: Click Start -> Programs -> VideoLAN -> VLC media player.
In Windows 7: Click Start -> All Programs -> VideoLAN -> VLC media player.
VLC is shown on the screen and a small icon LargeVLC.png is shown in the
system tray.
Stopping VLC Media Player
There are three ways to quit VLC:
- Right click the VLC icon (LargeVLC.png) in the tray and select Quit (Alt
-F4).
- Click the Close button in the main interface of the application.
- In the Media menu, select Quit (Ctrl-Q).
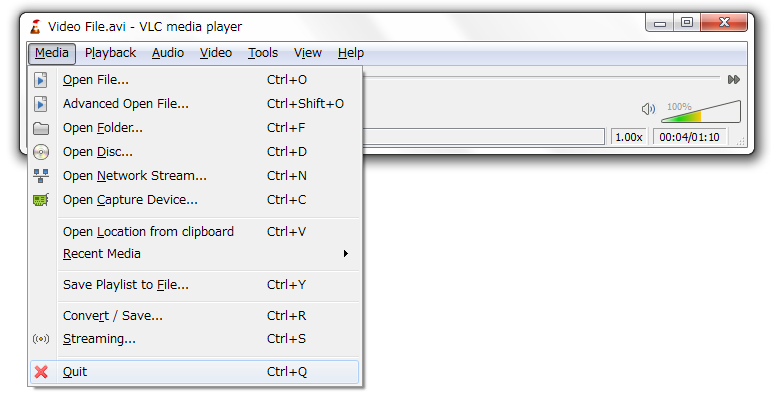 Basic interface quit.png
Notification Area Icon LargeVLC.png
Clicking this icon shows or hides the VLC interface. Hiding VLC does not
exit the application. VLC keeps running in the background when it is hidden.
Right clicking the icon in the notification area shows a menu with basic
operations, such as opening, playing, stopping, or changing a media file.
Main Interface
The main interface has the following areas:
- Menu bar
- Track slider - The track slider is below the menu bar. It shows the
playing progress of the media file. You can drag the track slider left to
rewind or right to forward the track being played.
Note: When a video file is played, the video is shown between the menu bar and
the track slider.
Note: When a media file is streamed, the track slider does not move
because VLC cannot know the total duration.
- Control Buttons - The buttons below the track slider cover all the basic
playback features.
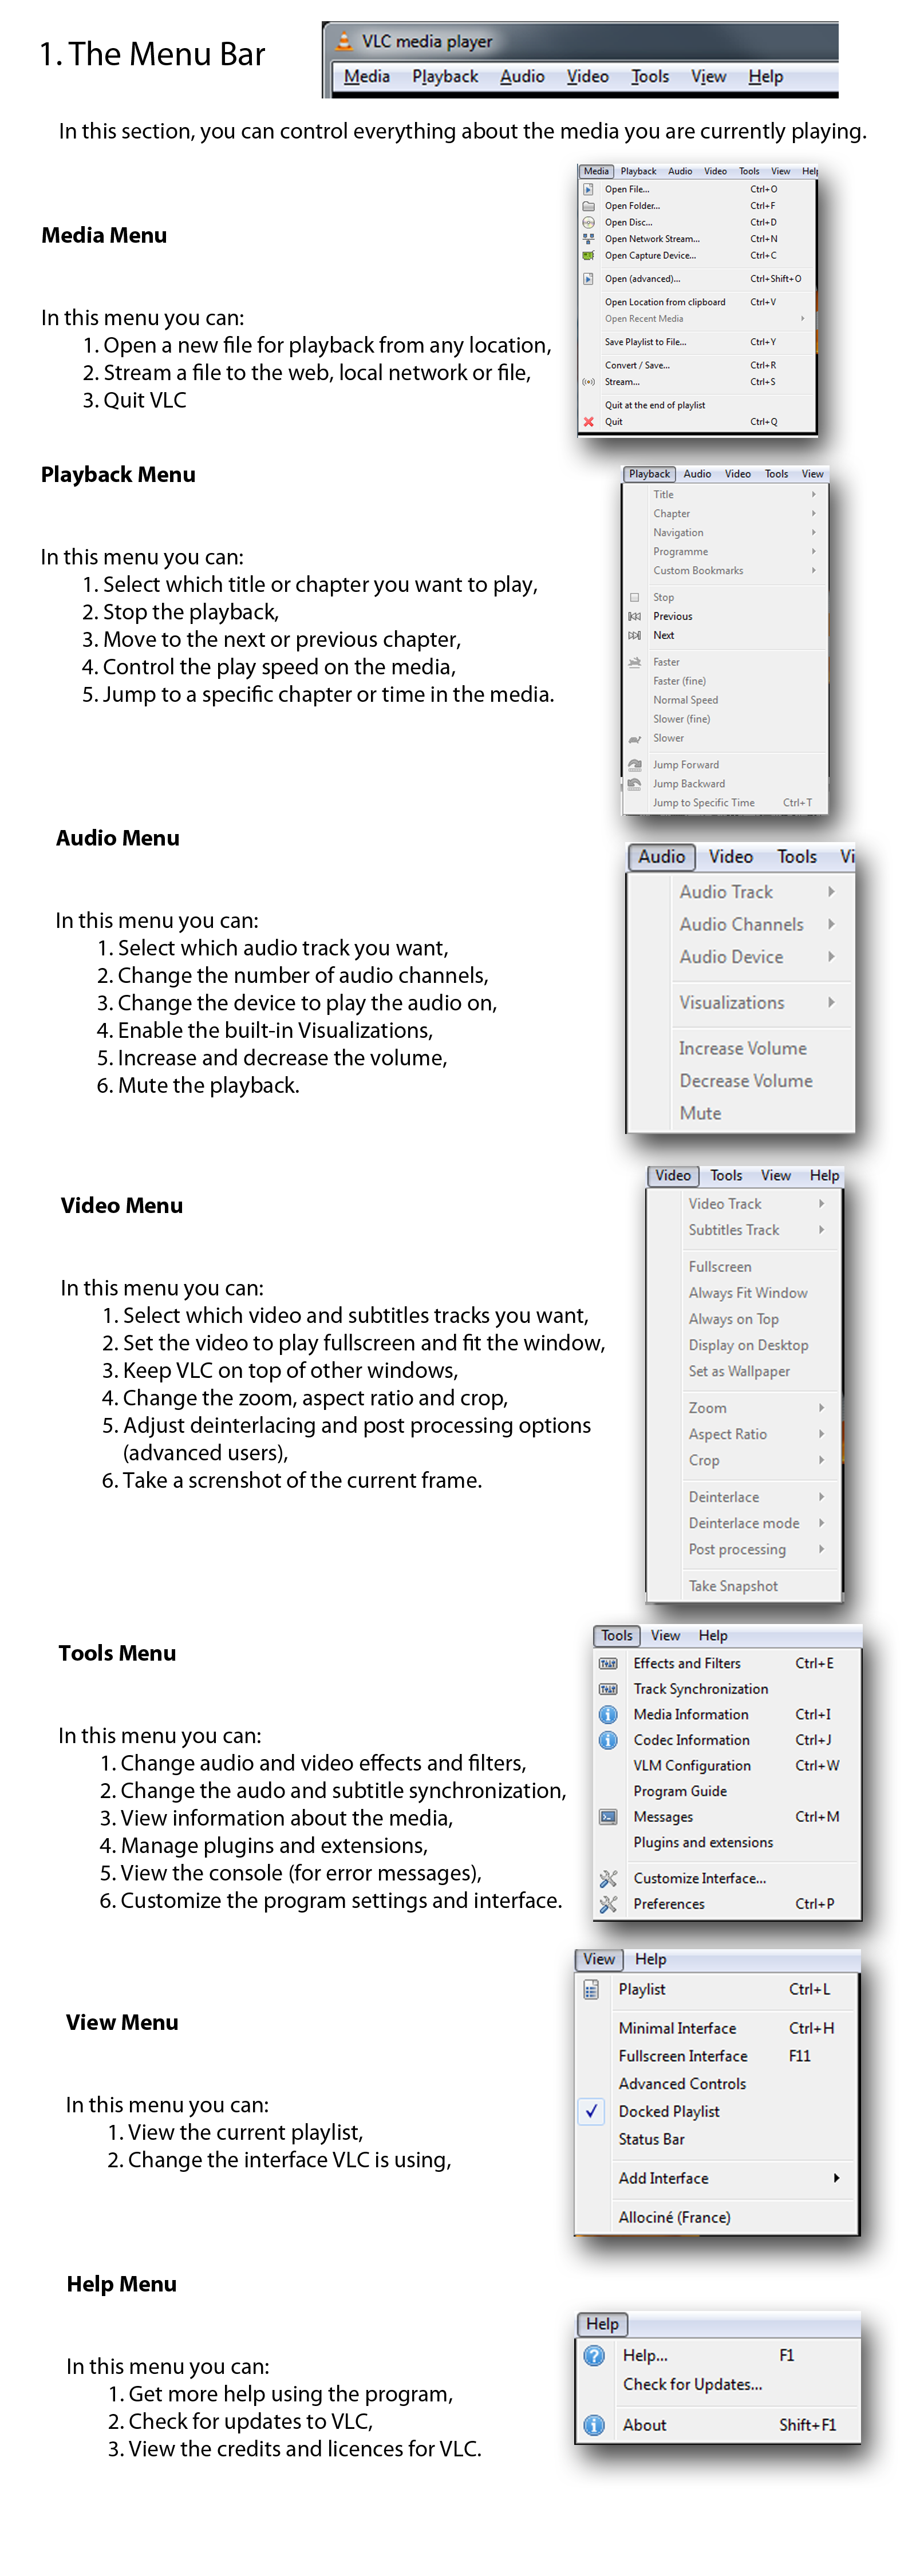 Click here to view an explanation of every menu item.
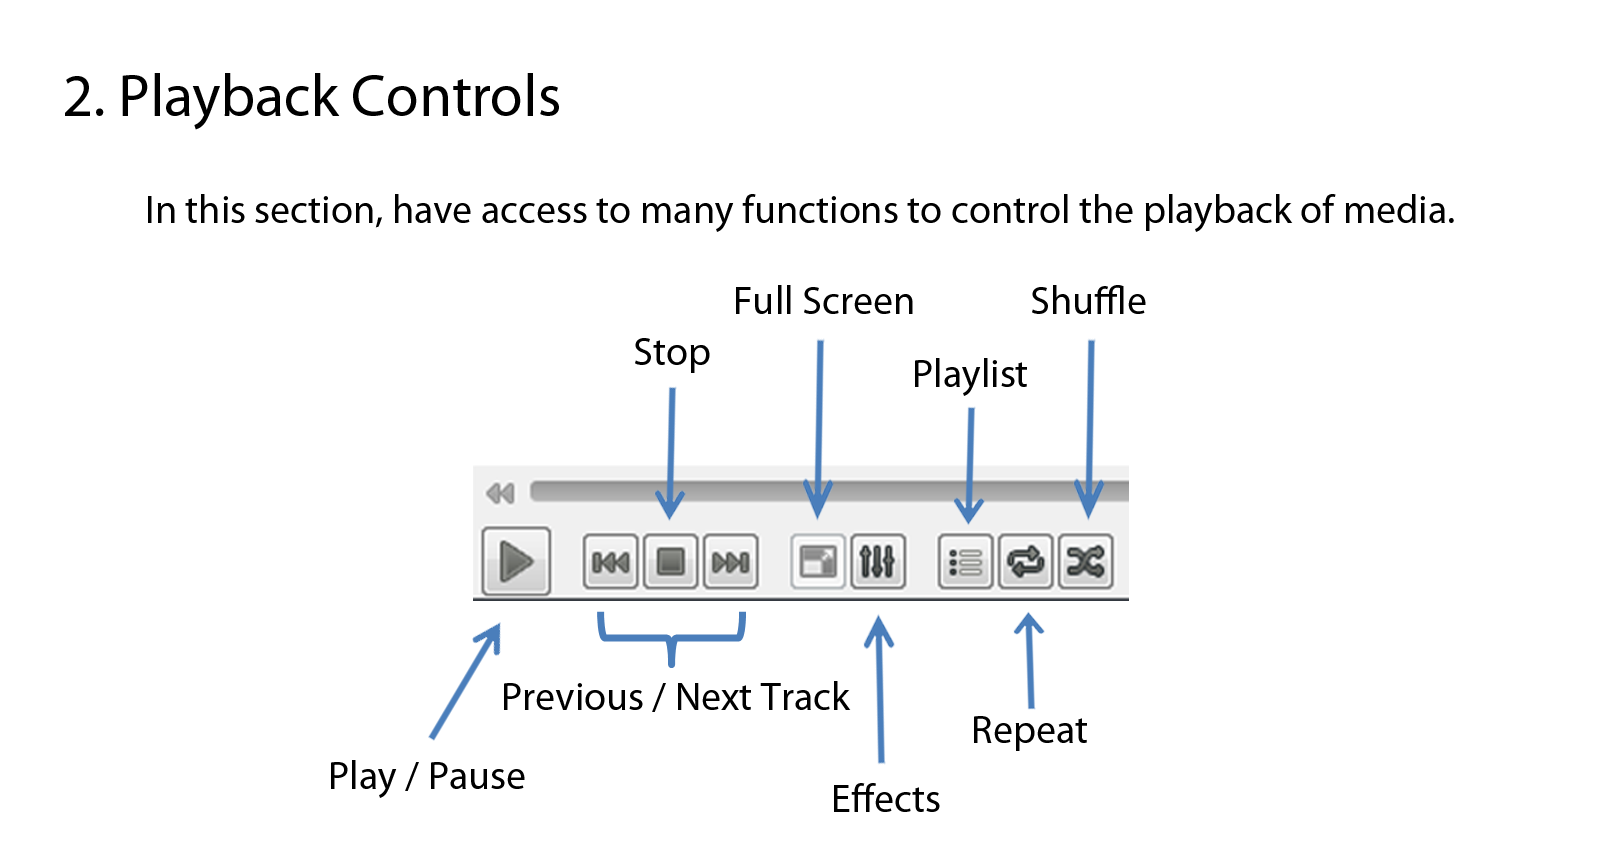 Playbackcontrols.png
Opening media
See Documentation:Play HowTo/Basic Use 0.9/Opening modes
Streaming Media Files
Streaming is a method of delivering audio or video content across a network
without the need to download the media file before it is played. You can
view or listen to the content as it arrives. It has the advantage that you
don't need to wait for large media files to finish downloading before
playing them.
VideoLan is designed to stream MPEG videos on high bandwidth networks. VLC
can be used as a server to stream MPEG-1, MPEG-2 and MPEG-4 files, DVDs and
live videos on the network in unicast or multicast. Unicast is a process
where media files are sent to a single system through the network. Multicast
is a process where media files are sent to multiple systems through the
network.
VLC is also used as a client to receive, decode and display MPEG streams.
MPEG-1, MPEG-2 and MPEG-4 streams received from the network or an external
device can be sent to one machine or a group of machines.
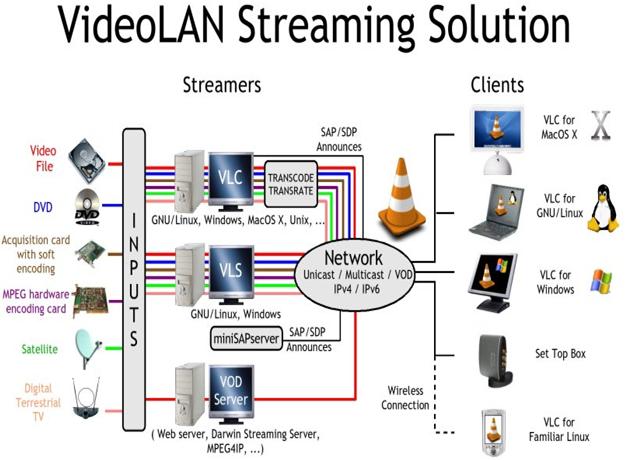 Streamingdiag.JPG
To stream a file:
Streamingdiag.JPG
To stream a file:
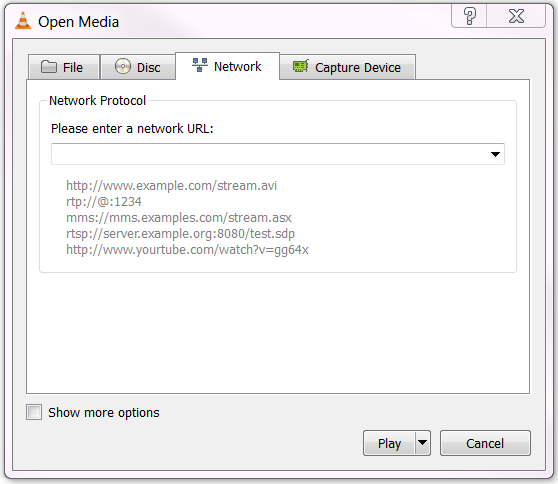
- From the Media menu, select Open Network Stream. The Open Media dialog
box loads with the Network tab selected.
- In the Please enter a network URL text box, Type the network URL.
- Click Play.
Note: When VLC plays a stream, the track slider shows the progress of the
playback.
For more information, refer to Documentation:Streaming HowTo/Receive and
 Save a Stream
Vlc network stream.PNG
Save a Stream
Vlc network stream.PNG
Converting and Saving a Media File Format
VLC can convert media files from one format to another.
To convert a media file:
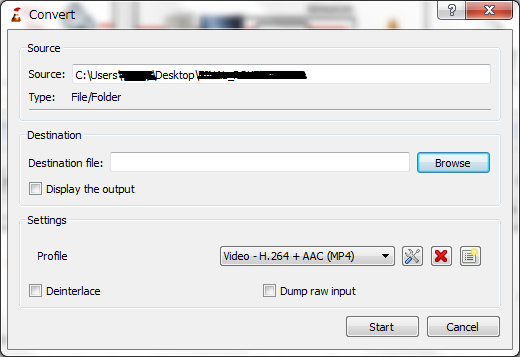
- From the Media menu, select Convert/Save. The Open media dialog window
appears.
- Click Add.... A file selection dialog window appears.
- Select the file you want to convert and click Open. The Convert dialog
window appears.
- In the Destination file text box, indicate the path and file name where
you want to store the converted file.
- From the Profile drop-down, select a conversion profile.
- Click Start.
 Basic interface convert.png