Ubuntu 22.04: NTP Server
From: https://linuxconfig.org/ubuntu-22-04-ntp-server
Ubuntu 22.04 NTP server

25 April 2022 by Korbin Brown

NTP stands for Network Time Protocol and is used for clock synchronization
across multiple computers. An NTP server is responsible for keeping a set
of
computers in sync with each other. On a local network, the server should be
able to keep all client systems to within a single millisecond of each
other.

Such a configuration would be necessary if, for example, the systems needed
to start or stop a task in unison at a precise time. In this article,
we’ll show you how to configure an NTP server on Ubuntu 22.04 Jammy
Jellyfish and how to configure a client system to sync its system time with
said server.

In this tutorial you will learn:
- How to install and configure NTP server
- How to connect to an NTP server from a client machine
 Ubuntu 22.04 NTP server
Software Requirements and Linux Command Line Conventions
Ubuntu 22.04 NTP server
Software Requirements and Linux Command Line Conventions
| Category | Requirements, Conventions or Software Version Used
|
| System | Ubuntu 22.04 Jammy Jellyfish
|
| Software | NTP server daemon
|
| Other | Privileged access to your Linux system as root or via the sudo
command.
|
| Conventions | # – requires given linux commands to be executed with root
privileges either
directly as a root user or by use of sudo command
$ – requires given linux commands to be executed as a regular non
-privileged user
|
Install NTP server
To begin, we need to install NTP server. You can do so by opening a command
line terminal and entering the following command:
$ sudo apt update
$ sudo apt install ntp
Configure NTP server
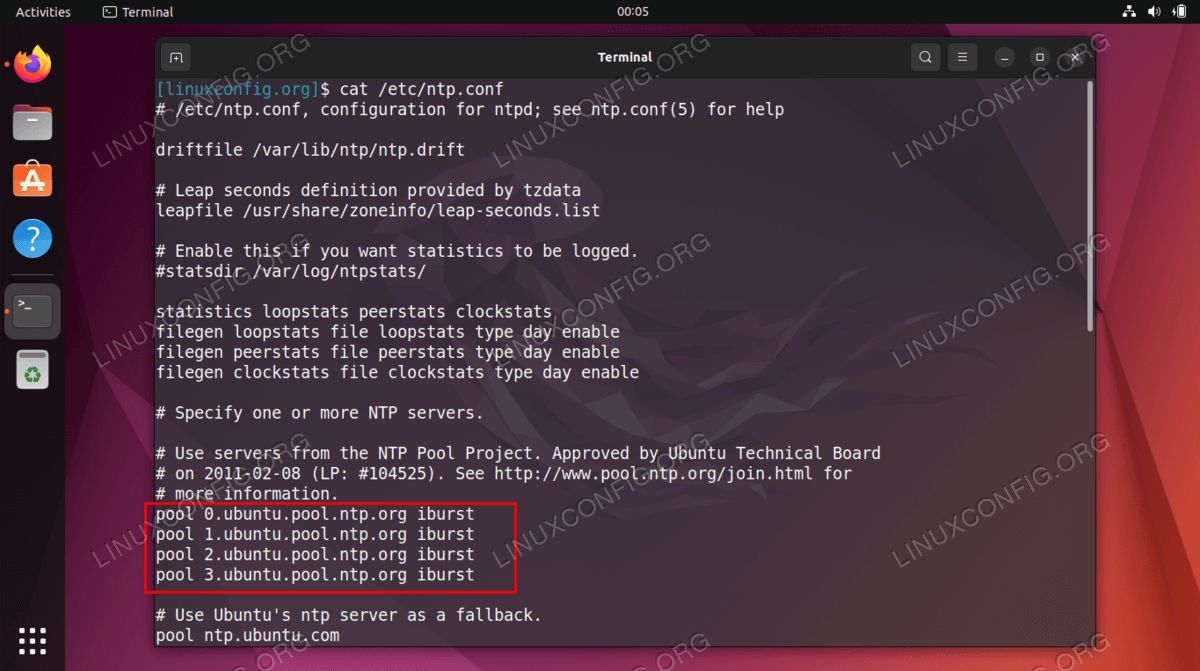
The NTP server comes pre-configured with some server pools already, which
you can see inside the /etc/ntp.conf file.
$ cat /etc/ntp.conf
The default server pools inside our NTP config file
 The default server pools inside our NTP config file
Generally, it’s best to replace these lines with server pools from your
own country, or at least your own continent. The less latency between you
and a time server, the better. You can use the NTP Pool Project website to
find the closest NTP server pool to your location.
The default server pools inside our NTP config file
Generally, it’s best to replace these lines with server pools from your
own country, or at least your own continent. The less latency between you
and a time server, the better. You can use the NTP Pool Project website to
find the closest NTP server pool to your location.
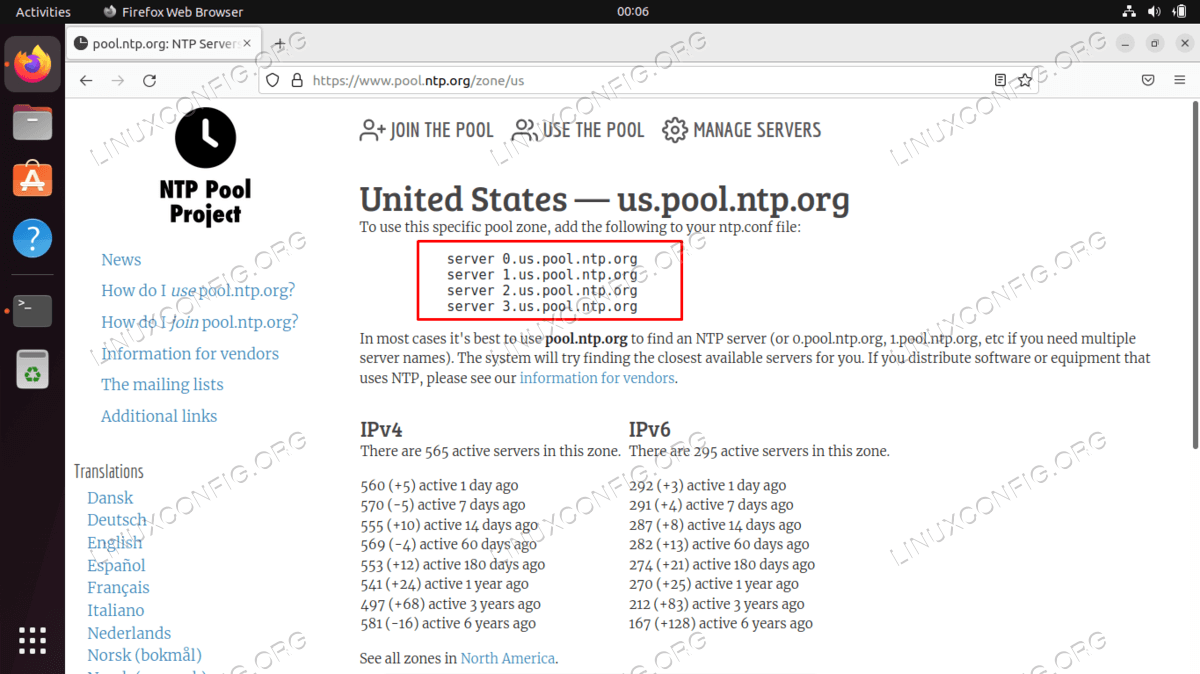 Find your closest server pools from the NTP Pool Project website. Once you find
the most relevant zone, all you need to do is add the lines in your config file
by using nano or your preferred text editor:
$ sudo nano /etc/ntp.conf
Find your closest server pools from the NTP Pool Project website. Once you find
the most relevant zone, all you need to do is add the lines in your config file
by using nano or your preferred text editor:
$ sudo nano /etc/ntp.conf
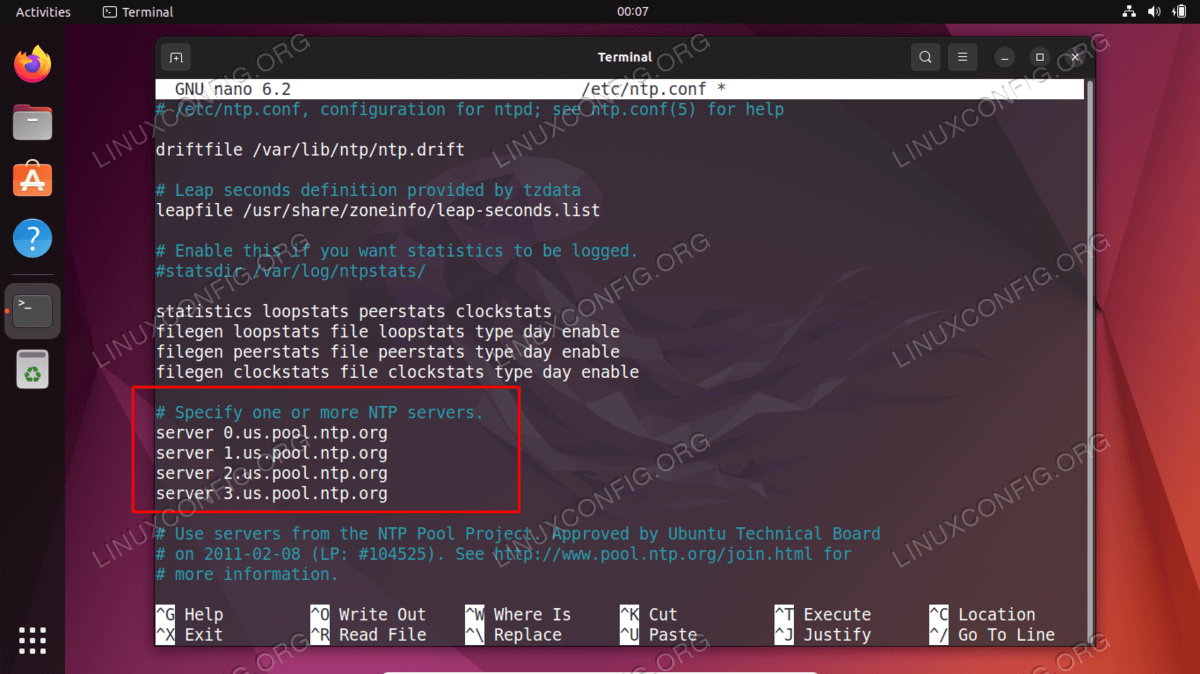 Enter the servers into the NTP config file
Once you’ve made these changes, save and exit the configuration file.
Restart the NTP service for the changes to take effect:
$ sudo systemctl restart ntp
Check on the status of the NTP service at any time with this command:
$ sudo systemctl status ntp
Enter the servers into the NTP config file
Once you’ve made these changes, save and exit the configuration file.
Restart the NTP service for the changes to take effect:
$ sudo systemctl restart ntp
Check on the status of the NTP service at any time with this command:
$ sudo systemctl status ntp
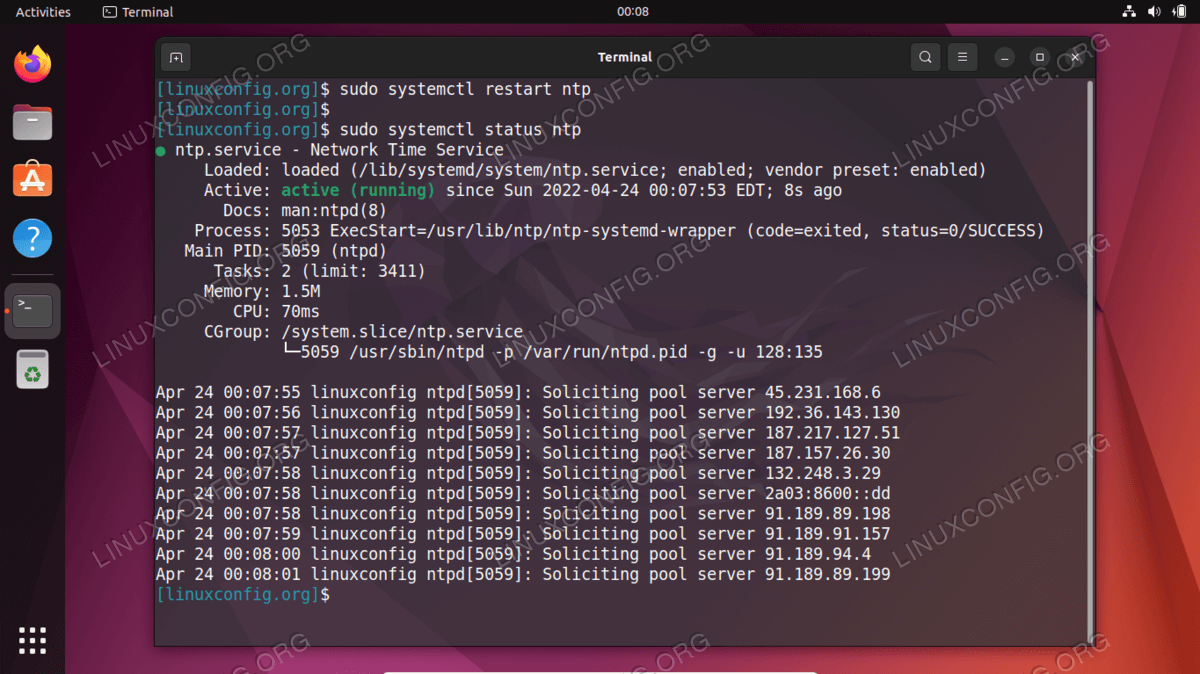 The status of NTP server daemon
Clients trying to connect to your NTP server will be doing so on UDP port
123. If you have the UFW firewall enabled on you system, be sure to
configure it to allow these incoming connection requests:
$ sudo ufw allow from any to any port 123 proto udp
Rules updated
Rules updated (v6)
NTP client configuration
The status of NTP server daemon
Clients trying to connect to your NTP server will be doing so on UDP port
123. If you have the UFW firewall enabled on you system, be sure to
configure it to allow these incoming connection requests:
$ sudo ufw allow from any to any port 123 proto udp
Rules updated
Rules updated (v6)
NTP client configuration
Now that we have an NTP server up and running, we will show how client
systems can connect to it for time synchronization. Just follow the steps
below on your client systems:
Step 1 First, we need to install the ntpdate package. We can use this to
verify connectivity between the client and the NTP time server we created.
$ sudo apt update
$ sudo apt install ntpdate
Step 2 Next, let’s attempt to manually sync our system time with the
NTP server. Type the following command, substituting your NTP server’s IP
address or hostname where appropriate:
$ sudo ntpdate 192.168.100.4
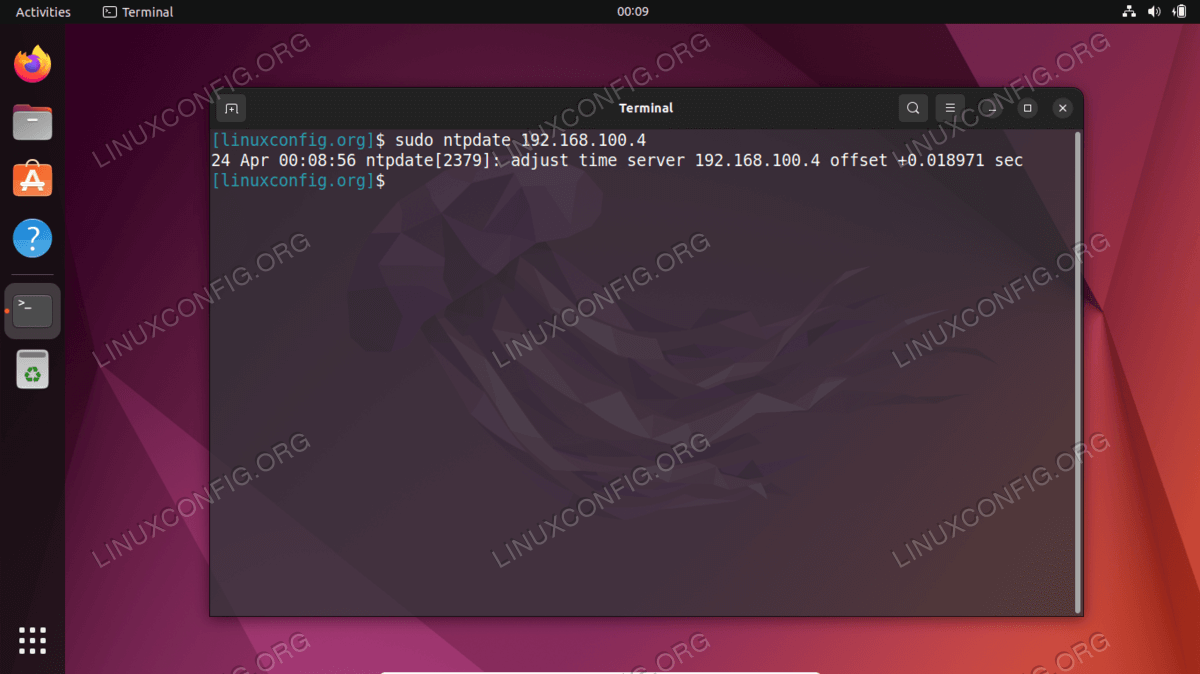 Connection to NTP server is successful
Step 3 That seems to be working as we’d expect. Next, be sure to
disable
Ubuntu’s default timesyncd service, as this will conflict with our
attempts to synchronize with the NTP server.
$ sudo timedatectl set-ntp off
Step 4 Now, we need to install the NTP daemon on our client system so we
can configure it to pull the time from our NTP server that we set up
earlier.
$ sudo apt install ntp
Step 5 We only need to add a single line to our ntp.conf file, and we can
do that very easily with a single command. Just make sure to replace the IP
address below with either the hostname or the IP address of your NTP
server.
$ sudo bash -c "echo server 192.168.100.4 prefer iburst >> /etc/ntp.conf"
Step 6 Then, restart the NTP daemon:
$ sudo systemctl restart ntp
Step 7 Lastly, use the ntpq command to list the NTP time synchronization
queue:
$ ntpq -p
Connection to NTP server is successful
Step 3 That seems to be working as we’d expect. Next, be sure to
disable
Ubuntu’s default timesyncd service, as this will conflict with our
attempts to synchronize with the NTP server.
$ sudo timedatectl set-ntp off
Step 4 Now, we need to install the NTP daemon on our client system so we
can configure it to pull the time from our NTP server that we set up
earlier.
$ sudo apt install ntp
Step 5 We only need to add a single line to our ntp.conf file, and we can
do that very easily with a single command. Just make sure to replace the IP
address below with either the hostname or the IP address of your NTP
server.
$ sudo bash -c "echo server 192.168.100.4 prefer iburst >> /etc/ntp.conf"
Step 6 Then, restart the NTP daemon:
$ sudo systemctl restart ntp
Step 7 Lastly, use the ntpq command to list the NTP time synchronization
queue:
$ ntpq -p
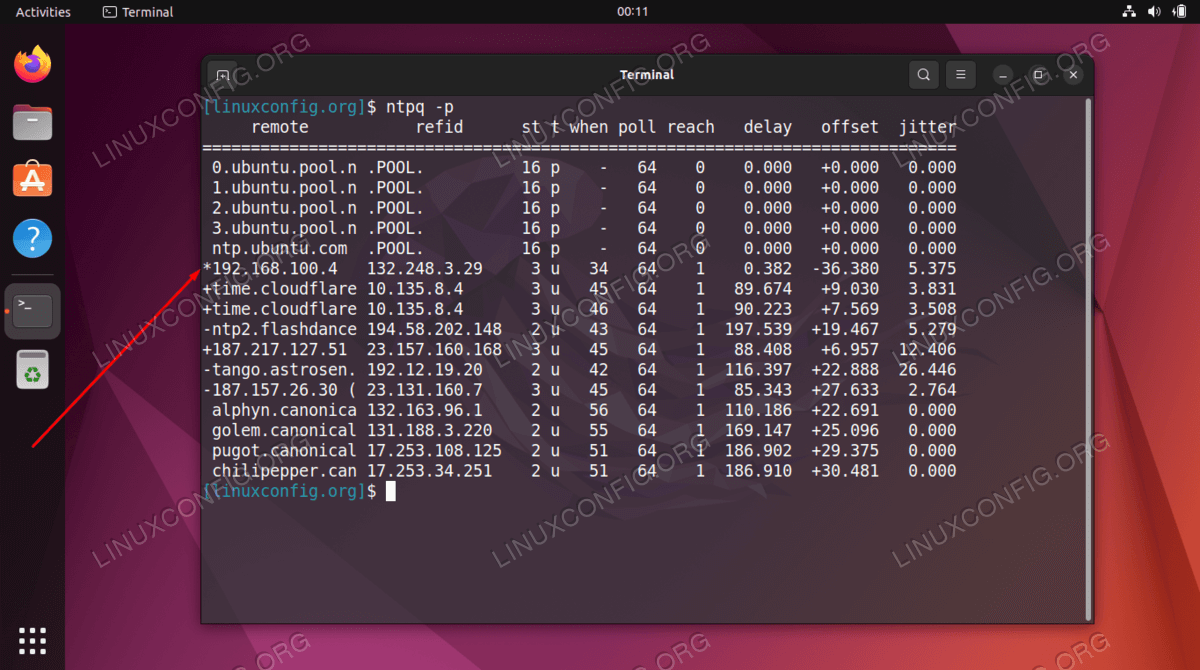 Output from the ntpq command
The asterisk * in the screenshot above indicates that our NTP server
192.168.100.4 is selected as the current time synchronization source. This
should remain the case unless the NTP server goes offline, as that’s how
we’ve configured it inside the ntp.conf configuration file.
Read the below appendix for more information on how to interpret the ntpq
command’s output.
Appendix
Output from the ntpq command
The asterisk * in the screenshot above indicates that our NTP server
192.168.100.4 is selected as the current time synchronization source. This
should remain the case unless the NTP server goes offline, as that’s how
we’ve configured it inside the ntp.conf configuration file.
Read the below appendix for more information on how to interpret the ntpq
command’s output.
Appendix
NTPQ Command column output interpretation:
- remote – The remote server you wish to synchronize your clock with
- refid – The upstream stratum to the remote server. For stratum 1
servers, this will be the stratum 0 source.
- st – The stratum level, 0 through 16.
- t – The type of connection. Can be “u” for unicast or manycast,
“b” for broadcast or multicast, “l” for local reference clock,
“s” for symmetric peer, “A” for a manycast server, “B” for a
broadcast server, or “M” for a multicast server
- when – The last time when the server was queried for the time. Default
is seconds, or “m” will be displayed for minutes, “h” for hours and
“d” for days.
- poll – How often the server is queried for the time, with a minimum of
16 seconds to a maximum of 36 hours. It’s also displayed as a value from a
power of two. Typically, it’s between 64 seconds and 1024 seconds.
- reach – This is an 8-bit left shift octal value that shows the success
and failure rate of communicating with the remote server. Success means the
bit is set, failure means the bit is not set. 377 is the highest value.
- delay – This value is displayed in milliseconds, and shows the round
ip time (RTT) of your computer communicating with the remote server.
- offset – This value is displayed in milliseconds, using root mean
squares, and shows how far off your clock is from the reported time the
server gave you. It can be positive or negative.
- jitter – This number is an absolute value in milliseconds, showing the
root mean squared deviation of your offsets.
NTPQ Command row output interpretation:
- ” “ Discarded as not valid. Could be that you cannot communicate with the
remote machine (it’s not online), this time source is a “.LOCL.” refid time
source, it’s a high stratum server, or the remote server is using this computer
as an NTP server.
- x Discarded by the intersection algorithm.
- . Discarded by table overflow (not used).
- – Discarded by the cluster algorithm.
- + Included in the combine algorithm. This is a good candidate if the
current server we are synchronizing with is discarded for any reason.
- # Good remote server to be used as an alternative backup. This is only
shown if you have more than 10 remote servers.
- * The current system peer. The computer is using this remote server as its
time source to synchronize the clock
- o Pulse per second (PPS) peer. This is generally used with GPS time
sources, although any time source delivering a PPS will do. This tally code and
the previous tally code “*” will not be displayed simultaneously.
Ref: Ref: https://pthree.org/2013/11/05/real-life-ntp/
Closing Thoughts
In this tutorial, we learned about the National Time Protocol (NTP) and how
to setup our own NTP server on Ubuntu 22.04 Jammy Jellyfish. We also saw
how
to configure a client machine (or multiple machines, as is usually the
case)
to connect to the NTP server for time synchronization.
Related Linux Tutorials: