How To Install LAMP
From: https://www.linode.com/docs/guides/how-to-install-a-lamp-stack
-on
-ubuntu-22-04/
Install a LAMP Stack on Ubuntu 22.04
Updated Wednesday, June 21, 2023, by Jeff Novotny

This guide was written for Ubuntu 22.04. Other distributions are
available:

The LAMP Stack includes an operating system, web server, programming
language, and database. These applications are collectively able to
implement web applications and other computing solutions. This guide
provides some background about the LAMP stack and explains how to install
and configure it on Ubuntu 22.04 LTS. It also explains how to quickly test
interactions between the applications.


What is a LAMP Stack?

The LAMP Stack is an acronym for Linux, Apache, MySQL, and PHP. It includes
an operating system, a web server, a database, and a versatile programming
language. All components are available through the default Ubuntu software
repositories.

The LAMP Stack is sufficient to host web applications and implement a modern
computing environment. Many other Ubuntu applications rely on some or all of
these programs. In some cases, substitutions to the LAMP stack can be made.
For example, the NGINX web server can be used instead of Apache. Each
component has a role within the software stack.
- Linux: Linux is an operating system based on UNIX. Linux is available for
free as open source technology. There are several distinct implementations
of Linux, which are known as distributions. Ubuntu is one of the most
popular distributions. Other alternatives include Debian, Red Hat, Arch, and
many, many others. Each distribution of Linux is associated with a software
library. This library is used to install other software, including the other
LAMP stack components.
- Apache HTTP Server: Apache is the most common web server for Ubuntu and
throughout the public internet. The Apache Software Foundation develops and
releases Apache as free and open source software. The standard version of
Apache includes all components required to host a web site. However, extra
modules can be used to add features including authentication and programming
language APIs.
- MySQL: MySQL is a relational database management system (RDBMS). Although
owned by Oracle, MySQL is free. Its source code is available under the GNU
General Public License. MariaDB or PostgreSQL sometimes replace MySQL in the stack.
- PHP: PHP is the server-side scripting and programming language used in the
stack. It is commonly used in web development and is firmly integrated with
the rest of the stack. An Ubuntu system interprets PHP code using a PHP
processor. PHP commands can be efficiently embedded within an HTML page. PHP
software is available for free under the PHP License. Alternatives to PHP
include Perl and Python, which can also serve as the P in the LAMP stack.
Before You Begin
- If you have not already done so, create a Linode account and Compute
Instance. See our Getting Started with Linode and Creating a Compute
Instance guides.
- Follow our Setting Up and Securing a Compute Instance guide to update your
system. You may also wish to set the timezone, configure your hostname,
create a limited user account, and harden SSH access.
Note
This guide is written for a non-root user. Commands that require elevated
privileges are prefixed with sudo. If you are not familiar with the sudo
command, see the Users and Groups guide.
Installing a LAMP Stack on Ubuntu
This section explains how to install a LAMP Stack on Ubuntu 22.04 LTS. These
instructions are also generally valid for Ubuntu 20.04 LTS.
Note
These instructions are valid with or without a registered domain name. If a
domain name maps to the IP address of the server, a virtual host should
also
be configured. For information on domain names and pointing the domain name
to a Linode, see the Linode DNS Manager guide.
To install the LAMP stack on Ubuntu 22.04 LTS, follow these steps. In all
cases, enter y to proceed with the installation when asked for
confirmation.
- Using apt, update the Ubuntu packages:
sudo apt update && sudo apt upgrade
- Install the Apache web server using apt:
sudo apt install apache2
- Install the MySQL web server:
sudo apt install mysql-server
- Install PHP, along with additional PHP modules for Apache and MySQL:
sudo apt install php libapache2-mod-php php-mysql
- (Optional) Install the following commonly-used PHP modules. These packages
add PHP support for cURL, JavaScript Object Notation (JSON), and the Common
Gateway Interface (CGI).
sudo apt install php-curl php-json php-cgi
- (Optional) To host a WordPress site on the server, install the following
PHP components:
sudo apt install php-curl php-gd php-mbstring php-xml php-xmlrpc
How to Configure the LAMP Stack for Ubuntu 22.04
At this point, all LAMP Stack components are installed, but the stack is not
yet ready to use. The individual elements must be configured or enabled.
Each component can immediately be configured when it is installed, but it is
usually easier to install the applications first and then configure them
later. The following sections explain how to configure a LAMP stack on
Ubuntu 22.04.
Configuring the Apache Web Server
- Adjust the default Apache keepalive settings to allow the server to better
conserve memory. The KeepAlive setting should be set to On. This allows
Apache to reuse connections. When KeepAlive is enabled, MaxKeepAliveRequests
and KeepAliveTimeouts should also be configured. Edit the apache2.conf file
and make the following changes.
Note
MaxKeepAliveRequests limits the number of requests for each persistent
connection. KeepAliveTimeouts determines how long the server waits for new
requests from a connection. The following sample configuration balances
performance and memory utilization. These values are a good starting point
for a new installation. However, it is a good idea to test different values
to determine the optimal settings.
File: /etc/apache2/apache2.conf
- KeepAlive On
- MaxKeepAliveRequests 50
- KeepAliveTimeout 5
- Change the default multi-processing module settings within the prefork
module. Edit the /etc/apache2/mods-available/mpm_prefork.conf file to
reflect the following changes.
Note
The following values are optimized for a 2GB Linode. Systems with more
capacity can handle more aggressive settings.
File: /etc/apache2/mods-available/mpm_prefork.conf
- <IfModule mpm_prefork_module>
- StartServers 4
- MinSpareServers 3
- MaxSpareServers 40
- MaxRequestWorkers 200
- MaxConnectionsPerChild 10000
- <IfModule>
- Using the console, configure ufw to allow the Apache Full profile. This
setting permits HTTP and HTTPS connections through the firewall, enabling
web access. Ensure OpenSSH connections are also allowed. Enable ufw when all
changes are complete.
Note
The Apache Full profile allows both HTTP and HTTPS traffic.
To temporarily limit firewall access to HTTP requests during
configuration, use the Apache profile instead. The Apache
Secure profile only allows encrypted HTTPS traffic through
the firewall. Do not use this profile until HTTPS is enabled
on the server.
sudo ufw allow OpenSSH
sudo ufw allow in "Apache Full"
sudo ufw enable
- Verify the firewall settings using the ufw status command:
sudo ufw status
Status: active
To Action From
-- ------ ----
OpenSSH ALLOW Anywhere
Apache Full ALLOW Anywhere
OpenSSH (v6) ALLOW Anywhere (v6)
Apache Full (v6) ALLOW Anywhere (v6)
- Disable the mpm_event module and enable the mpm_prefork module using the
a2dismod and a2enmod commands. Depending on the installation, these settings
might already be configured.
sudo a2dismod mpm_event
sudo a2enmod mpm_prefork
- Restart Apache using the systemctl utility:
sudo systemctl restart apache2
- Ensure Apache is still active after the restart:
sudo systemctl status apache2
apache2.service - The Apache HTTP Server
Loaded: loaded (/lib/systemd/system/apache2.service; enabled; vendor
prese>
Active: active (running) since Wed 2022-05-11 10:45:23 UTC; 6s ago
- Apache is now ready to respond to incoming requests. To verify the server
is working properly, visit the IP address of the web server using a web
browser. The browser should display the default Ubuntu/Apache2 welcome page.
The page includes the message “It works” and some basic information
about the installation.
Note
Use the Linode Dashboard to find the IP address for your Ubuntu system.
http://your_IP_address/
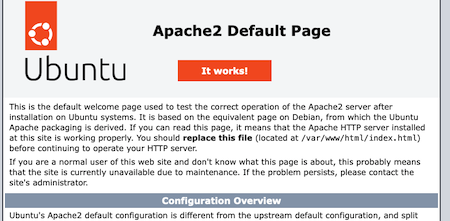 Apache Welcome Page
For more information about configuring the Apache HTTP Server, see the
Apache Documentation.
Configuring a Virtual Host for Your Domain on Apache
A virtual host should be configured for the domain, even if the server is only
hosting one site. A virtual host collects the domain details in one place. It
also makes it easier to modify the site or add more domains in the future.
Apache creates a default virtual host file in the var/www/html directory
when it is installed. Leave this file in place and create a new virtual host
for the domain in the same directory. If the server is hosting multiple
sites, a separate virtual host must be configured for each domain.
To configure a virtual host, follow these steps. Replace example.com with
the actual domain name wherever it occurs.
- It is easiest to use the default file as a basis for the new virtual host.
Copy the default Apache configuration file to:
/etc/apache2/sites -available/example.com.conf
The new configuration file must have the same name as the domain and have the
.conf extension.
sudo cp /etc/apache2/sites-available/000-default.conf /etc/apache2/sites
-available/example.com.conf
- Add the following changes to the .conf file. Replace example.com with the
actual name of the domain.
- Uncomment the ServerName field and add the name of the domain.
- Add a ServerAlias This must be set to the domain name preceded with www..
This allows users to access the site with or without the www prefix.
- Edit the DocumentRoot, ErrorLog, and CustomLog fields so they point to the
directory associated with the new domain. The DocumentRoot must be set to
/var/www/html/yourdomainname/public_html.
File: /etc/apache2/sites-available/example.com.conf
<Directory /var/www/html/example.com/public_html>
Require all granted
</Directory>
<VirtualHost *:80>
ServerName example.com
ServerAlias www.example.com
ServerAdmin webmaster@localhost
DocumentRoot /var/www/html/example.com/public_html
ErrorLog /var/www/html/example.com/logs/error.log
CustomLog /var/www/html/example.com/logs/access.log
combined
</VirtualHost>
- Create the public_html and logs directories for the domain. Ensure there is
no space between public_html and logs. The two entries must be separated with a
comma.
sudo mkdir -p /var/www/html/example.com/{public_html,logs}
- Change the owner of the public_html to www-data:
sudo chown -R www-data:www-data /var/www/html/example.com/public_html
- Set the directory permissions for the public_html directory:
sudo chmod -R 755 /var/www/html/example.com/public_html
- Use a2ensite to link the virtual hosts file and enable the site:
sudo a2ensite example.com
Enabling site example.com
- (Optional) As a security precaution, disable the default site:
sudo a2dissite 000-default.conf
- Reload Apache to apply all the changes:
Note
If Apache fails to reload, validate the syntax of the configuration files.
Use the command sudo apache2ctl configtest to find any potential errors in
the .conf file. Ensure the name of the virtual host matches the domain name
being used.
sudo systemctl reload apache2
- Verify whether the domain is accessible. The DNS record for the domain must
already resolve to the Linode. Visit the domain using a browser, entering
the domain name in the address bar. The contents of the DocumentRoot
directory for the domain should be visible. No files have been added to the
directory yet, so the browser displays an empty index page that does not
have any files or directories.
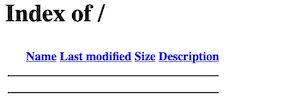 Home Directory for Domain
Configuring the MySQL Database
The MySQL database is ready to use as soon as it is installed. However, it
is necessary to create a database user for the web application and increase
application security. To finish configuring MySQL, follow these steps.
- Log in to the MySQL shell as the root user. The application displays the
mysql > prompt.
sudo mysql -u root
Welcome to the MySQL monitor. Commands end with ; or \g.
Your MySQL connection id is 10
Server version: 8.0.29-0ubuntu0.22.04.2 (Ubuntu)
...
Type 'help;' or '\h' for help. Type '\c' to clear the current input statement.
mysql>
- From the MySQL shell, create the webdata database. Create a new user
account for web application access. Provide an actual user name and password
in place of webuser and password in the CREATE USER query. Grant full rights
to the user. MySQL should respond with Query OK after each line.
CREATE DATABASE webdata;
CREATE USER 'webuser' IDENTIFIED BY 'password';
GRANT ALL ON webdata.* TO 'webuser';
- Exit the SQL shell:
quit
- The latest release of MySQL requires a root password before
mysql_secure_installation can be used. Enter the SQL shell again using sudo
mysql but do not provide a user.
sudo mysql
- Set a password for root'@'localhost. Use an actual secure password instead
of password.
ALTER USER 'root'@'localhost' IDENTIFIED WITH mysql_native_password by
'password';
- Exit the SQL shell:
Note
To log in to the MySQL shell as root after this change, use mysql -u root -p
and provide the password when prompted.
exit
- Use the built-in mysql_secure_installation tool to increase the security of
the database. Provide the MySQL password for the root account upon request.
sudo mysql_secure_installation
- When prompted to change the root password, leave it unchanged. But answer Y
for the following questions:
- Remove anonymous users?
- Disallow root login remotely?
- Remove test database and access to it?
- Reload privilege tables now?
For more information on how to configure and use MySQL, see the MySQL
Reference Manual.
Configuring PHP
PHP does not require nearly as much configuration as the other parts of the
LAMP stack. However, it can be fine-tuned, and some logs should be added. To
configure PHP on Ubuntu, follow these guidelines. Further information about
PHP can be found in the PHP Documentation Site.
- First verify which PHP release is installed using the -v option. Store this
information for the next step.
php -v
PHP 8.1.2-1ubuntu2.6 (cli) (built: Sep 15 2022 11:30:49) (NTS)
Copyright (c) The PHP Group
Zend Engine v4.1.2, Copyright (c) Zend Technologies
with Zend OPcache v8.1.2-1ubuntu2.6, Copyright (c), by Zend
Technologies
- PHP errors are easier to debug if error messages and logging are enabled.
The max_input_time parameter can be adjusted to allow better performance.
Edit the php.ini file and make the following changes. This file is found in
the /etc/php/php_version/apache2 directory, where php_version consists of
the major and minor release of PHP. In this example, the PHP release is 8.1,
so the correct file is /etc/php/8.1/apache2/php.ini.
Note
Ensure these variables are not commented out. If necessary, remove the ;
character at the start of the line.
File: /etc/php/8.1/apache2/php.ini
- error_reporting = E_COMPILE_ERROR | E_RECOVERABLE_ERROR
| E_ERROR | E_CORE_ERROR
- error_log = /var/log/php/error.log
- max_input_time = 30
- Create the PHP error log and assign ownership of the log to the web
server:
sudo mkdir /var/log/phpsudo chown www-data /var/log/php
- Restart the Apache server to apply the PHP changes:
sudo systemctl restart apache2
Testing the LAMP Stack Installation on Your Ubuntu Server
Earlier tests verified the operational status of Apache and the
configuration of the virtual host. However, it is also important to test PHP
and the MySQL database. In particular, the web server must be able to
interact with both components.
The easiest way to verify the Ubuntu LAMP Stack configuration is with a
short test script. The PHP code does not have to be long or complicated.
However, the code must initiate a connection to MySQL. The script must be
placed somewhere within the DirectoryRoot directory.
For database validation, use PHP to call the mysqli_connect function. Pass
the user name and the password for the account created in the Configuring
the MySQL Database section to MySQL. The mysqli_connect function returns a
Connection object if the attempt is successful. The script indicates whether
the connection succeeded or not, and provides more information about any failures.
To validate the installation, follow these steps.
- Create a new file named phptest.php in the public_html directory for the
domain. Ensure the servername variable is set to localhost and the username
and password match the details of the MySQL web user account.
File: /var/www/html/example.com/public_html/phptest.php
<html>
<head>
<title>PHP Test</title>
</head>
<body>
<?php echo '<p>Welcome to the Site!</p>';
// When running this script on a local database, the
servername must be 'localhost'. Use the name and
password of the web user account created earlier.
Do not use the root password.
$servername = "localhost";
$username = "webuser";
$password = "password";
// Create MySQL connection
$conn = mysqli_connect($servername, $username
, $password);
// If the conn variable is empty, the connection has
failed. The output for the failure case includes
the error message
if (!$conn) {
die('<p>Connection failed: </p>'
. mysqli_connect_error());
}
echo '<p>Connected successfully</p>';
?>
</body>
</html>
- Use a web browser to test the script. Enter the name of the domain followed
by phptest.php in the address bar. In the following example, substitute the
actual name of the domain for example.com.
http://example.com/phptest.php
- The browser should display the web page without any errors. The page
includes the text “Welcome to the Site!” and “Connected
successfully”. If you see the “Connection Failed:” error message,
review the SQL error information to debug the problem. See the
Troubleshooting section for more information.
 Results of Test Script
- To increase security, remove the test script when testing is complete:
sudo rm /var/www/html/example.com/public_html/phptest.php
Troubleshooting the LAMP Stack Installation
Although it is fairly straightforward to install a LAMP Stack on Ubuntu, it
is a lengthy process. It is easy to miss a command or incorrectly spell a
variable. The easiest way to quickly find errors is to keep testing as you
proceed. For instance, visit the IP address of the Ubuntu system after
configuring and enabling Apache.
Here are a few things to consider if the LAMP Stack is not working.
- Verify Apache is running: Even if Apache was initially working, it could
have stopped or failed upon a reload. Confirm it is active and restart it
using these commands:
sudo systemctl status apache2
sudo systemctl restart apache2
- Confirm the domain name and server IP address: If the HTTP request times
out, it could be due to an incorrect address or domain name. Try the IP
address first, then visit the domain name without any subdirectories or
filenames. Ensure the DNS record for the domain has been set to the IP
address of the Ubuntu system and the address has propagated. This can take
up to one full day.
- Confirm the user information in MySQL: Ensure the database user has been
added properly. Ensure the webdata database exists and the user has been
granted all rights to it.
- Review all configuration files: Many errors are due to missing or incorrect
variables in the configuration files. Ensure the DirectoryRoot variable in
/etc/apache2/sites-available/example.com.conf matches the path of the domain
directory. If this variable is incorrect, the browser might display the
default Apache landing page, a 404 error, or an unexpected directory list.
- Verify the location of the test script: The test script must be located
somewhere in the DirectoryRoot directory. The script should also be visible
in the root directory of the domain.
- Confirm the user name and password used in the test script: Most database
connection failures in the test script are due to an incorrect server name,
password, or user name. Look for missing or incorrect information in the script.
- Review the Logs: The error logs for PHP are located at
/var/log/php/error.log, while domain logs can be found at
/var/www/html/example.com/logs/error.log. Examine the contents of both files
and scan them for errors.
- Review the installation instructions: It is easy to overlook an important
step. Incorrect user permissions or an uninstalled PHP module can cause
confusing failures.
A Summary of How to Install a LAMP Stack
on Ubuntu 22.04
The LAMP Stack consists of the Linux operating system, Apache web server,
MYSQL RDBMS, and PHP programming language. These free and open source
components power many modern web applications. The individual components are
designed to work together and are easy to install and use.
The LAMP stack can be installed on Ubuntu 22.04 LTS using apt. After
configuring the Apache web server, it is good practice to create a virtual
host for the domain. To integrate the MySQL web server, create a new account
to represent the web user. Additional PHP packages must be installed so
Apache, PHP, and the database can communicate. The new installation can be
tested using a short PHP test script that connects to the database. For more
information about each LAMP Stack component, see the More Information
section of this guide.
More Information
You may wish to consult the following resources for additional information
on this topic. While these are provided in the hope that they will be
useful, please note that we cannot vouch for the accuracy or timeliness of
externally hosted materials.