Get Date Time with ESP32
From: https://randomnerdtutorials.com/esp32-ntp-client-date-time-arduino-ide/
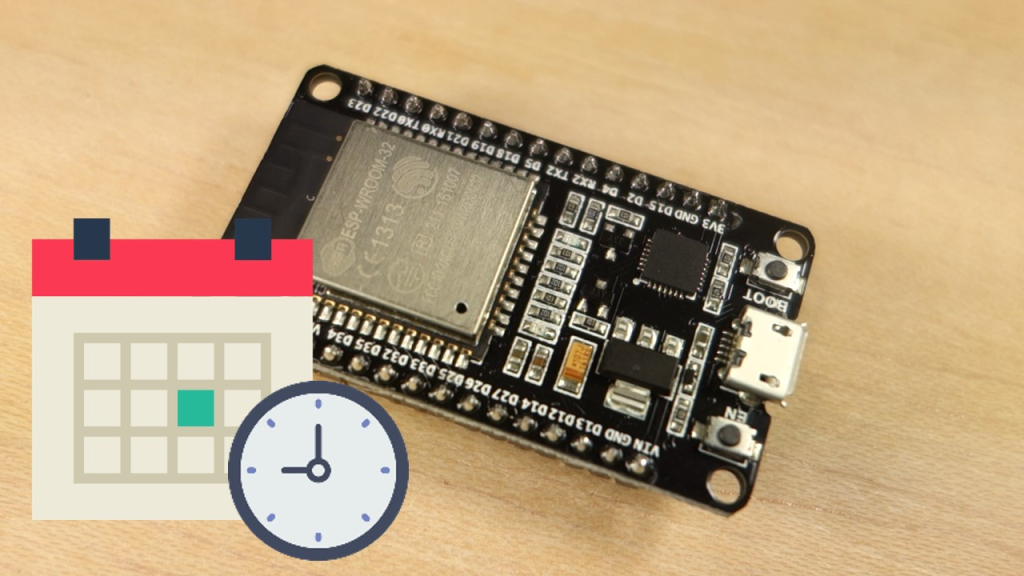
Getting Date and Time with ESP32 on Arduino IDE (NTP Client)


In this tutorial we’ll show you how to get date and time using the ESP32 and Arduino IDE. Getting date and time is especially useful in data logging to timestamp your readings. If your ESP32 project has access to the Internet, you can get date and time using Network Time Protocol (NTP) – you don’t need any additional hardware.


Note: there’s an easier and updated guide to get date and time with the ESP32 with the pre-installed time.h library: ESP32 NTP Client-Server: Get Date and Time (Arduino IDE).

Before proceeding with this tutorial you should have the ESP32 add-on installed in your Arduino IDE. Follow one of the following tutorials to install the ESP32 on the Arduino IDE, if you haven’t already.
Note: there’s an easier and updated guide to get date and time with the ESP32 with the pre-installed time.h library: ESP32 NTP Client-Server: Get Date and Time (Arduino IDE).
Before proceeding with this tutorial you should have the ESP32 add-on installed in your Arduino IDE. Follow one of the following tutorials to install the ESP32 on the Arduino IDE, if you haven’t already.
- Installing the ESP32 Board in Arduino IDE (Windows instructions)
- Installing the ESP32 Board in Arduino IDE (Mac and Linux instructions)
NTP Client Library
The easiest way to get date and time from an NTP server is using an NTP Client library. For that we’ll be using the NTP Client library forked by Taranais. Follow the next steps to install this library in your Arduino IDE:
- Click here to download the NTP Client library. You should have a .zip folder in your Downloads
- Unzip the .zip folder and you should get NTPClient-master folder
- Rename your folder from NTPClient-master to NTPClient
- Move the NTPClient folder to your Arduino IDE installation libraries folder
- Finally, re-open your Arduino IDE
Getting Date and Time from NTP Server
Here we provide a sample code to get date and time from the NTP Server. This example was modified from one of the library examples.
/*H*****************************************************
Rui Santos
Complete project details at https://randomnerdtutorials.com
Based on the NTP Client library example
******************************************************/
#include
#include
#include
//************************* DEFINES ************************************
#define BAUD 9600
const char *ssid = "REPLACE_WITH_YOUR_SSID";
const char *password = "REPLACE_WITH_YOUR_PASSWORD";
//************************* PROTOTYPES ************************************
//************************* VARIABLES ************************************
WiFiUDP ntpUDP; // Define NTP Client to get time
NTPClient timeClient( ntpUDP );
String formattedDate; // Variables for date and time
String dayStamp;
String timeStamp;
/*F********************************************************************
*
**********************************************************************/
void
setup()
{
Serial.begin( BAUD ); // Initialize Serial Monitor
Serial.print( "Connecting to ");
Serial.println( ssid );
WiFi.begin( ssid, password );
while( WiFi.status() != WL_CONNECTED )
{
delay( 500 );
Serial.print(".");
}
// Print local IP address and start web server
Serial.println( "" );
Serial.println( "WiFi connected." );
Serial.println( "IP address: " );
Serial.println( WiFi.localIP() );
timeClient.begin(); // Init NTPClient to get time
// Set offset time in seconds to adjust for your timezone, for example:
// GMT +1 = 3600
// GMT +8 = 28800
// GMT -1 = -3600
// GMT 0 = 0
timeClient.setTimeOffset( 3600 );
}
/*F***************************************************************************
*
****************************************************************************/
void
loop()
{
while( !timeClient.update() )
{
timeClient.forceUpdate();
}
// formattedDate comes with following format: 2018-05-28T16:00:13Z
// We need to extract date and time
formattedDate = timeClient.getFormattedDate();
Serial.println( formattedDate );
// Extract date
int splitT = formattedDate.indexOf( "T" );
dayStamp = formattedDate.substring( 0, splitT);
Serial.print( "DATE: " );
Serial.println( dayStamp );
// Extract time
timeStamp = formattedDate.substring( splitT +1
, formattedDate.length() -1);
Serial.print( "HOUR: ");
Serial.println( timeStamp );
delay( 1000 );
}
To get more NTP examples, in the Arduino IDE, go to File > Examples > NTPClient.
How the Code Works
Let’s take a quick look at the code to see how it works. First, you include the libraries to connect to Wi-Fi and get time and create an NTP client.
#include
#include
#include
Setting SSID and password
Type your network credentials in the following variables, so that the ESP32 is able to establish an Internet connection and get date and time from the NTP server.
// Replace with your network credentials
const char* ssid = "REPLACE_WITH_YOUR_SSID";
const char* password = "REPLACE_WITH_YOUR_PASSWORD";
Preparing NTP Client
The following two lines define an NTP Client to request date and time from an NTP server.
WiFiUDP ntpUDP;
NTPClient timeClient( ntpUDP );
Then, initialize String variables to save the date and time.
String formattedDate;
String dayStamp;
String timeStamp;
In the setup() you initialize the Serial communication at baud rate 115200 to print the results:
Serial.begin( BAUD );
These next lines connect the ESP32 to your router.
// Initialize Serial Monitor
Serial.begin( BAUD );
Serial.print( "Connecting to ");
Serial.println( ssid );
WiFi.begin( ssid, password);
while( WiFi.status() != WL_CONNECTED)
{
delay( 500 );
Serial.print( "." );
}
// Print local IP address and start web server
Serial.println( "" );
Serial.println( "WiFi connected." );
Serial.println( "IP address: " );
Serial.println( WiFi.localIP() );
Next, initialize the NTP client to get date and time from an NTP server.
timeClient.begin();
You can use the setTimeOffset() method to adjust the time for your timezone in seconds.
timeClient.setTimeOffset( 3600 );
Here are some examples for different timezones:
- GMT +1 = 3600
- GMT +8 = 28800
- GMT -1 = -3600
- GMT 0 = 0
These next lines ensure that we get a valid date and time:
while( !timeClient.update() )
{
timeClient.forceUpdate();
}
Note: sometimes the NTP Client retrieves 1970. To ensure that doesn’t happen we need to force the update.
Getting date and time
Then, convert the date and time to a readable format with the getFormattedDate() method:
formattedDate = timeClient.getFormattedDate();
The date and time are returned in the following format:
2018-04-30T16:00:13Z
If you want to get date and time separately, you need to split that string. The “T” letter separates the date from the time, so we can easily split that String. That’s what we do in these next lines.
// Extract date
int splitT = formattedDate.indexOf( "T" );
dayStamp = formattedDate.substring( 0, splitT);
Serial.println( dayStamp );
// Extract time
timeStamp = formattedDate.substring( splitT +1, formattedDate.length() -1);
Serial.println( timeStamp );
The date is saved on the dayStamp variable, and the time on the timeStamp variable.The time is requested and printed in every second.
Testing Code
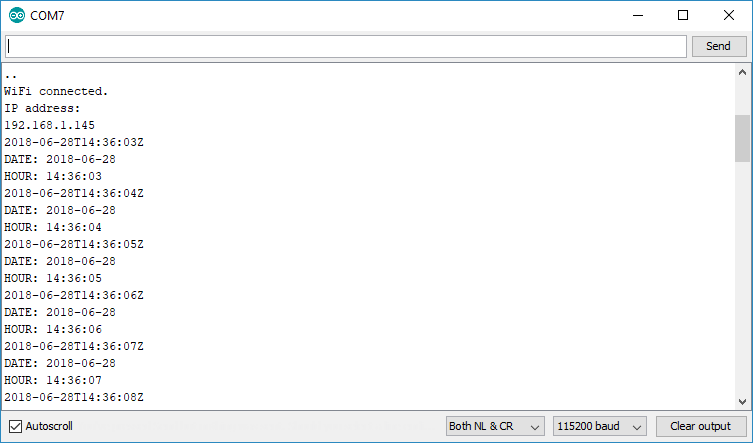
Upload the code to the ESP32. Make sure you have the right board and COM port selected. After uploading the code, press the ESP32 “Enable” button, and you should get the date and time every second as shown in the following figure.
 Wrapping Up
In this tutorial we’ve shown you how to easily get date and time with the ESP32 on the Arduino IDE using an NTP server. The code provided is not useful by itself. The idea is to use the example provided in this guide in your own projects to timestamp your sensor readings.
This method only works if the ESP32 is connected to the Internet. If your project doesn’t have access to the internet, you need to use other method. You can use an RTC module like the DS1307.
We have other tutorials related with ESP32 that you may also like:
Learn ESP32 with Arduino IDE Course
ESP32 Data Logging Temperature to MicroSD Card
ESP32 Publish Sensor Readings to Google Sheets
Build an All-in-One ESP32 Weather Station Shield
Getting Started with ESP32 Bluetooth Low Energy (BLE)
ESP32 with LoRa using Arduino IDE