Getting Date & Time From NTP Server With ESP32
From: https://lastminuteengineers.com/esp32-ntp-server-date-time-tutorial/
Every once in a while you’ll come across an idea where keeping time a prime
concern. For example, imagine a relay that has to be activated at a certain time
or a data logger that has to store values at precise intervals.
The first thing that comes to mind is to use an RTC (Real Time Clock) chip.
However, because these chips are not perfectly accurate, you must perform manual
adjustments on a regular basis to keep them synchronized.
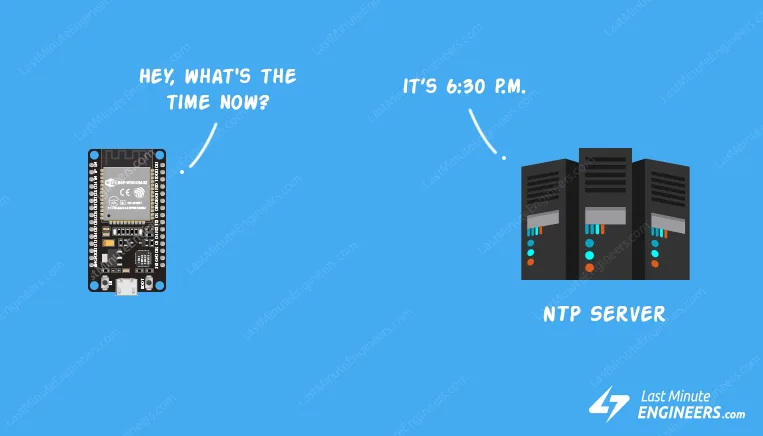
Instead, it is preferable to employ the Network Time Protocol (NTP). If your
ESP32 project has Internet access, you can obtain date and time (with a
precision of a few milliseconds of UTC) for FREE. Also, you don’t need any
additional hardware.
What is an NTP?
An NTP stands for Network Time Protocol . It’s a standard Internet Protocol (IP)
for synchronizing the computer clocks to some reference over a network.
The protocol can be used to synchronize all networked devices to
Coordinated Universal Time  (UTC) within a few milliseconds
(50 milliseconds over the public Internet and under 5 milliseconds in a LAN
environment).
Coordinated Universal Time (UTC) is a world-wide time standard, closely related
to GMT (Greenwich Mean Time). UTC does not vary, it is the same world wide.
NTP sets the clocks of computers to UTC, any local time zone offset or day light
saving time offset is applied by the client. In this manner clients can
synchronize to servers regardless of location and time zone differences.
NTP Architecture
NTP uses a hierarchical architecture. Each level in the hierarchy is known as a
stratum .
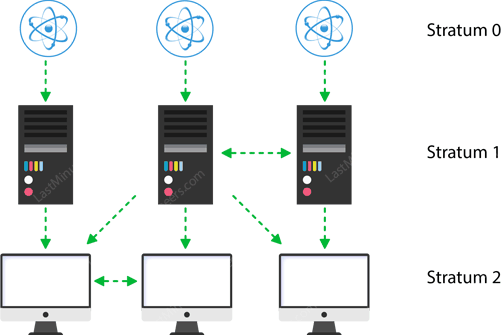
At the very top are high-precision timekeeping devices, such as atomic clocks,
GPS or radio clocks, known as stratum 0 hardware clocks.
Stratum 1 servers have a direct connection to a stratum 0 hardware clock and
therefore have the most accurate time.
Each stratum in the hierarchy synchronizes to the stratum above and act as
servers for lower stratum computers.
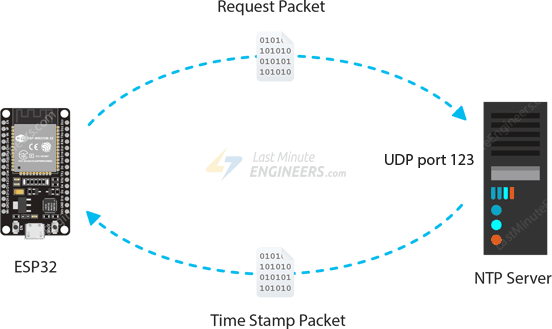
How NTP Works?
NTP can operate in a number of ways. The most common configuration is to
operate in client-server mode . The basic working principle is
as follows:
- The client device such as ESP32 connects to the server using the User
Datagram Protocol (UDP) on port 123.
- A client then transmits a request packet to a NTP server.
- In response to this request the NTP server sends a time stamp packet.
- A time stamp packet contains multiple information like UNIX timestamp,
accuracy, delay or timezone.
- A client can then parse out current date & time values.
Preparing the Arduino IDE
Enough of the theory, Let’s Go Practical!
But before venturing further into this tutorial, you should have the ESP32
add-on installed in your Arduino IDE. Follow below tutorial to prepare your
Arduino IDE to work with the ESP32, if you haven’t already.
Insight Into ESP32 Features & Using It With Arduino IDE
Few years back, ESP8266 took the embedded IoT world by storm. For less than $3,
you could get a programmable, WiFi-enabled microcontroller being able to...
Getting Date and Time from NTP Server
The following sketch will give you complete understanding on how to get date and
time from the NTP Server.
Before you head for uploading the sketch, you need to make some changes
 to make it work for you.
- You need to modify the following two variables with your network credentials,
so that ESP32 can establish a connection with existing network.
const char *ssid = "YOUR_SSID";
const char *password = "YOUR_PASS";
- You need to adjust the UTC offset for your timezone in milliseconds. Refer
the list of UTC time offsets . Here are some examples for different timezones:
- For UTC -5.00 : -5 * 60 * 60 : -18000
- For UTC +1.00 : 1 * 60 * 60 : 3600
- For UTC +0.00 : 0 * 60 * 60 : 0
const long gmtOffset_sec = 3600;
- Change the Daylight offset in milliseconds. If your country observes
Daylight saving time set it to 3600. Otherwise, set it to 0.
const int daylightOffset_sec = 3600;
Once you are done, go ahead and try the sketch out.
/*F********************************************************************
*
**********************************************************************/
#include <WiFi.h>
#include "time.h"
//************************* DEFINES ************************************
#define BAUD 9600
const char *ssid = "YOUR_SSID";
const char *password = "YOUR_PASS";
//************************* PROTOTYPES ************************************
void printLocalTime();
//************************* VARIABLES ************************************
const char *ntpServer = "pool.ntp.org";
const long gmtOffset_sec = 3600;
const int daylightOffset_sec = 3600;
/*F********************************************************************
*
**********************************************************************/
void
setup()
{
Serial.begin( BAUD );
Serial.printf( "Connecting to %s ", ssid);
WiFi.begin( ssid, password ); // CONNECT TO WiFi
while( WiFi.status() != WL_CONNECTED)
{
delay( 500 );
Serial.print( "." );
}
Serial.println( " CONNECTED");
configTime( gmtOffset_sec, daylightOffset_sec, ntpServer);
printLocalTime(); // INIT AND GET TIME
WiFi.disconnect( true ); // DISCONNECT WiFi AS IT'S NO LONGER NEEDED
WiFi.mode( WIFI_OFF );
}
/*F********************************************************************
*
**********************************************************************/
void
loop()
{
delay( 1000 );
printLocalTime();
}
/*F********************************************************************
*
**********************************************************************/
void
printLocalTime()
{
struct tm timeinfo;
if( !getLocalTime( &timeinfo ) )
{
Serial.println( "Failed to obtain time");
return;
}
Serial.println( &timeinfo, "%A, %B %d %Y %H:%M:%S" );
}
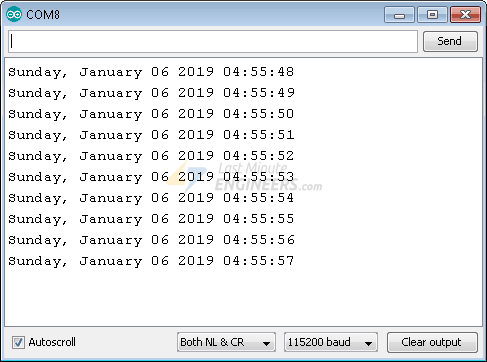
After uploading the sketch, press the EN button on your ESP32, and you should
get the date and time every second as shown below.
Code Explanation
Let’s take a quick look at the code to see how it works. First, we include the
libraries needed for this project.
- WiFi.h library provides ESP32 specific WiFi methods we
are calling to connect to network.
- time.h is the ESP32 native time library which does
graceful NTP server synchronization.
#include <WiFi.h>
#include "time.h"
Next, we set up a few constants like SSID, WiFi password, UTC Offset &
Daylight offset that you are already aware of.
const char* ssid = "YOUR_SSID";
const char* password = "YOUR_PASS";
const long gmtOffset_sec = 3600;
const int daylightOffset_sec = 3600;
Along with that we need to specify the address of the NTP Server we wish to use.
pool.ntp.org is an open NTP project great for things like this.
const char *ntpServer = "pool.ntp.org";
The pool.ntp.org automatically picks time servers which are geographically close
for you. But if you want to choose explicitly, use one of the
sub-zones
of pool.ntp.org.
| Area
| HostName
|
| Worldwide
| pool.ntp.org
|
| Asia
| asia.pool.ntp.org
|
| Europe
| europe.pool.ntp.org
|
| North America
| north-america.pool.ntp.org
|
| Oceania
| oceania.pool.ntp.org
|
| South America
| south-america.pool.ntp.org
|
In setup section, we first initialize serial communication with PC and join the
WiFi network using
WiFi.begin() function.
Serial.begin( BAUD ); // BAUD DEFINED IN #defines, ABOVE
Serial.printf( "Connecting to %s ", ssid ); // CONNECT TO WiFi
WiFi.begin( ssid, password );
while( WiFi.status() != WL_CONNECTED)
{
delay( 500 );
Serial.print( "." );
}
Serial.println( " CONNECTED" );
Once ESP32 is connected to the network, we initialize the NTP client using
configTime() function to get date and time from an NTP server.
configTime( gmtOffset_sec, daylightOffset_sec, ntpServer); //init and get time
Now we can simply call the printLocalTime() custom function whenever we want to
print current date & time.
getLocalTime() function is used to transmit a request packet to a NTP server and
parse the received time stamp packet into to a readable format. It takes time
structure as a parameter.
You can access the date & time information by accessing members of this time
structure.
/*F********************************************************************
*
**********************************************************************/
void
printLocalTime()
{
struct tm timeinfo;
if( !getLocalTime( &timeinfo))
{
Serial.println( "Failed to obtain time" );
return;
}
Serial.println( &timeinfo, "%A, %B %d %Y %H:%M:%S");
}
In the table below, you can see how each member of this time structure relates
to a certain piece of information.
| Symbol | Returns
|
| %A | day of week
|
| %B | month of year
|
| %d | day of month
|
| %Y | year
|
| %H | hour
|
| %M | minutes
|
| %S | seconds
|